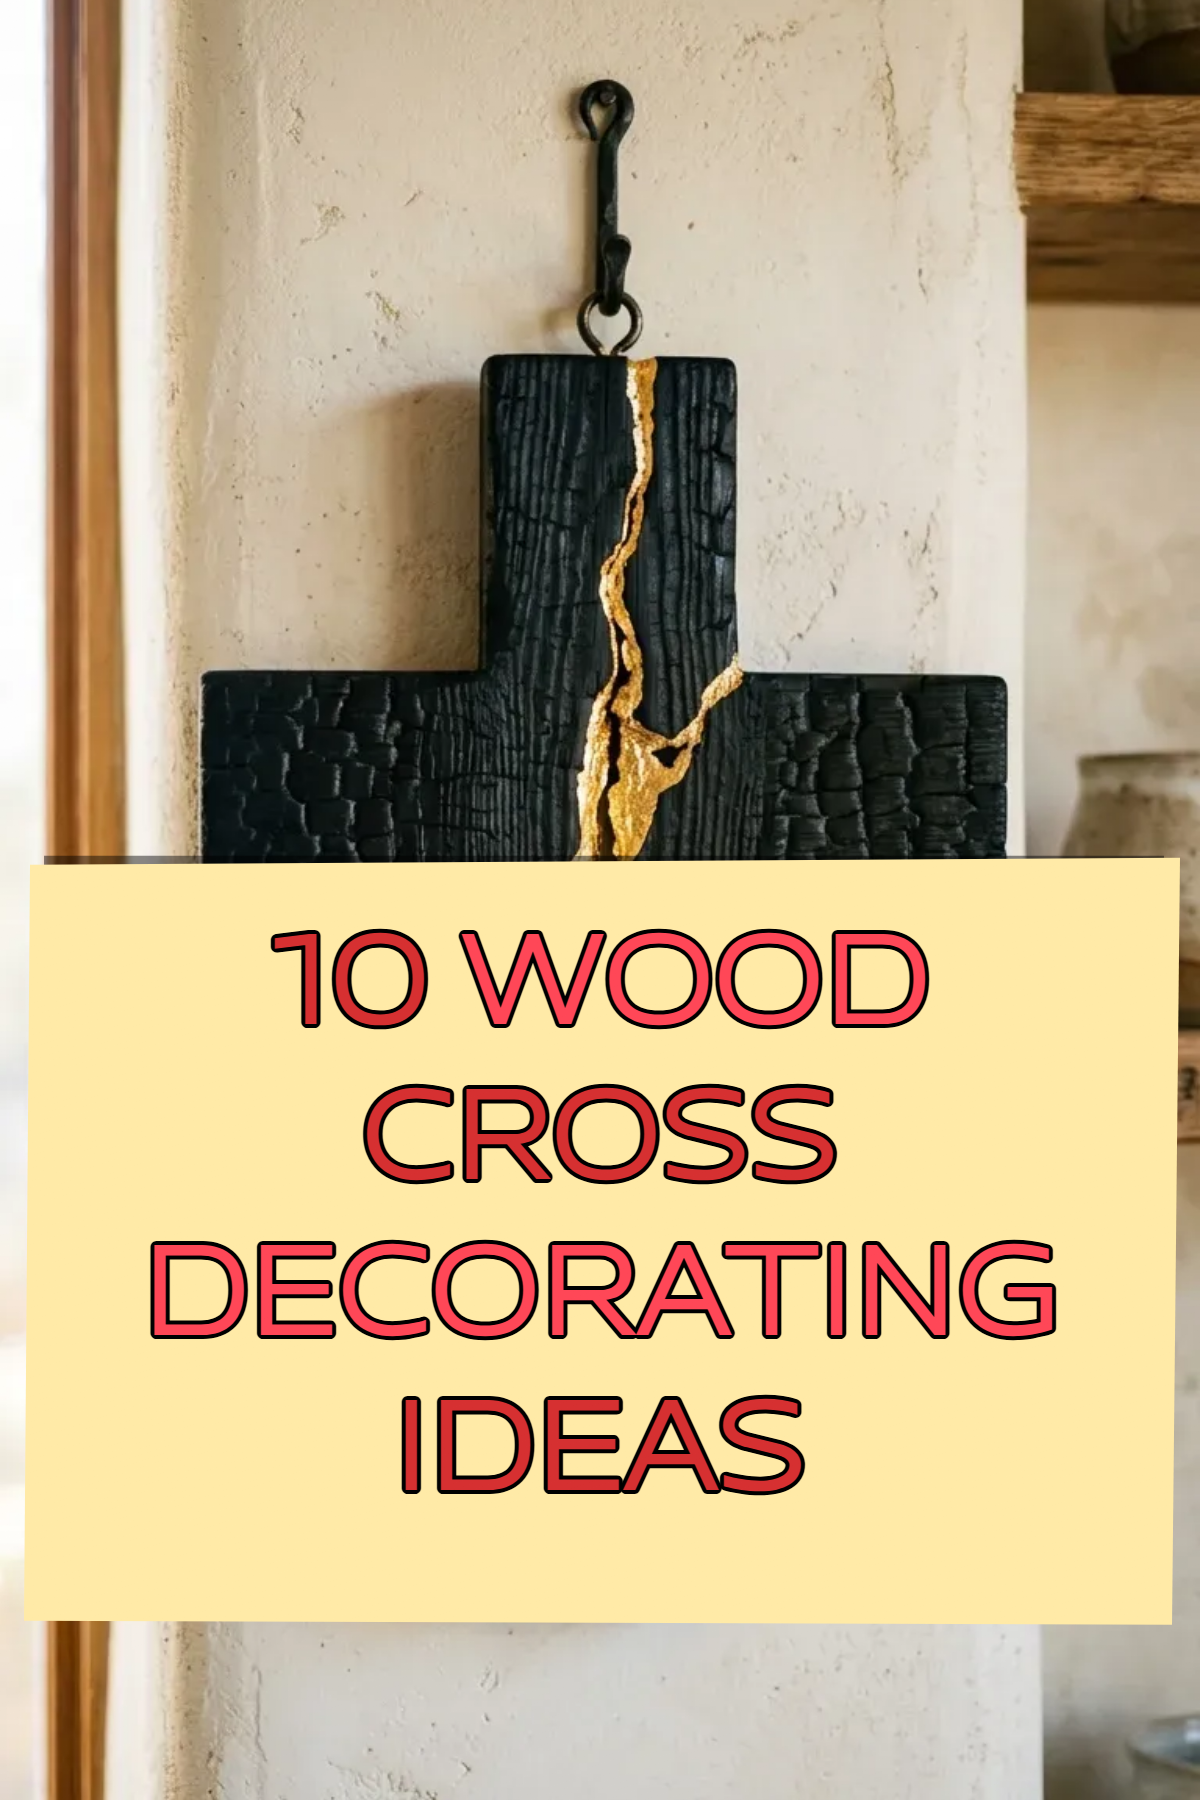
10 Wood Cross Decorating Ideas
Decorating a wooden cross transforms a simple symbolic timber form into a dimensional piece of fine wall art, a family heirloom, or an architectural focal point. Moving far beyond plain hobby-store cutouts, elevated cross design blends woodworking finishes with mixed-media techniques like hand-forged metalsmithing, botanical preservation, mosaic stone inlay, and gold-leaf gilding.
The secret to master-tier cross decorating lies in the balance of textural layering, wood grain enhancement, and negative space. By combining rich timber bases—such as charred pine, live-edge walnut, or weathered barnwood—with tactile elements like unlacquered brass, dried floral arrangements, and intricate pyrography, you create meaningful decor that complements farmhouse, modern minimalist, bohemian, and traditional interiors alike.
Whether creating a standalone gallery centerpiece, styling a tiered mantle vignette, or crafting an artisanal gift, these ten curated concepts deliver step-by-step assembly guides, material formulas, and production-ready visual prompts.
Why This Idea Is Trending & Flattering
-
High-Impact Tactile Texture: Pairing carved wood with natural stone, woven fibers, and metals creates dynamic shadow lines on flat walls.
-
Heirloom Longevity: Solid hardwood construction combined with archival sealants ensures pieces resist warping, fading, and degrading over decades.
-
Seamless Whole-Home Integration: Scales effortlessly from rustic modern ranch spaces to clean Scandinavian and traditional cottage aesthetics.
-
Accessible Mixed-Media Art: Serves as a versatile canvas for diverse artisan skills—pyrography, mosaic tiling, gilding, wire weaving, and floral sculpting.
-
Customizable Symbolism: Accommodates personal touches like hand-stamped scripture, heirloom jewelry fragments, birthstones, and preserved event florals.
Timber Prep, Stains & Craft Foundation Guide
Core Wood Species & Patina Formats
-
Solid Hardwoods (Oak, Walnut, Cherry): Dense, tight grain patterns that take clear matte sealers and subtle oil rubs without blotching.
-
Softwoods & Pine: Porous and receptive to heavy wire-brushing, Shou Sugi Ban torch charring, and distressed milk paint finishes.
-
Reclaimed Barnwood & Driftwood: Naturally textured with gray weathering, authentic nail holes, and saw kerfs; requires stabilizing matte sealants.
Essential Tools & Hardware
-
Wood Finishing: 220-grit sandpaper, tack cloth, natural tung oil or dark walnut stain, non-yellowing dead-flat acrylic topcoat.
-
Adhesives & Joinery: Heavy-duty epoxy putty, two-part clear structural epoxy, industrial polyurethane construction adhesive, counter-sunk pocket screws.
-
Structural Hanging: Heavy-duty zinc D-ring hangers, flush-mount metal French cleats (for heavy stone/iron crosses), and rubber wall bumpers.
1. The Charred Shou Sugi Ban & Molten Gold Leaf Kintsugi Cross
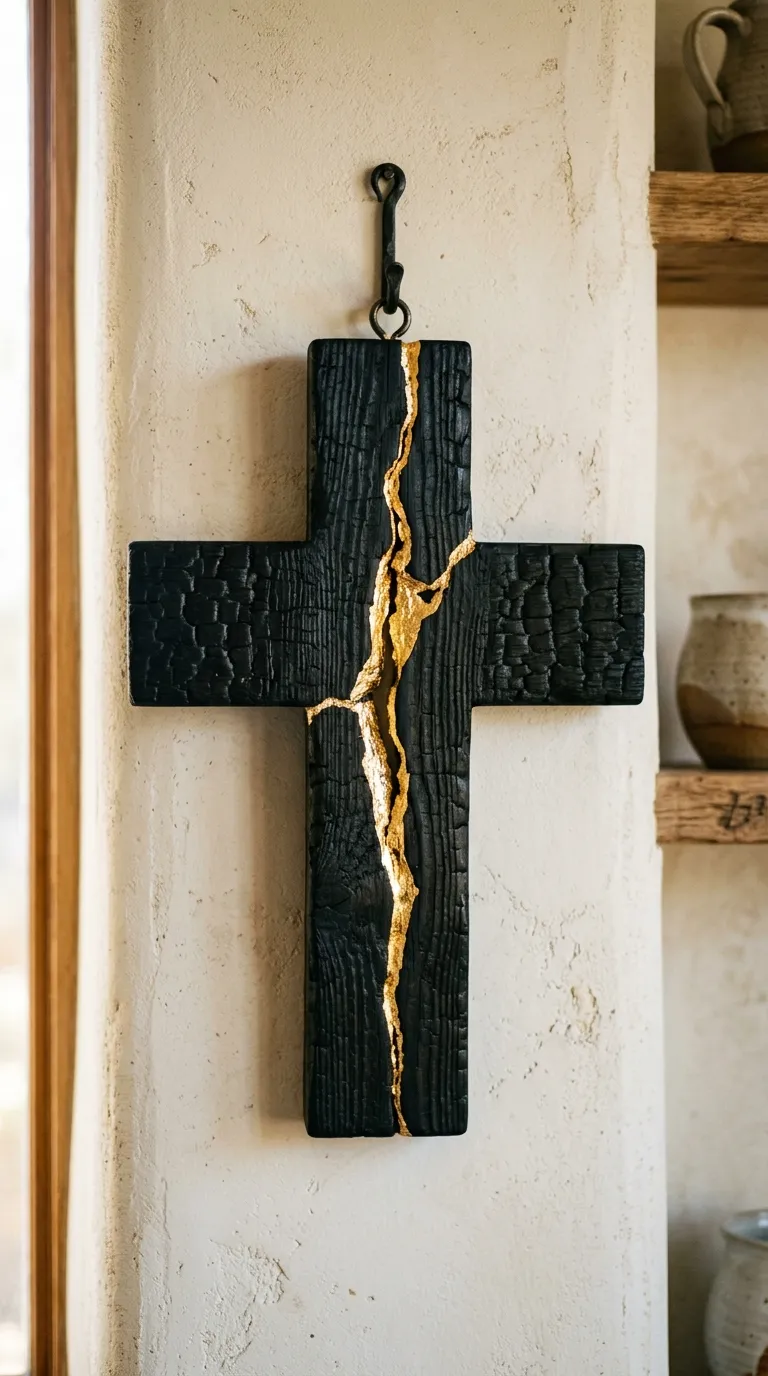
Concept Overview & Aesthetic Appeal
A dramatic, Japanese-inspired design featuring deeply charred black pine wood with textured alligator grain, cracked down the center and sealed with brilliant 24k gold leaf in the style of traditional Kintsugi.
Step-by-Step Execution Guide
-
Cut a heavy $12times18text{-inch}$ pine or cedar cross using $2times4$ timber.
-
Char the surface evenly using a propane torch until a crackled “alligator skin” carbon layer develops across the face and sides.
-
Brush away loose soot using a stiff brass-bristle wire brush, wiping the wood clean with a damp tack cloth.
-
Intentionally chisel or fracture an irregular hairline lightning crack running from the top arm down through the center intersection.
-
Paint the recessed interior of the crack with gold size adhesive, allowing it to reach a clear tacky state (approx. 15 minutes).
-
Lay genuine 24k gold leaf sheets over the adhesive line, pressing gently with a soft mop brush before brushing away excess leaf flakes.
-
Seal the entire charred and gilded surface with two coats of satin spray polyurethane.
Pro Craft Tip
Use a stiff natural-bristle brush rather than a synthetic brush when sweeping away excess gold leaf to prevent scratching the delicate metallic foil.
2. The Preserved Wildflower & Crystal Resin Inlay Cross
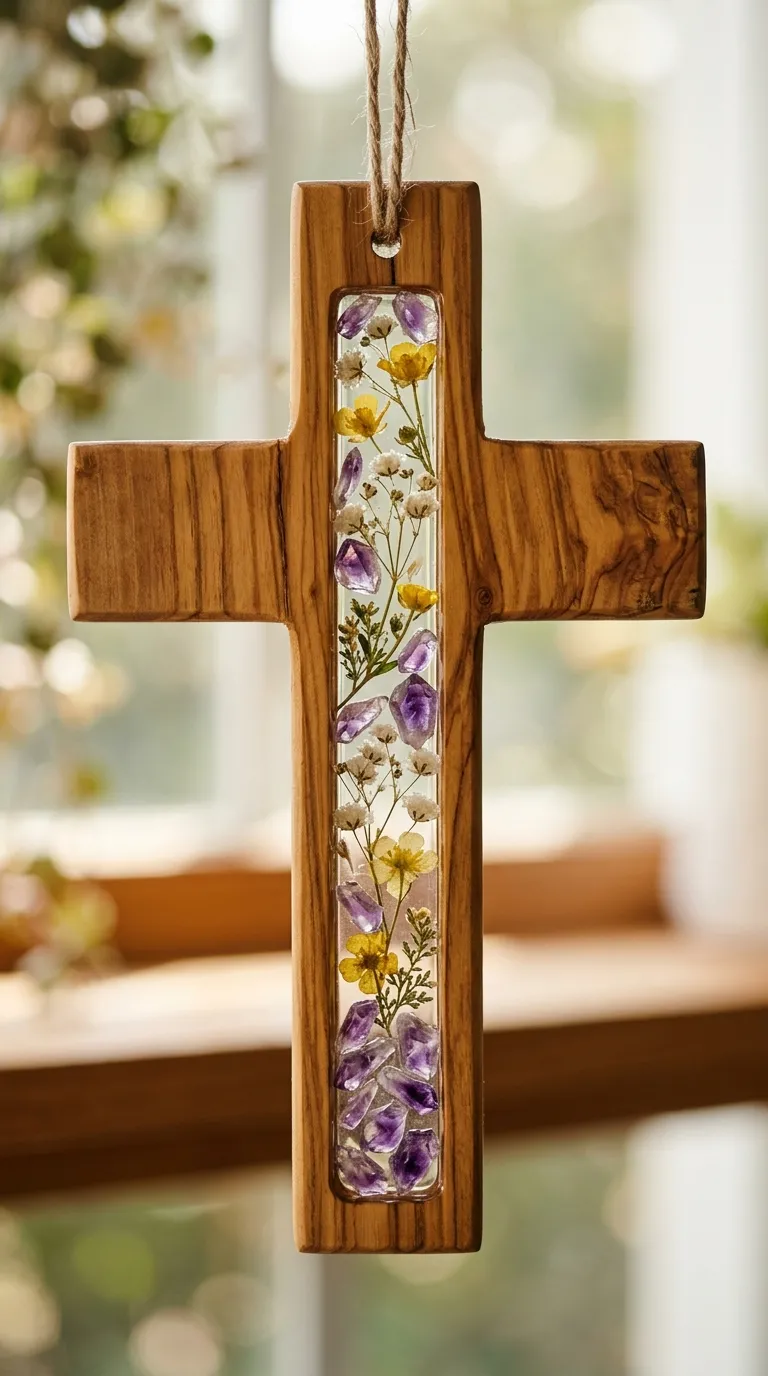
Concept Overview & Aesthetic Appeal
An ethereal, botanical piece where real pressed garden florals (baby’s breath, miniature pansies, and ferns) and rough amethyst crystal shards are cast into a recessed resin channel carved into raw olive wood.
Step-by-Step Execution Guide
-
Route a 1/2-inch wide, 1/4-inch deep channel along the center lines of a raw-edge olive wood cross plaque.
-
Seal the bare wood channel with a thin brush-coat of clear epoxy to prevent air bubbles from outgassing from the timber.
-
Arrange micro-pressed dried florals, green moss, and raw crushed crystal shards inside the routed channel.
-
Mix a 1:1 ratio deep-pour jewelry-grade casting epoxy resin, degassing the mixture with a heat gun for 60 seconds.
-
Pour the clear resin slowly into the channel until it forms a slight convex dome (surface-tension meniscus) over the wood edge.
-
Pass a micro-torch 4 inches above the wet resin to pop any rising micro-bubbles.
-
Let cure undisturbed in a dust-free box for 48 hours, then hand-buff the resin face with polishing compound.
Pro Craft Tip
Ensure pressed botanicals are 100% moisture-free using silica gel beads before embedding; residual plant moisture will turn flowers brown inside cured epoxy.
3. The Hand-Hammered Antiqued Copper Repoussé Wrapped Cross
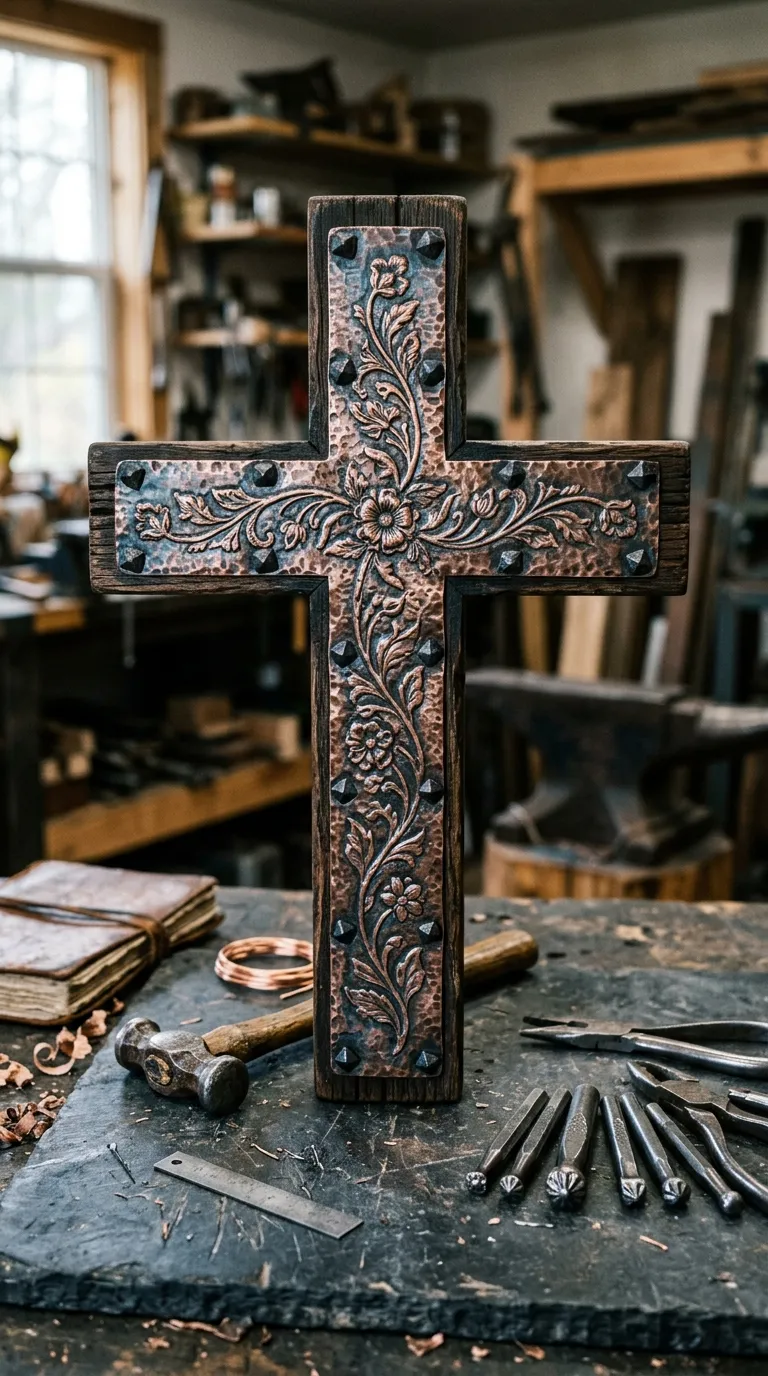
Concept Overview & Aesthetic Appeal
A high-texture, Old-World artisan cross featuring hand-tooled floral repoussé copper sheet metal wrapped over a distressed dark walnut wooden core, accented with forged iron clavo nails.
Step-by-Step Execution Guide
-
Cut a 36-gauge soft copper sheet 1 inch wider than your $10times16text{-inch}$ dark walnut cross base on all sides.
-
Lay the copper sheet face down on a rubber dampening mat, using rounded embossing stylus tools to press raised botanical vine motifs from the back.
-
Flip the copper over to define sharp outlines on the front face using a Teflon burnisher.
-
Wrap the embossed copper sheet tightly around the wooden cross core, folding corners like a gift box.
-
Secure the wrapped metal edges to the reverse wood side using copper wire tacks.
-
Hammer large, antiqued black iron clavo decorative pyramid nails through the center metal intersection.
-
Brush the copper with liver of sulfur solution to antique the crevices, then buff high reliefs with fine 0000-grade steel wool.
Pro Craft Tip
Anneal the copper sheet with a gentle torch pass if the metal becomes stiff (work-hardened) while embossing to restore full malleability.
4. The Modern Asymmetrical Live-Edge & Spalted Maple Cross
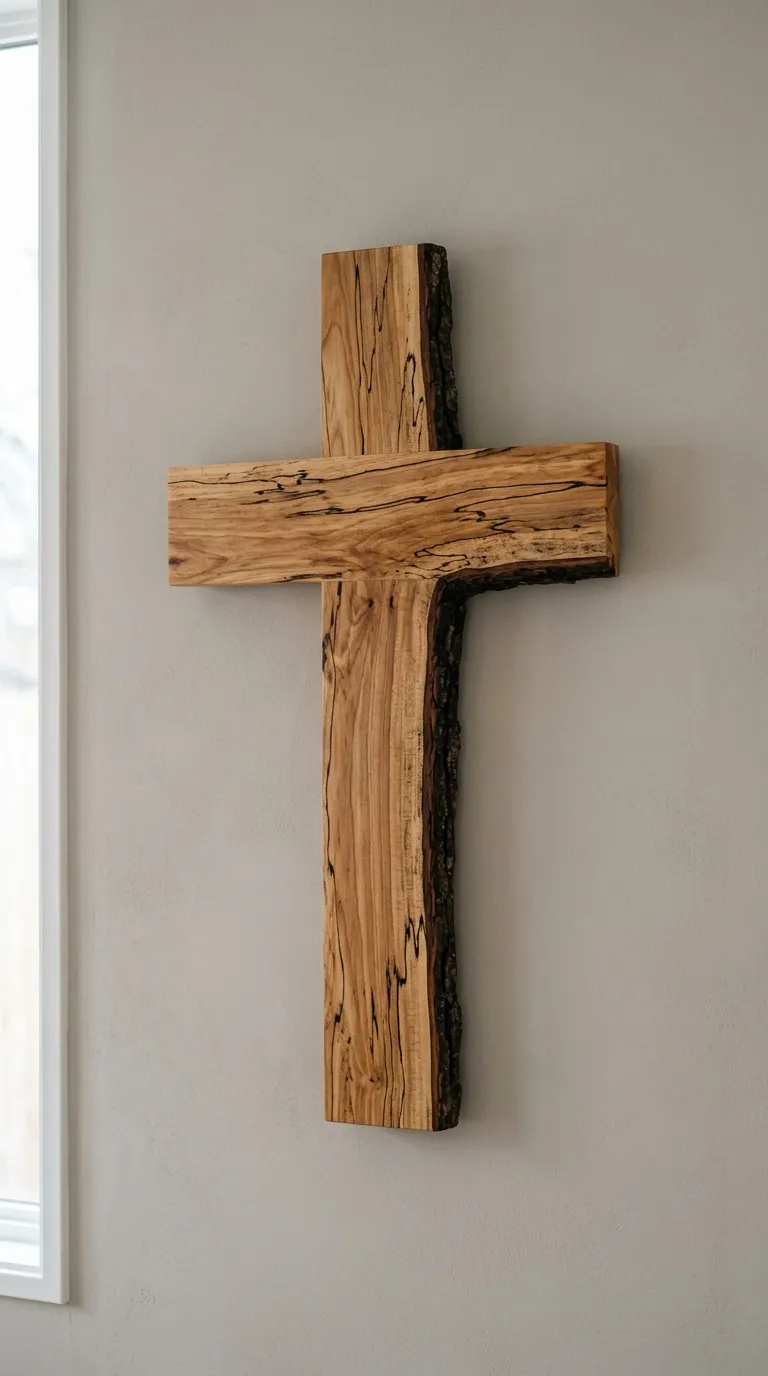
Concept Overview & Aesthetic Appeal
An architectural, minimalist statement cross that celebrates organic imperfection, combining natural live bark edges and dark fungal spalting lines with a crisp, geometric cut.
Step-by-Step Execution Guide
-
Mill an asymmetrical cross from a 1.5-inch thick spalted maple or English walnut slab, keeping the natural live bark edge intact on one vertical side.
-
Sand the flat face through progressive grits ($80 rightarrow 120 rightarrow 180 rightarrow 220$) until silky smooth.
-
Stabilize loose live-edge bark by injecting thin cyanoacrylate (CA glue) into the bark-to-wood cambium seam.
-
Cut the cross joint using an open half-lap joint, securing the intersection with waterproof wood glue and a single hidden hardwood dowel.
-
Apply two flood coats of natural tung oil or hardwax oil (e.g., Rubio Monocoat), letting it soak in for 15 minutes before buffing dry.
-
Mount with a recessed flush French cleat on the back to maintain a clean, floating wall profile.
Pro Craft Tip
Spalted timber contains softer wood pockets; treat soft spalted zones with a wood hardener before final sanding to achieve a uniform, mirror-smooth finish.
5. The Hand-Carved Pyrography & Henna Mandala Cross
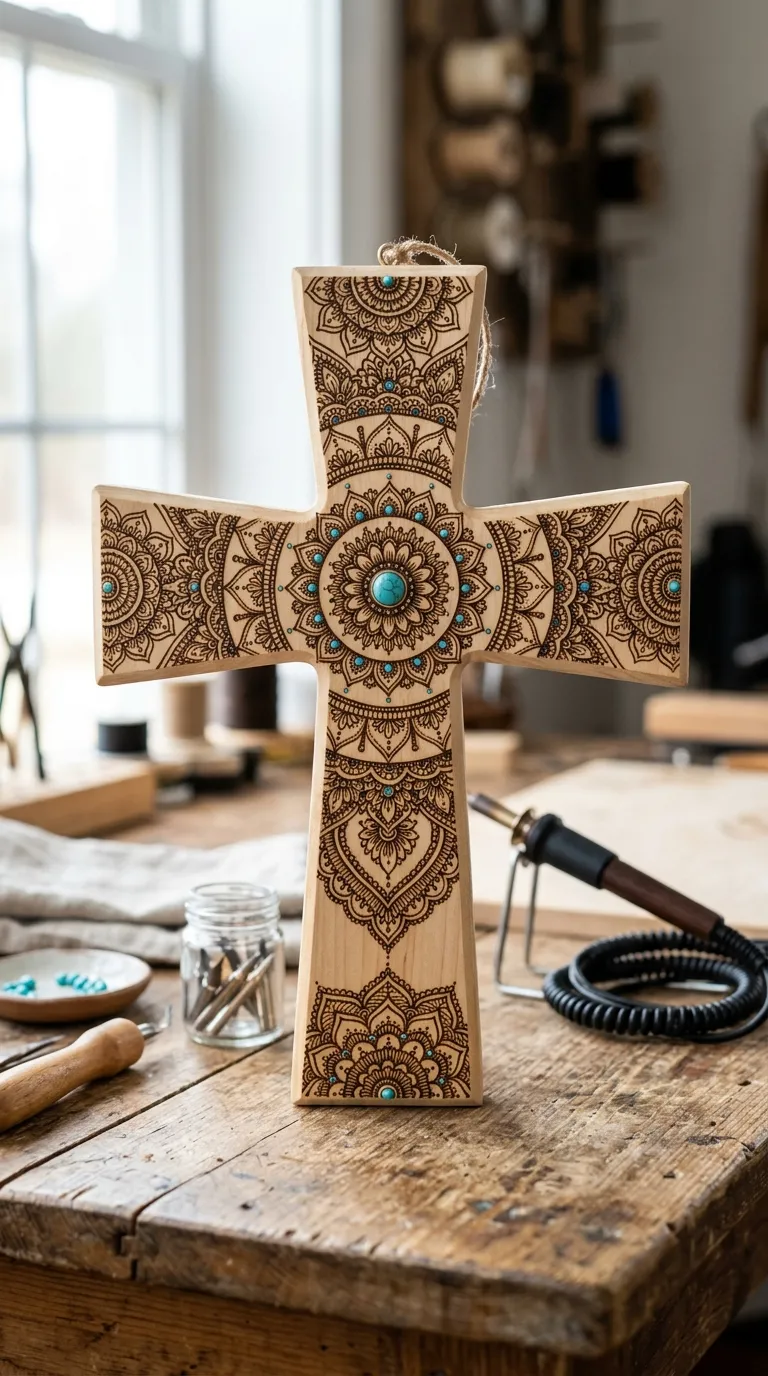
Concept Overview & Aesthetic Appeal
A bohemian, detailed artwork featuring wood-burned lace mandalas, sacred geometric patterns, and intricate botanical henna vines burned into smooth, light basswood.
Step-by-Step Execution Guide
-
Sand an $8times14text{-inch}$ kiln-dried basswood or solid birch cross to a 320-grit ultra-fine surface.
-
Transfer an intricate radial mandala template onto the wood center using graphite transfer paper.
-
Use a variable-temperature wire-nib pyrography wood-burning pen fitted with a skew tip for fine outline borders ($400^circtext{C}$).
-
Switch to a rounded shading spoon tip at a lower temperature ($320^circtext{C}$) to create soft, gradient shadows within mandala petals.
-
Accentuate central mandala focal points with tiny dots of turquoise acrylic paint or metallic bronze enamel.
-
Finish with an ultra-matte spray lacquer to protect the burned linework without darkening the light wood grain.
Pro Craft Tip
Basswood and birch have minimal grain variation and low resin content, making them the best timber species for burning crisp, bleed-free pyrography lines.
6. The Mosaic Sea-Glass & Tumbled Travertine Coastal Cross
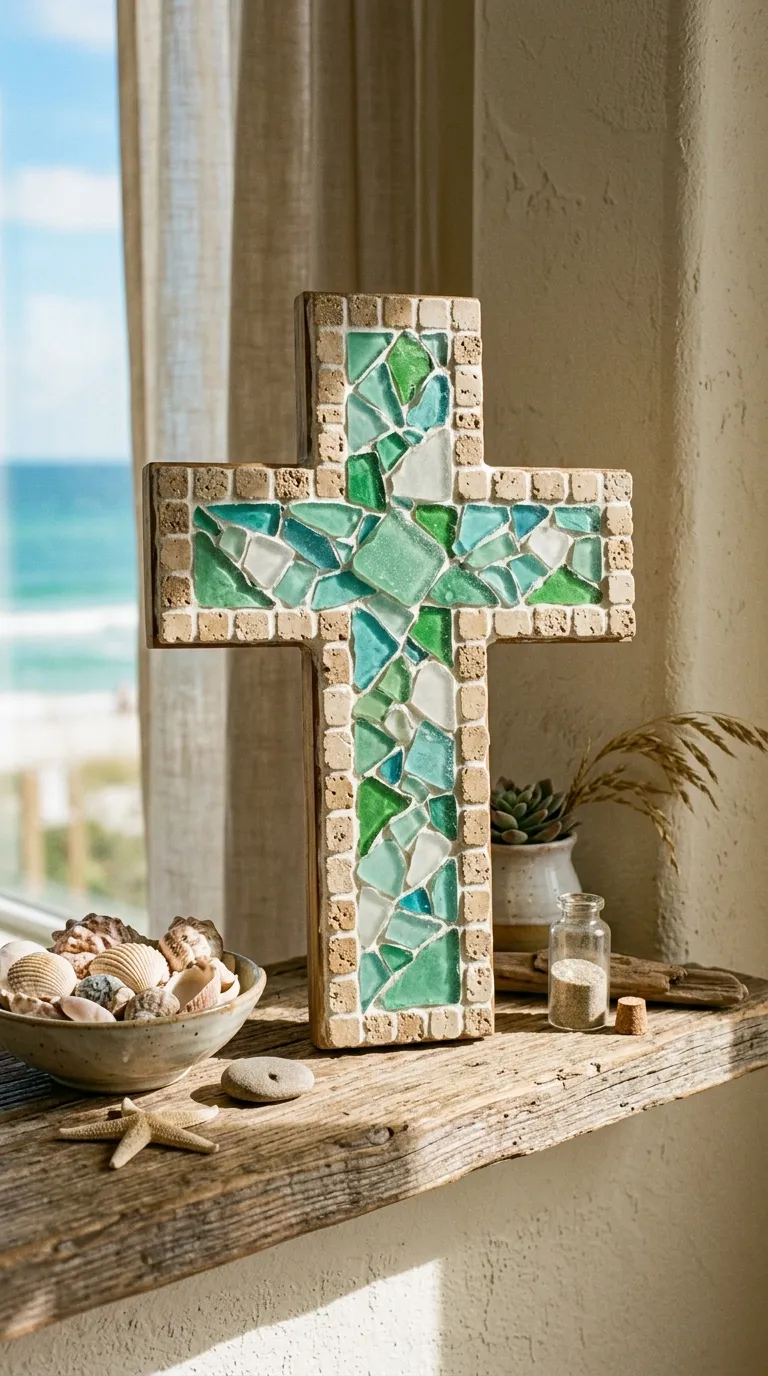
Concept Overview & Aesthetic Appeal
A textured coastal cross combining sea-foam green, aqua, and frosted white authentic ocean glass pieces mixed with tumbled beige travertine stone tiles.
Step-by-Step Execution Guide
-
Cut a 1/2-inch thick exterior-grade birch plywood backer cross, priming the top face with an acrylic bonding primer.
-
Arrange tumbled travertine mosaic mini-tiles around the outer border of the cross arms, securing them with thin-set tile mortar.
-
Fill the interior cross body with genuine tumbled sea-glass shards, angling pieces to catch incoming window light.
-
Mix a batch of sand-free, polymer-fortified grout in an off-white driftwood-sand tone.
-
Spread the grout evenly across the mosaic, packing it firmly into gaps between sea-glass edges.
-
Wipe the glass surfaces clean after 20 minutes using a damp grout sponge rinsed in clean water.
-
Polish the glass faces with a dry microfiber cloth once cured to remove any remaining grout haze.
Pro Craft Tip
Use non-sanded grout rather than sanded grout; coarse sand particles will scratch frosted sea-glass surfaces during sponge cleanup.
7. The Layered Shiplap Farmhouse Cross with Galvanized Metal Laurel

Concept Overview & Aesthetic Appeal
A multi-layered modern farmhouse design featuring a distressed whitewashed horizontal shiplap base, layered beneath a cut galvanized sheet-metal laurel wreath and wooden cross.
Step-by-Step Execution Guide
-
Join four miniature 2-inch wide tongue-and-groove pine planks to create a solid shiplap backing board ($12times18text{ inches}$).
-
Paint the backing board with off-white chalk paint, distressing edges with 150-grit sandpaper to expose underlying wood grain.
-
Cut or source a 10-inch circular laurel branch wreath crafted from aged, galvanized corrugated sheet metal.
-
Build a slim $8times14text{-inch}$ stained dark-walnut wooden cross.
-
Stack the components: Shiplap Base (bottom) $rightarrow$ Galvanized Laurel Wreath (middle) $rightarrow$ Stained Walnut Cross (top).
-
Fasten all three layers together through the back using 1.25-inch wood screws.
-
Add a rustic natural jute twine hanging bow at the top apex.
Pro Craft Tip
Wipe galvanized metal with white vinegar before distressing to create a natural, matte oxidized zinc patina that removes modern shiny factory coatings.
8. The Woven Macramé & Bleached Driftwood Bohemian Cross

Concept Overview & Aesthetic Appeal
A soft-fiber mixed-media cross created from two naturally weathered sea-driftwood branches lashed together with intricate natural cotton macramé rope weaves and long fringed tails.
Step-by-Step Execution Guide
-
Source two authentic sun-bleached saltwater driftwood branches (vertical: 18 inches; horizontal: 10 inches).
-
Carve a shallow notch at the intersecting cross point, securing the branches with wood glue and a square lashing of 3mm natural unbleached cotton cord.
-
Knot half-square spiral sinnets down the lower vertical arm using macramé rope.
-
Weave intricate diamond chevron patterns across the horizontal arm ends, letting rope tails drape downward.
-
Comb out the lower rope ends with a pet slicker brush to create a soft, brushed fringe.
-
Dip the lower 2 inches of the fringe into a sage-green or terracotta fabric dye bath for an ombré dip-dyed accent.
Pro Craft Tip
Soak collected beach driftwood in a 10% bleach-to-water solution for 24 hours and dry completely in the sun to eliminate natural ocean odors and mold.
9. The Antiqued Distressed Mirror Glass & Weathered Oak Cross
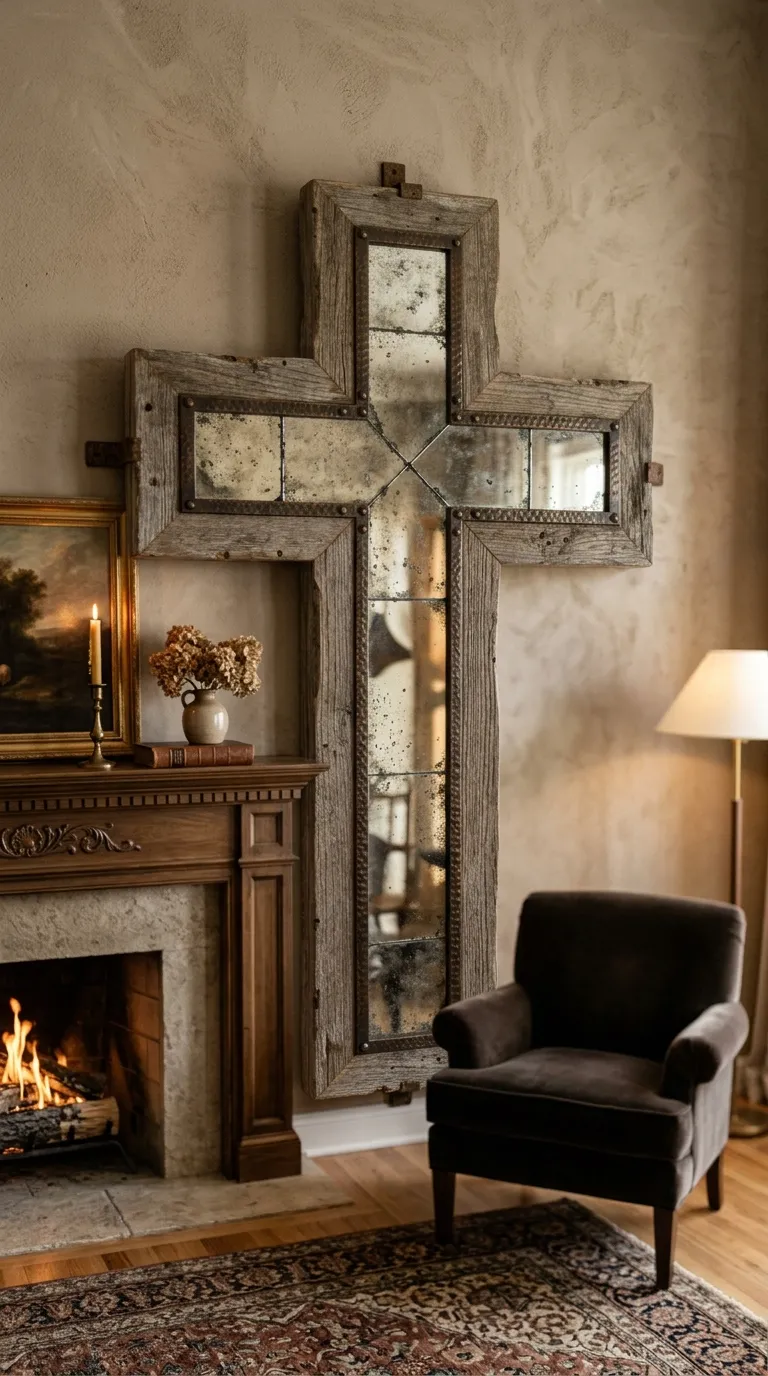
Concept Overview & Aesthetic Appeal
A luminous, vintage-luxe cross constructed from reclaimed French oak wood, inlaid with hand-distressed antiqued mirror glass strips that reflect warm room lighting.
Step-by-Step Execution Guide
-
Construct a $14times22text{-inch}$ frame cross with a 1/4-inch deep routed front recess using weathered gray oak.
-
Cut four strips of 1/8-inch mirror glass to fit inside the cross recesses.
-
Strip the gray backing paint off the mirror glass using paint stripper, then spritz the exposed silver layer with a 50/50 bleach-water solution to create antique mottled black spots.
-
Spray the back of the distressed glass with flat black spray paint to lock in the antique mirror patina.
-
Adhere the antiqued mirror strips into the wooden recesses using neutral-cure mirror mastic adhesive.
-
Frame the inner glass seams with a thin rope of dark bronze braided trim.
Pro Craft Tip
Always use specialized mirror mastic adhesive; standard acidic silicone caulk will eat through the delicate reflective mirror silvering over time.
10. The Chunky Reclaimed Timber Beam Cross with Wrought-Iron Straps
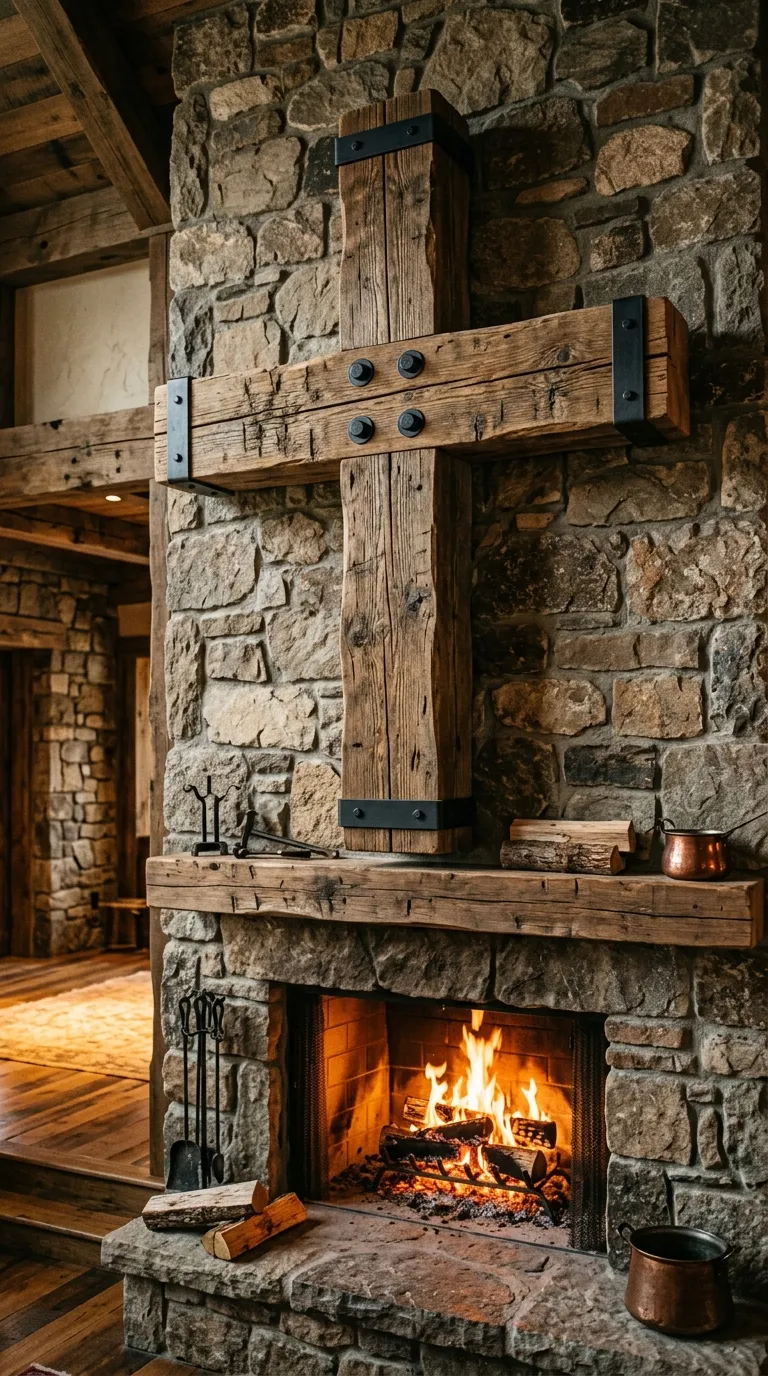
Concept Overview & Aesthetic Appeal
A massive, masculine lodge-style installation built from heavy $4times4text{-inch}$ reclaimed architectural timber beams, joined with custom heavy-gauge blackened steel structural corner plates.
Step-by-Step Execution Guide
-
Cut two heavy $4times4text{-inch}$ hand-hewn fir or pine architectural timbers (vertical: 24 inches; horizontal: 16 inches).
-
Cut a precision center half-lap joint so both heavy timbers sit flush when joined together.
-
Secure the joint with structural wood adhesive and two 1/2-inch blackened steel carriage bolts running completely through the wood.
-
Fabricate four L-shaped corner brackets from 1/8-inch thick, 1.5-inch wide blackened hot-rolled steel flat stock.
-
Mount the steel brackets over the intersection using heavy-duty structural hex-head lag screws.
-
Distress timber ends with an adze or drawknife, finishing with dark antique paste wax.
-
Mount to wall studs using a 200-lb rated heavy-duty aluminum interlocking French cleat.
Pro Craft Tip
Because solid $4times4$ timber beams are heavy (15+ lbs), never rely on drywall anchors alone; always anchor the French cleat directly into solid wall studs with 3-inch structural screws.
Wood Cross Decor Concept & Technique Comparison
| Wood Cross Concept | Base Wood Species | Key Decorative Medium | Hanging Hardware | Difficulty Level |
| Shou Sugi Ban Gold | Charred Pine / Cedar | 24k Gold Leaf Gilding | Heavy D-Ring | Intermediate |
| Floral Resin Inlay | Live-Edge Olive Wood | Pressed Botanicals / Resin | Keyhole Slot | Intermediate |
| Copper Repoussé | Distressed Walnut | Embossed Copper / Clavos | Dual Sawtooth | Intermediate |
| Live-Edge Spalted | Spalted Maple Slab | Natural Live Bark / Oil | Flush French Cleat | Beginner to Int. |
| Pyrography Mandala | Solid Birch / Basswood | Wood-Burning Pen / Paint | Sawtooth Bracket | Advanced (Artisan) |
| Sea-Glass Mosaic | Birch Plywood Backer | Sea-Glass / Travertine | D-Ring Hangers | Beginner to Int. |
| Layered Shiplap | White-Pine Shiplap | Galvanized Metal Laurel | Jute Rope / Cleat | Beginner |
| Macramé Driftwood | Ocean Driftwood | 3mm Cotton Macramé Rope | Integrated Cord Loop | Beginner |
| Antiqued Mirror Oak | Reclaimed French Oak | Distressed Mirror Glass | Heavy D-Ring | Intermediate |
| Chunky Heavy Beam | $4times4$ Reclaimed Timber | Blackened Steel Brackets | Heavy French Cleat | Advanced (Carpentry) |
Common Decorating Mistakes & How to Avoid Them
-
Failing to Seal Resinous Wood Knots: Unsealed pine knots release sap and tannin oils over time, creating yellow stains across white chalk paint or resin. Solution: Apply two coats of shellac-based primer (e.g., Zinsser B-I-N) over all timber knots before painting or casting.
-
Using Standard Caulk on Mirror Inlays: Acid-cure silicone caulk dissolves the reflective backing of decorative mirror glass, turning it black and cloudy. Solution: Strictly use non-acidic, solvent-free mirror mastic adhesive designed specifically for glass installation.
-
Inadequate Structural Support for Heavy Crosses: Hanging multi-pound timber and stone crosses with basic picture nails leads to wall damage and broken art. Solution: Use interlocking aluminum French cleats mounted directly into wall studs for any piece weighing over 10 lbs.
-
Over-Saturating Mixed Media Elements: Combining heavy metals, bright resin, flowers, and multiple wood stains on a single cross creates visual clutter. Solution: Follow the Hero Element Rule—choose one primary technique (e.g., tooled copper or charred wood) and keep supporting elements simple and neutral.