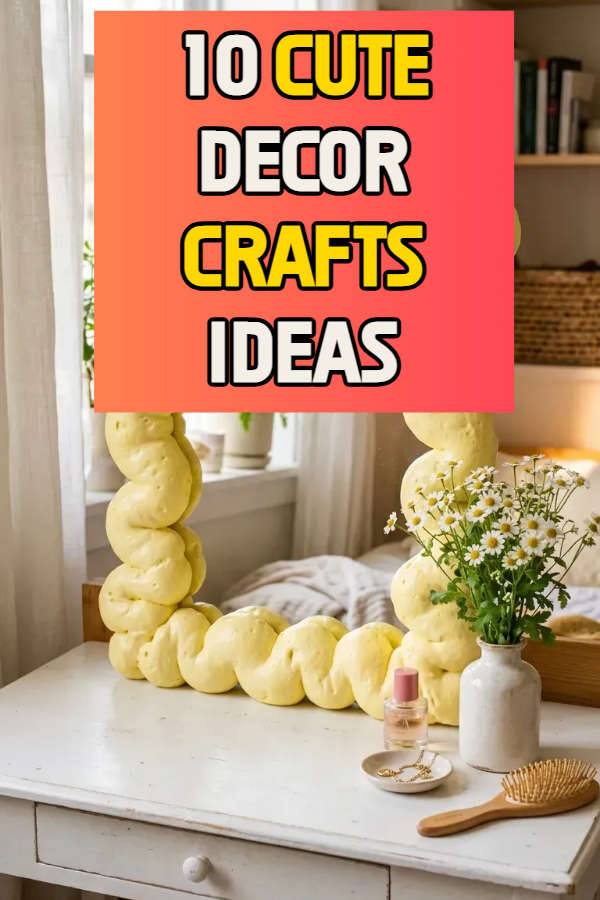
10 Cute Decor Crafts Ideas
Creating cute decor crafts allows you to personalize your living space with playful textures, pastel palettes, and charming handmade accents without spending a fortune on retail boutique decor. Rather than generic store-bought trinkets, DIY aesthetic crafts combine accessible craft mediums—such as air-dry clay, tufting yarn, soy wax, glass beads, and dried botanicals—into elevated home accents.
The secret to making DIY decor look professionally finished lies in color discipline, neat edge-finishing, and high-quality sealants. By sticking to soft curated color schemes like buttermilk yellow, sage green, blush pink, and creamy oat, you can create functional items like wavy mirror frames, scalloped trinket dishes, and botanical candle pillars that bring warmth to any room.
Whether you want to upgrade your vanity desk, style an open bookshelf, or spend a relaxing creative weekend, these ten cute DIY craft blueprints deliver step-by-step assembly guides, supply lists, and production-ready visual prompts.
Why This Idea Is Trending & Flattering
-
Bespoke Personalization: Customize sizes, shapes, and exact color palettes to match your room aesthetic perfectly.
-
Low-Cost Material Entry: Most projects use affordable craft staples like clay, yarn, thrifted glassware, and silicone molds.
-
Functional & Decorative: Many crafts double as practical organizers—from ring holders and coasters to cozy mood lighting.
-
Mindful Creative Outlet: Hands-on crafting with tactile materials offers a relaxing, screen-free weekend activity.
-
Giftable Keepsakes: Handmade aesthetic decor pieces make thoughtful, personalized gifts for friends and family.
Materials, Mediums & Craft Foundation Guide
Core Cute & Cozy Color Palette
-
Pastel Foundation: Buttermilk Yellow, Powder Pink, Muted Lilac, Soft Sky Blue
-
Earthy Neutrals: Warm Alabaster, Pale Sand, Oatmeal Linen, Soft Terracotta
-
Botanical Accents: Herbal Sage Green, Mint Frost, Muted Olive
Essential Craft Supplies & Tooling
-
Clay & Molding: Lightweight air-dry clay (e.g., DAS or Crayola Air-Dry), polymer clay, silicone casting molds, fine sandpaper (400-grit), water-resistant glossy varnish.
-
Textiles & Fibers: Cotton macramé cord, chunky acrylic yarn, wooden embroidery hoops, felt backing, mini latch-hook or punch needle tools.
-
Adhesives & Sealants: Low-temp hot glue gun, multi-surface craft epoxy, Mod Podge (matte/gloss), UV resin with a mini UV lamp.
-
Hardware & Upcycling: Frameless acrylic mirrors, thrifted ceramic saucers, clear glass bud bottles, candle wicks, natural soy wax flakes.
1. The Pastel Wavy Foam Mirror Frame
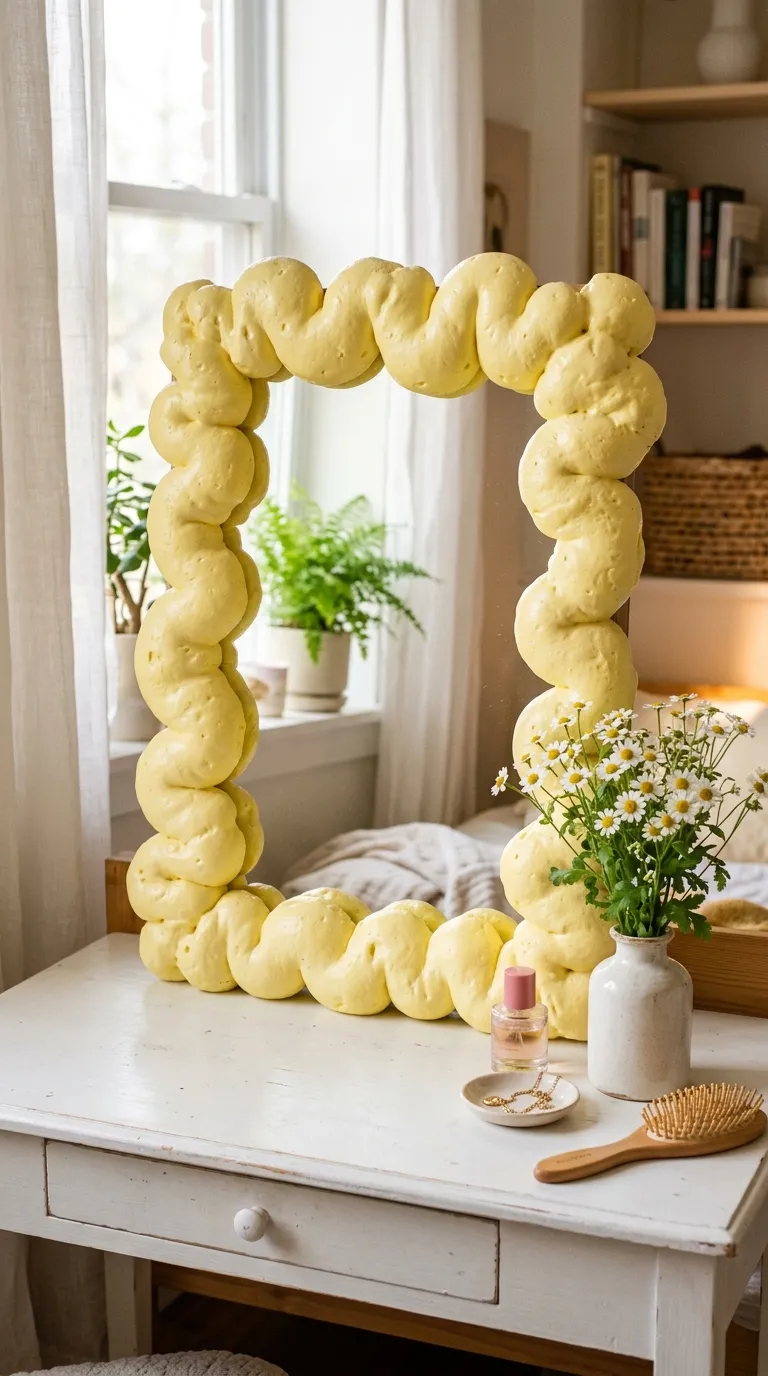
Concept Overview & Aesthetic Appeal
A playful, cloud-like statement mirror crafted by applying expanding foam around a simple frameless mirror, spray-painted in soft pastel hues.
Step-by-Step Execution Guide
-
Lay a large sheet of cardboard outdoors or in a well-ventilated space, placing a $12times16$-inch frameless glass or acrylic mirror in the center.
-
Mask the inner reflective glass with newspaper and blue painter’s tape, leaving a 1-inch perimeter edge exposed.
-
Shake a can of expanding polyurethane insulating foam thoroughly; spray continuous wavy, looping mounds around the outer edge of the mirror.
-
Allow the foam to cure and harden completely for 24 hours.
-
Spray the cured foam with two even coats of pastel spray paint (such as soft buttercup yellow, lilac, or pale sage) and seal with a matte clear coat.
-
Carefully peel off the painter’s tape and clean any glass residue with glass cleaner.
Pro Craft Tip
Spray the foam in a smooth, continuous fluid motion without stopping; the foam expands to nearly triple its size as it cures.
2. Scalloped Edge Air-Dry Clay Trinket Dishes
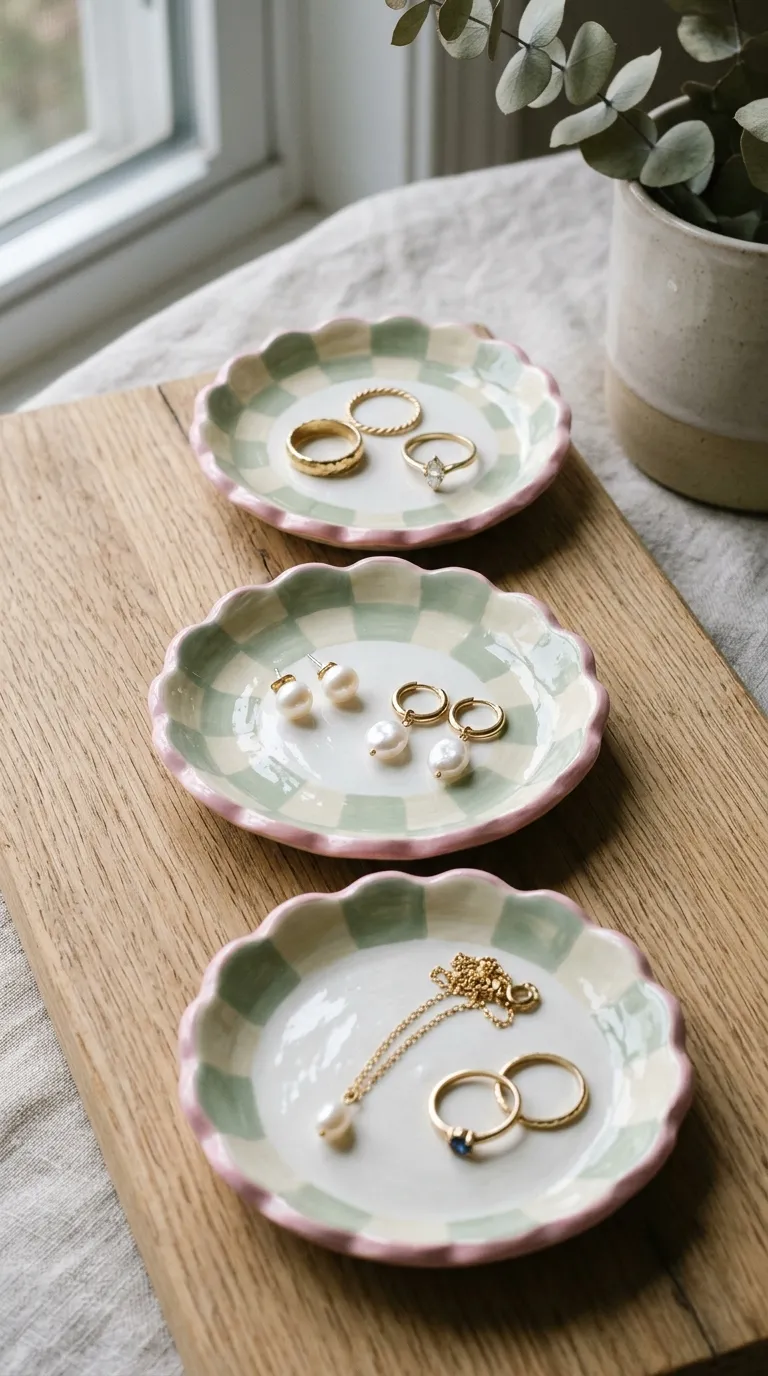
Concept Overview & Aesthetic Appeal
Charming scalloped catch-all dishes for jewelry, rings, and keys, finished with hand-painted checkerboard patterns or pastel border stripes.
Step-by-Step Execution Guide
-
Roll out a lump of white air-dry clay onto parchment paper to an even 1/4-inch thickness using a rolling pin with guide rings.
-
Cut out a 5-inch circle using a bowl or cookie cutter as a template.
-
Use a small round bottle cap or the back of a spoon to press uniform semicircles around the outer rim to create a scalloped edge.
-
Gently curl the scalloped edges upward into an open shallow bowl shape, letting the clay dry for 48 hours.
-
Sand any rough edges with 400-grit sandpaper until completely smooth.
-
Paint with pastel acrylic paints (gingham, wavy checks, or solid borders), finishing with a thick coat of high-gloss water-resistant varnish.
Pro Craft Tip
Dip your fingertips in a tiny dab of water while smoothing the clay edges before drying to eliminate micro-cracks without softening the clay.
3. Mini Punch-Needle Tufted Mug Rugs & Coasters
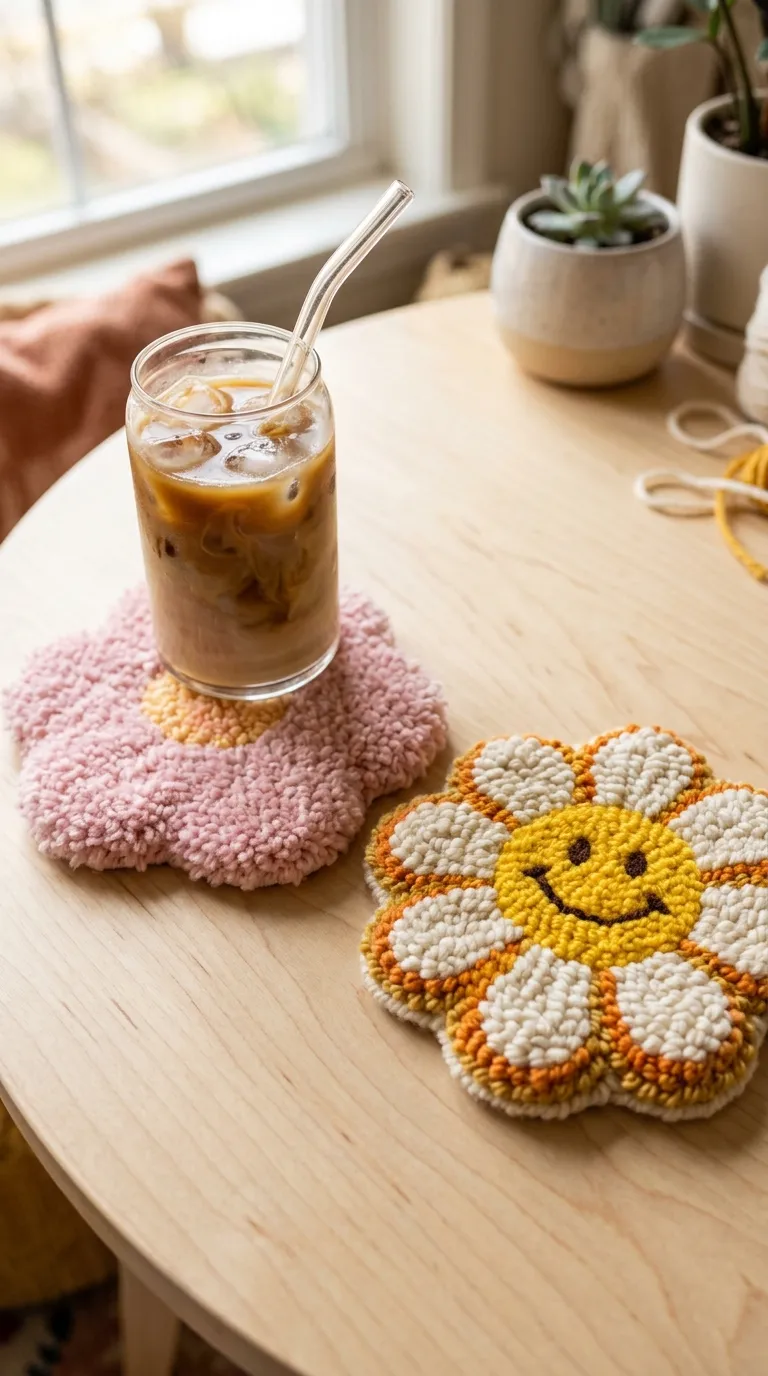
Concept Overview & Aesthetic Appeal
Soft, tactile textile coasters shaped like blooming flowers, smiling daisies, or fruit slices, handcrafted using punch-needle embroidery.
Step-by-Step Execution Guide
-
Stretch monks cloth tightly over a 7-inch round plastic or wooden embroidery hoop.
-
Trace a cute shape (like a daisy flower or retro cherry pair) onto the fabric with a washable marker.
-
Thread a punch needle tool with soft acrylic or cotton yarn in your chosen pastel colors.
-
Punch the design from the back side, keeping loop heights uniform to create a plush, carpet-like front texture.
-
Coat the back of the tufted loops with liquid fabric latex or craft glue to lock the yarn threads permanently.
-
Cut the shape out with a 1/2-inch border, fold the excess fabric to the back, and glue a protective piece of round felt on the underside.
Pro Craft Tip
Keep your hoop tension drum-tight while punching; loose fabric causes uneven loop heights and snagged stitches.
4. Pressed Flower Floating Glass Herbarium Frames
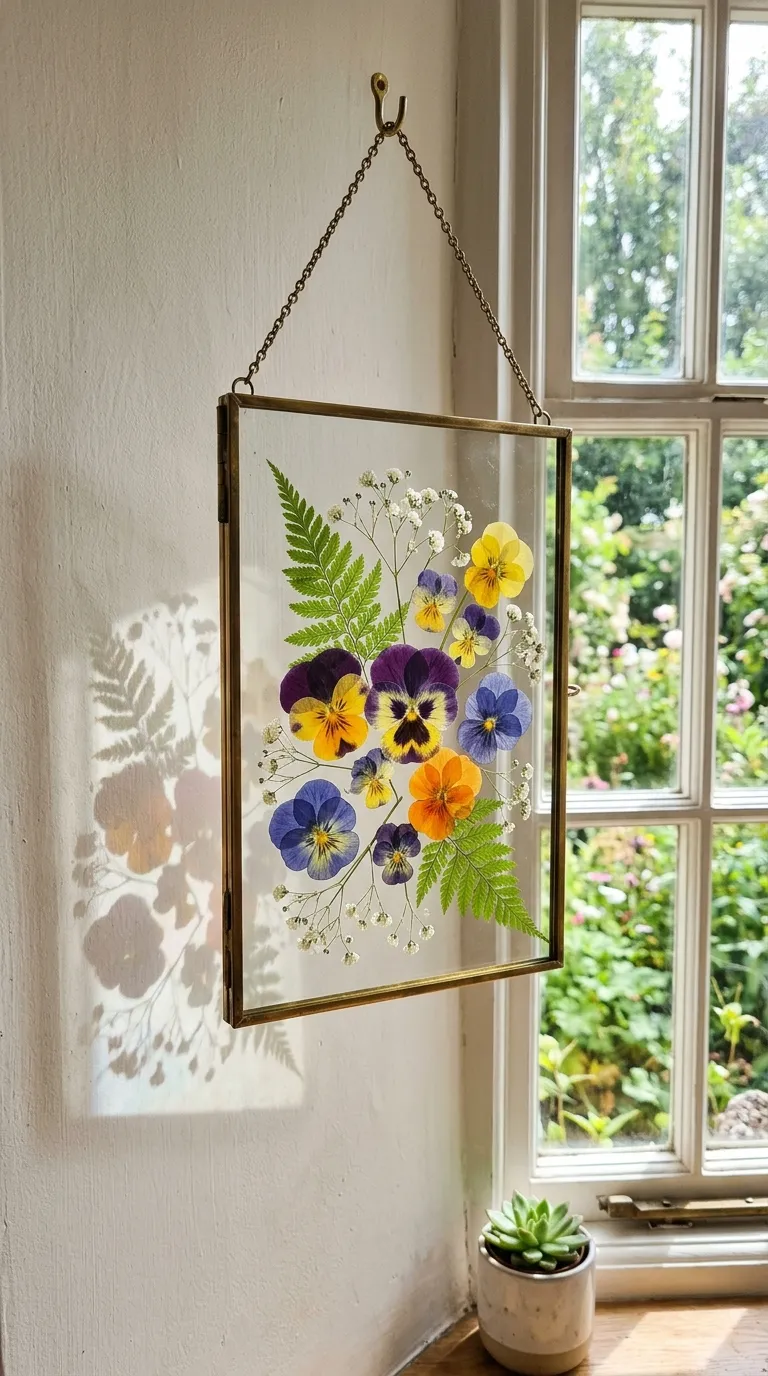
Concept Overview & Aesthetic Appeal
Delicate botanical wall art created by pressing fresh garden blooms and displaying them suspended between two transparent glass panes in a brass frame.
Step-by-Step Execution Guide
-
Collect fresh, flat-faced flowers (pansies, violas, daisies, ferns, and baby’s breath).
-
Place the flowers between sheets of parchment paper inside a heavy book, weighting it down for 10 to 14 days until completely dry and flat.
-
Clean both glass panes of a double-sided floating brass frame with rubbing alcohol.
-
Arrange the dried botanicals onto the bottom glass pane using a tiny pin-drop of clear craft glue to hold their positions.
-
Close the top glass pane, lock the brass latch, and hang the frame near a sunlit window.
Pro Craft Tip
Avoid thick flower centers (like whole roses or large sunflowers); choose naturally thin petals like violas and cosmos to keep the glass panes flush.
5. Ribbed Soy Pillar Candles with Pastel Color-Dipping
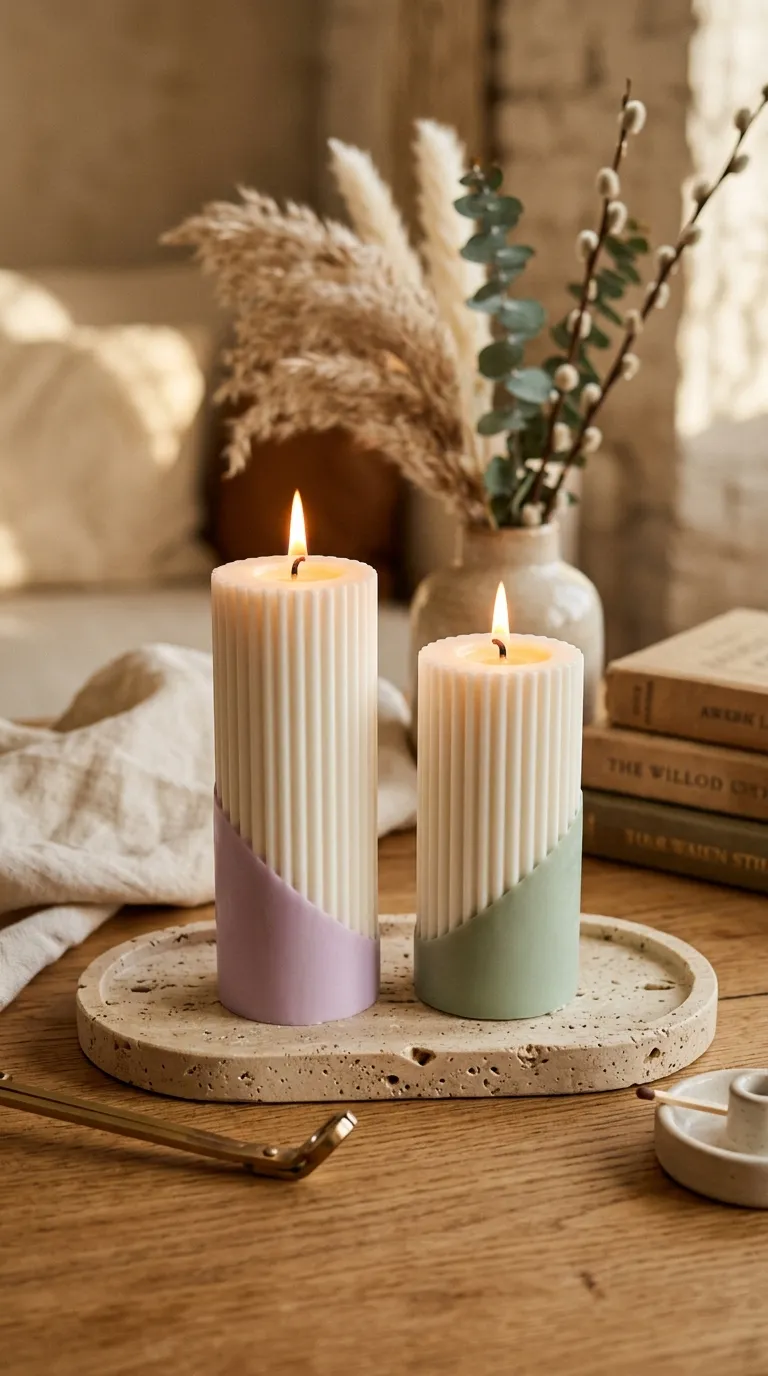
Concept Overview & Aesthetic Appeal
Chic, sculptural fluted pillar candles made from natural soy wax, custom-tinted by dipping the base into warm pastel-colored wax at an angle.
Step-by-Step Execution Guide
-
Melt natural soy pillar wax (e.g., BW-921) in a metal pitcher to 180°F (82°C), stirring in candle fragrance oil if desired.
-
Thread a braided cotton wick into a ribbed or spiral silicone pillar mold, sealing the wick hole with mold putty.
-
Pour the wax at 135°F (57°C) into the mold and let it cure undisturbed for 12 hours before demolding.
-
Melt a small batch of white soy wax in a shallow bowl, coloring it with a tiny flake of pastel dye block (pink, sage, or butter).
-
Dip the bottom third of the white ribbed candle into the colored wax at a 45-degree angle for 3 seconds, lifting it smoothly to create an ombré dip line.
Pro Craft Tip
Dip the candle in room-temperature water for 1 second immediately after the colored wax dip to lock in a smooth, streak-free edge.
6. Upcycled Glass Bottle Mushroom Flower Vases
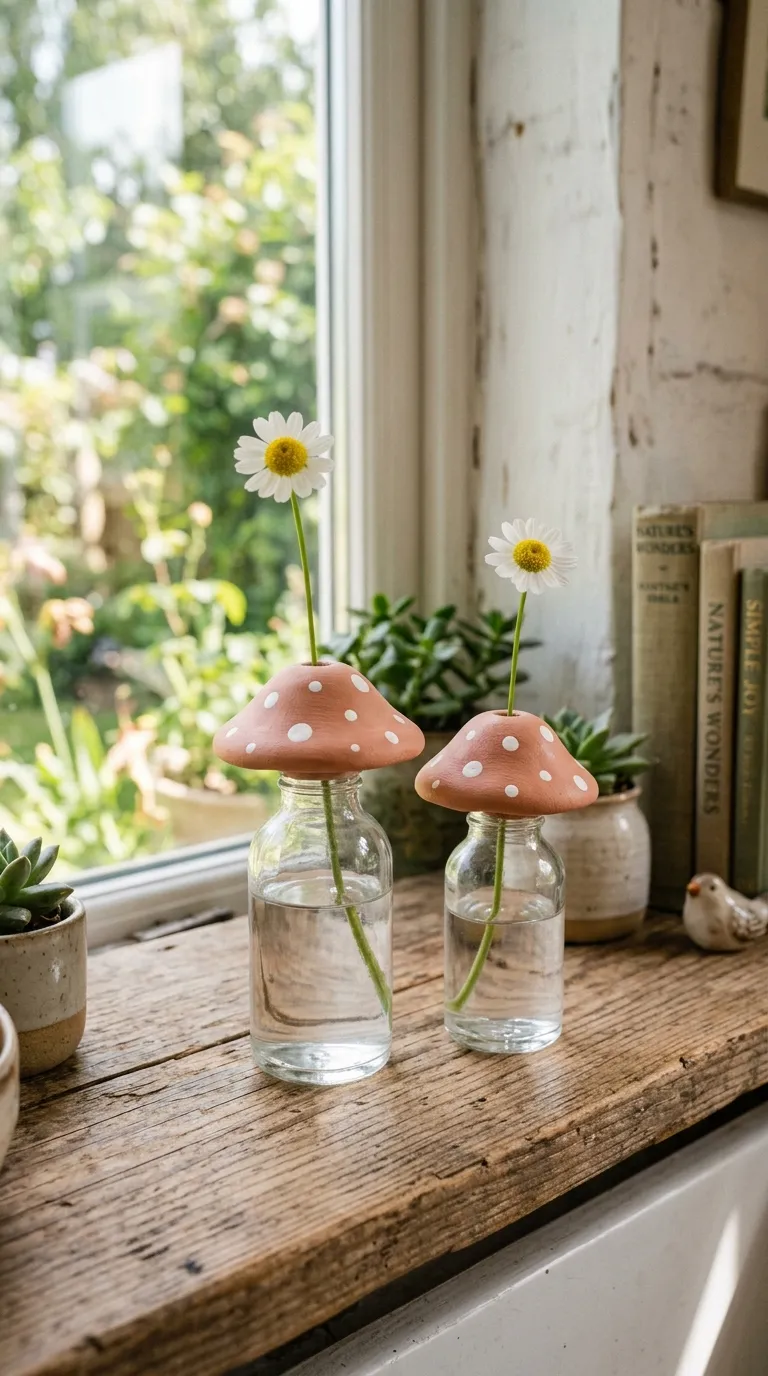
Concept Overview & Aesthetic Appeal
Transform plain thrifted glass soda bottles or olive oil cruets into whimsical forest mushrooms using clay caps and ceramic paint finishes.
Step-by-Step Execution Guide
-
Clean an empty glass bottle thoroughly, removing labels and adhesive residue.
-
Roll a ball of air-dry clay into a wide mushroom cap dome, hollowing out the underside so it fits snugly over the neck of the bottle.
-
Blend the clay dome smoothly around the bottle lip, leaving the bottle mouth open for flower stems.
-
Allow the clay mushroom cap to dry completely for 48 hours.
-
Paint the bottle base in creamy ivory ceramic paint and the clay cap in warm terracotta or soft blush with white dots.
-
Seal the entire outer surface with a waterproof glossy acrylic topcoat.
Pro Craft Tip
Only apply clay to the exterior neck of the bottle; keeping the glass interior untouched ensures the vase can hold fresh water for live stems.
7. DIY Checkerboard Wooden Storage Box
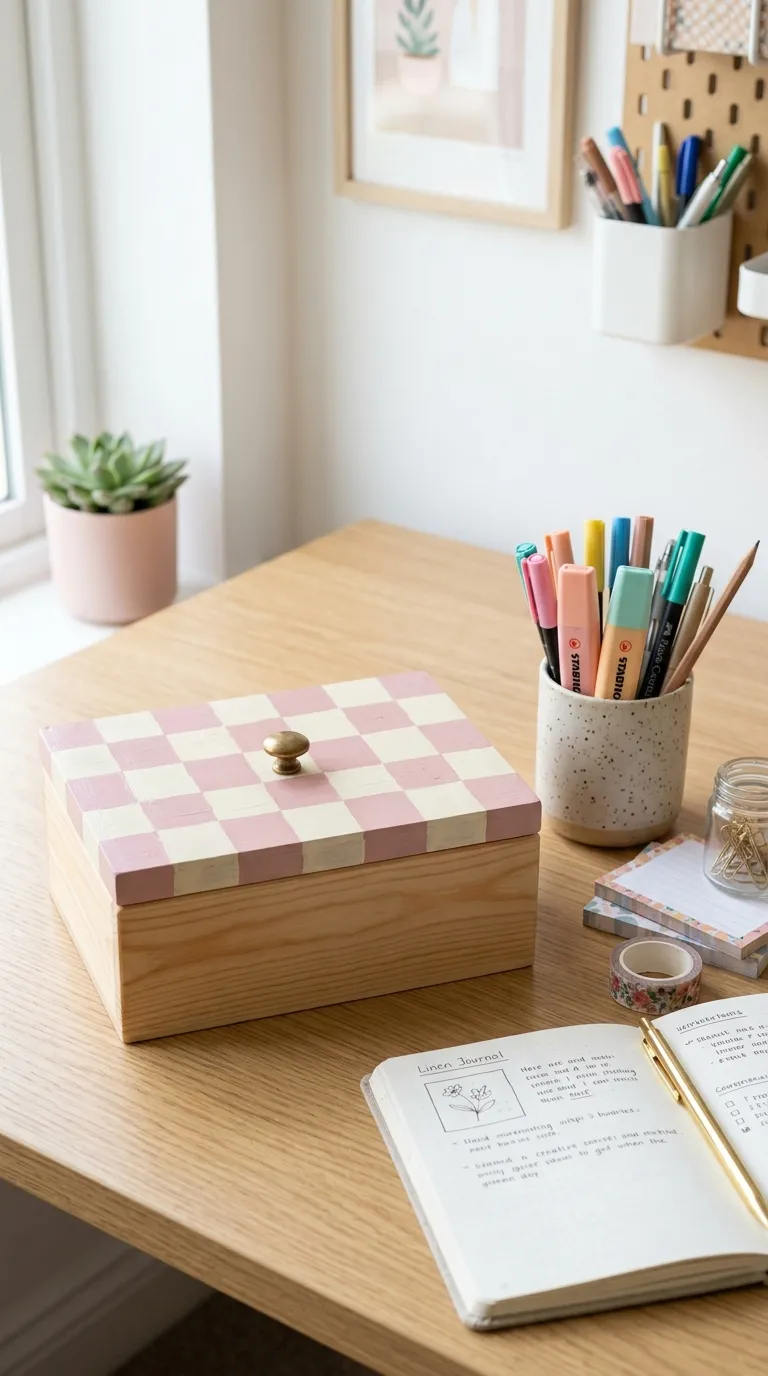
Concept Overview & Aesthetic Appeal
A trendy desk organizer made from an unfinished wooden keepsake box painted with a clean pastel-and-cream checkerboard grid.
Step-by-Step Execution Guide
-
Lightly sand an unfinished wooden craft box (approx. $6times6$ inches) to remove splinters.
-
Paint the entire box with two coats of creamy off-white acrylic craft paint as a base.
-
Use a ruler and pencil to draw a precise 1-inch grid across the lid and sides.
-
Carefully fill alternating squares with a soft pastel color (like sage green, lavender, or dusty rose) using a flat-edge shader brush.
-
Apply thin strips of low-tack washi tape along your pencil lines if you need clean, crisp straight edges.
-
Finish with two coats of satin clear varnish, adding a small brass knob to the lid.
Pro Craft Tip
Use a flat synthetic-bristle brush rather than a round brush; flat bristles allow you to stamp clean, razor-sharp square edges in one pass.
8. Chunky Arm-Knit Chenille Cloud Pillow
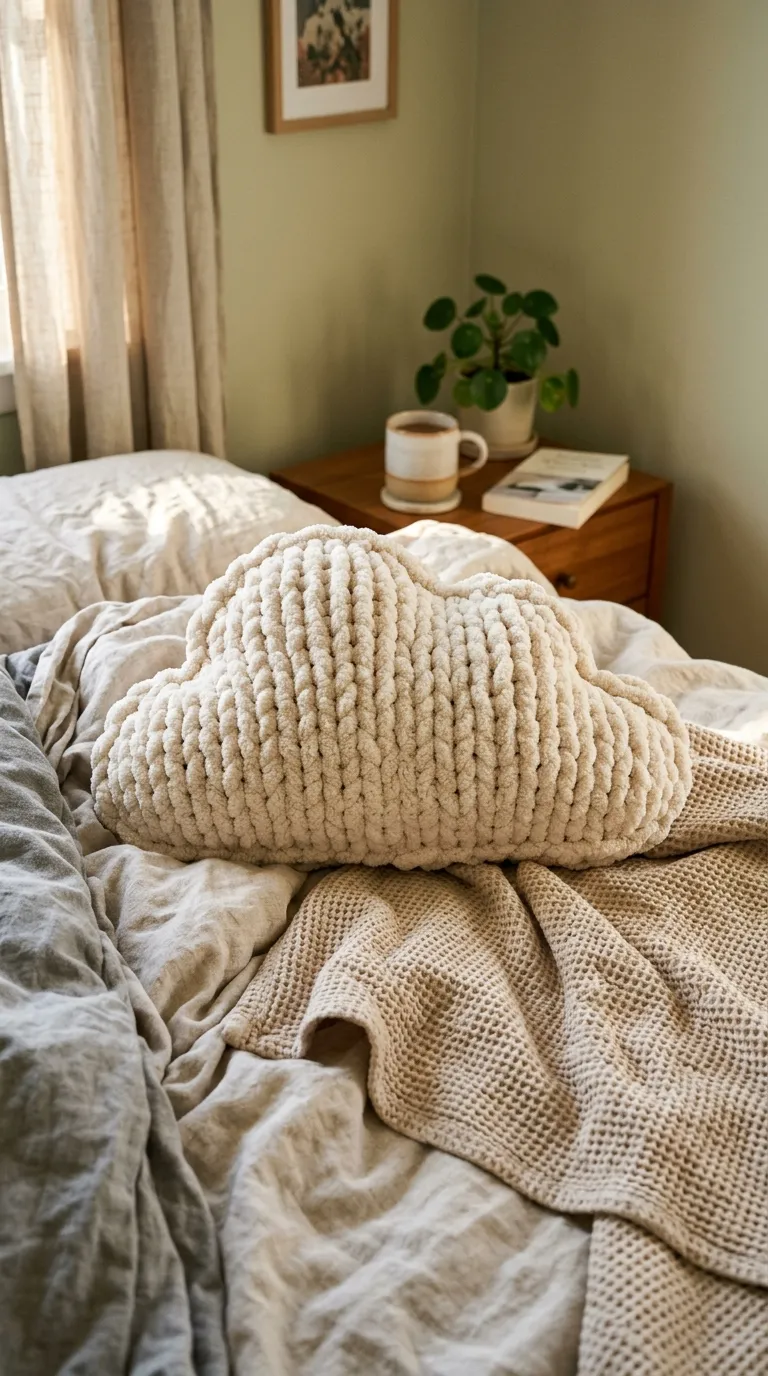
Concept Overview & Aesthetic Appeal
An ultra-soft, oversized cloud or knot pillow created without knitting needles using chunky jumbo tubular chenille yarn.
Step-by-Step Execution Guide
-
Take a skein of jumbo chunky chenille or tubular velvet yarn (approx. 25–30 mm thick).
-
Cast on 6 large loops directly onto your arm or work surface.
-
Hand-knit 8 to 10 rows using simple knit stitches, pulling the working yarn through the loops by hand.
-
Once you have a rectangular pillow tube, fill the interior cavity with hypoallergenic polyester fiberfill stuffing.
-
Hand-stitch the top and bottom ends closed by weaving the yarn tail through the edge loops.
-
Shape the stuffed knit into a soft cloud contour or tie into a modern Scandinavian monkey-fist knot.
Pro Craft Tip
Keep your hand loops relatively tight while knitting; looser loops can allow white polyester stuffing to show between stitches.
9. Beaded Wire Flower Suncatcher Garland
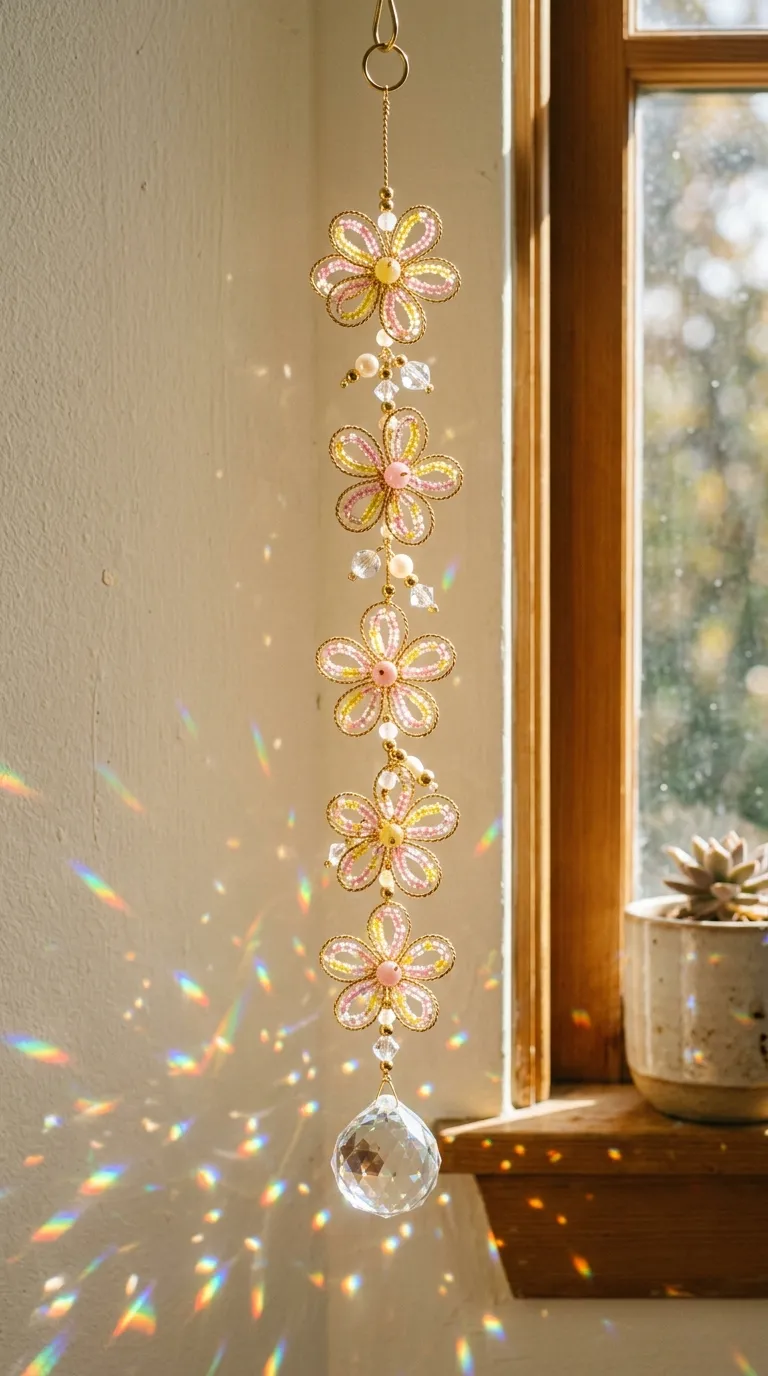
Concept Overview & Aesthetic Appeal
A shimmering window garland made from flexible craft wire shaped into delicate flower petals and strung with pastel glass seed beads and crystal prisms.
Step-by-Step Execution Guide
-
Cut a 12-inch length of 24-gauge gold or silver craft wire.
-
String 15 to 20 pastel glass seed beads (in shades of pink, yellow, and clear) onto the wire.
-
Bend the beaded wire into a teardrop loop and twist the base to form a single flower petal; repeat to form a 5-petal daisy.
-
Twist a larger pearl or crystal bead into the center of the petals to complete the flower.
-
Create 4 to 5 beaded flowers, connecting them along a length of thin gold chain.
-
Suspend a faceted glass teardrop prism at the bottom of the chain to refract rainbow light prisms across the room when hung in a window.
Pro Craft Tip
Use nylon-jaw craft pliers when twisting wire; metal pliers can scratch the metallic coating off decorative craft wire.
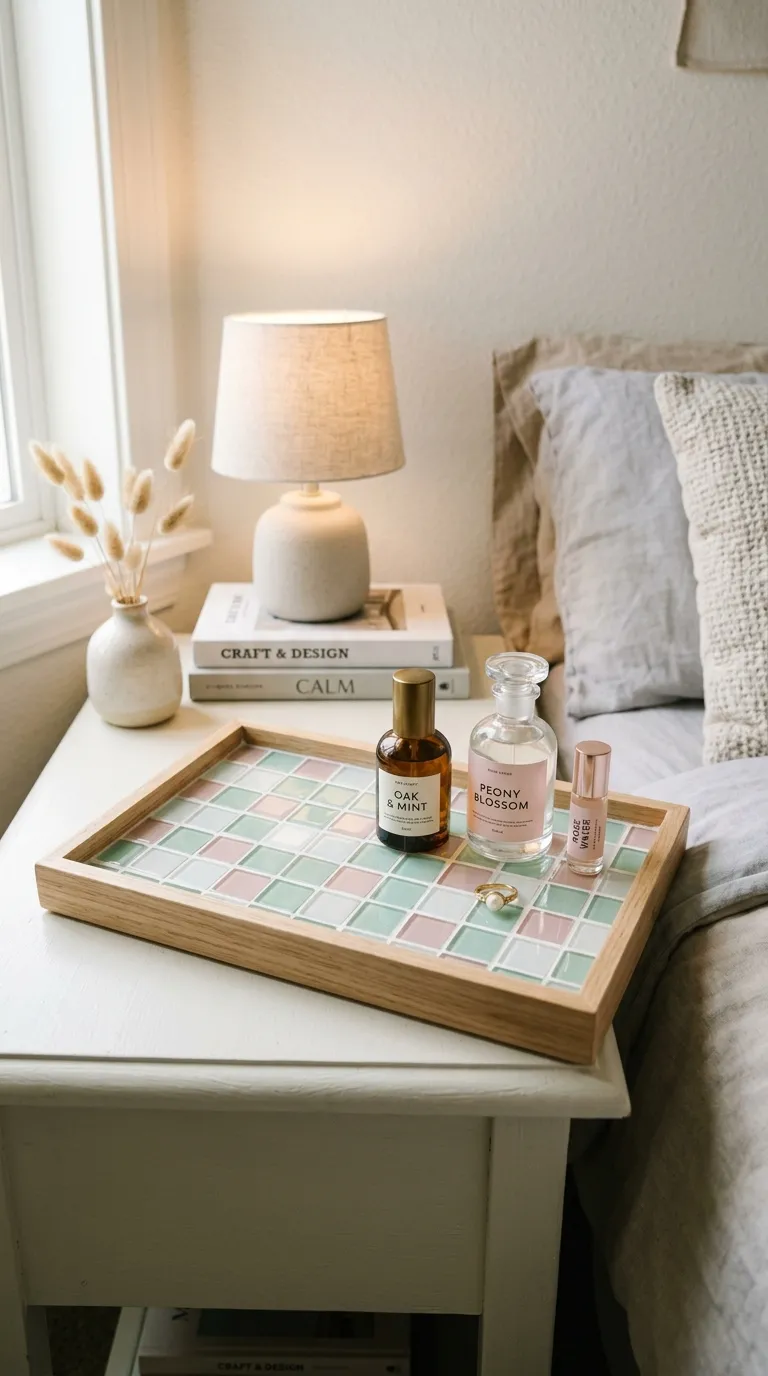
10. Mosaic Glass Tile Trinket Tray
Concept Overview & Aesthetic Appeal
A vibrant, Spanish-inspired tabletop tray crafted by setting pastel ceramic or glass mosaic tiles onto a wooden base and grouting with soft white grout.
Step-by-Step Execution Guide
-
Take a shallow wooden craft tray or wooden coaster with a raised 1/2-inch border.
-
Arrange 1/2-inch square glass mosaic tiles in pastel pink, mint, and white across the tray bottom to test the layout.
-
Glue each tile down using a small dab of clear craft glue or silicone adhesive, leaving a 1/8-inch gap between tiles.
-
Mix powdered white tile grout with water to a toothpaste-like consistency.
-
Spread the grout across the tiles with a rubber spatula, pressing it firmly into all the gaps.
-
After 15 minutes, wipe the excess grout off the tile surfaces using a damp sponge, polishing the tiles with a dry microfiber cloth once fully cured.
Pro Craft Tip
Wipe the sponge diagonally across the tile grid; wiping parallel to the gaps can accidentally scoop grout out of the seams.
Craft Concept Comparison & Supply Overview
| Cute Decor Craft | Primary Craft Medium | Estimated Cost | Assembly Time | Skill Level |
| Wavy Foam Mirror | Expanding Foam / Mirror | $12 – $18 | 24 Hours (Cure) | Beginner |
| Scalloped Clay Dishes | Air-Dry Clay / Varnish | $8 – $12 | 48 Hours (Dry) | Beginner |
| Tufted Mug Rugs | Monks Cloth / Yarn | $10 – $15 | 2 Hours | Intermediate |
| Pressed Flower Frame | Pressed Flora / Glass | $12 – $20 | 2 Weeks (Pressing) | Beginner |
| Ribbed Pillar Candles | Soy Wax / Silicone Mold | $15 – $22 | 12 Hours | Intermediate |
| Mushroom Bottle Vases | Upcycled Glass / Clay | $5 – $10 | 48 Hours | Beginner |
| Checkerboard Box | Wood Box / Acrylic Paint | $6 – $10 | 3 Hours | Beginner |
| Chunky Knit Pillow | Jumbo Chenille Yarn | $14 – $20 | 1 Hour | Beginner |
| Beaded Suncatcher | Glass Beads / Wire | $8 – $12 | 1.5 Hours | Intermediate |
| Mosaic Glass Tray | Mosaic Tiles / Grout | $10 – $16 | 4 Hours | Intermediate |
Common Crafting Mistakes & How to Avoid Them
-
Skipping Clay Drying Times: Painting or sealing air-dry clay before it has dried through traps moisture inside, causing the clay to mold or crack. Solution: Let clay dry naturally for at least 48 hours away from direct heat sources before painting.
-
Applying Heavy Expanding Foam Too Close to Glass: Spraying expanding foam directly across the mirror face can obscure the reflective glass area. Solution: Tape off a wide border with painter’s tape and spray only along the outer perimeter frame.
-
Using Water to Dilute Air-Dry Clay Paint: Over-saturating air-dry clay with watery paint softens the clay structure and causes surface warping. Solution: Use undiluted, high-pigment acrylic craft paints and apply two thin coats rather than one wet coat.
-
Pouring Candle Wax at High Temperatures: Pouring hot soy wax into silicone molds causes shrinkage craters and frosting on the candle surface. Solution: Cool soy pillar wax to 130°F–135°F (54°C–57°C) before pouring into room-temperature molds.