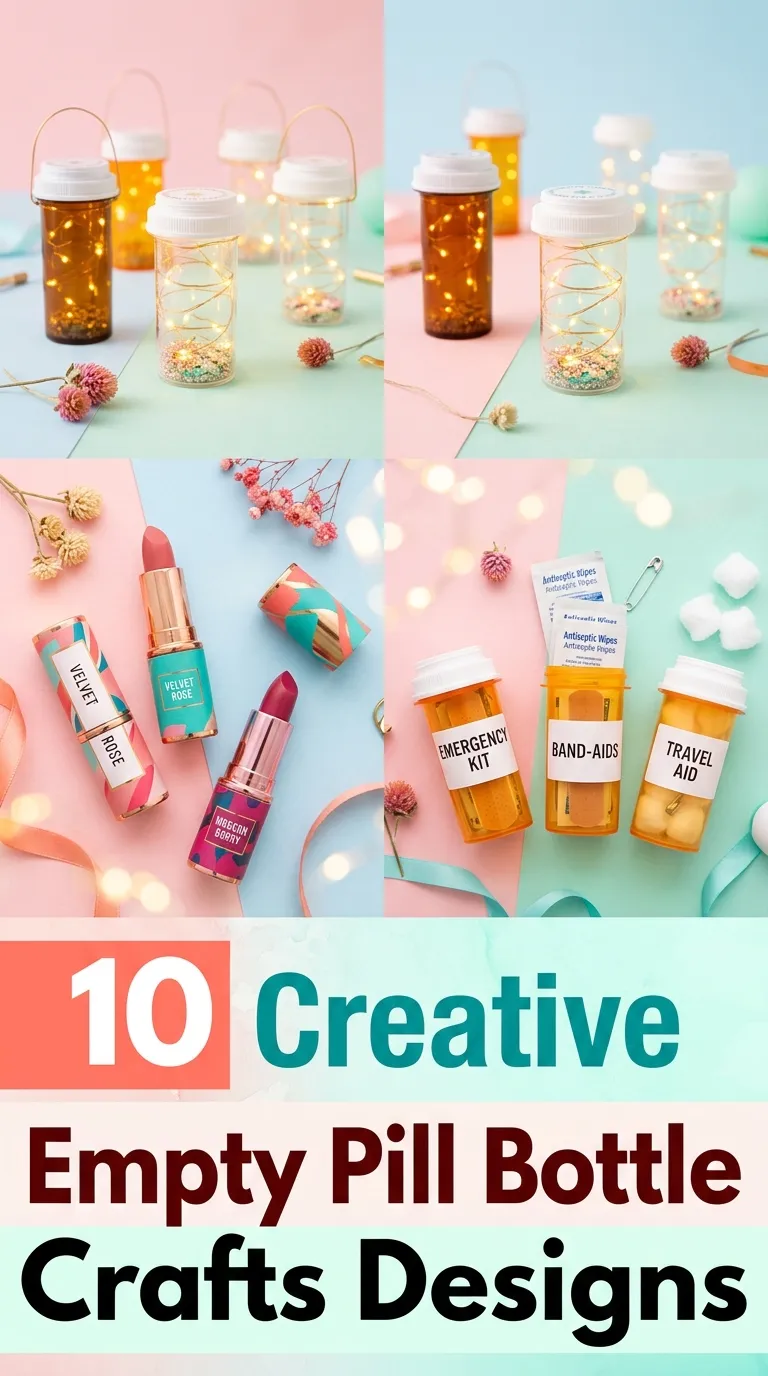
10 Empty Pill Bottle Crafts Ideas
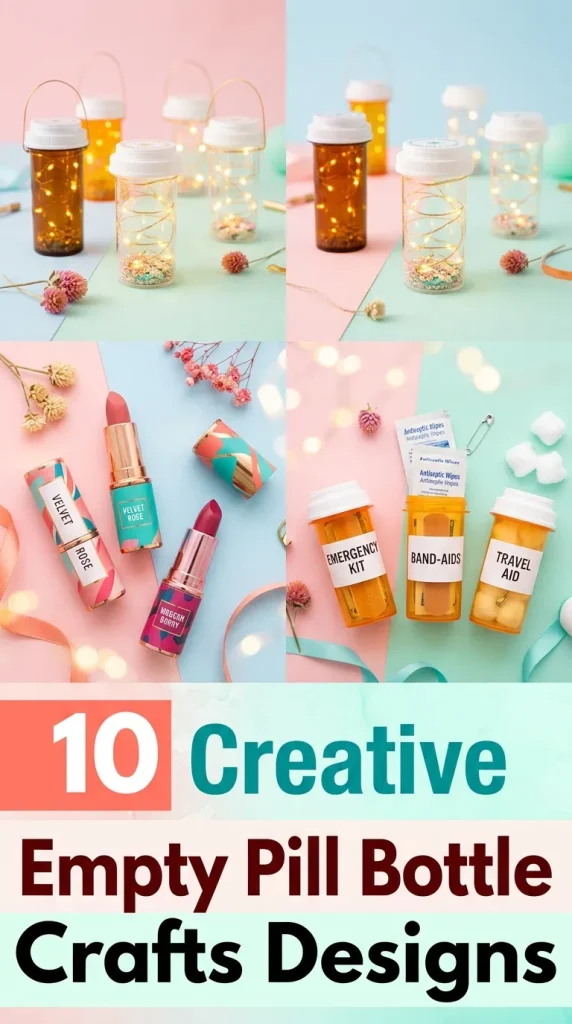
Upcycling plastic prescription medication containers is an increasingly popular sustainable home decor and organizing trend on social media. Instead of sending these durable, moisture-resistant cylinders to landfills, creators are discovering highly practical ways to transform them into functional household assets. This comprehensive step by step tutorial will guide you through the process of cleaning, prepping, decorating, and restructuring empty medicine bottles into ten distinct handmade utilities. Readers will learn how to safely strip away adhesive label residues, alter structural plastics using basic household tools, and apply sophisticated decorative finishes that hide the industrial origins of the containers. Repurposing these objects is exceptionally useful because it provides a cost-effective system for conquering household clutter while encouraging a zero-waste lifestyle. Whether you want to streamline your sewing room workspace, protect fragile travel items, or add whimsical ambient accents to an entry table layout, mastering these upcycling techniques offers a highly practical skill set. By understanding the physical properties of polymer containers and utilizing strategic design layouts, you can easily convert ordinary waste items into beautiful, high-efficiency home organization solutions.
Why Miniature Plastic Container Crafts Dominate Modern Upcycling Inspo
The dramatic surge in popularity surrounding empty container transformations across digital crafting circles highlights a broader cultural shift toward sustainable, resource-conscious household planning. Modern minimalist style interior design trends heavily focus on micro-organization and hidden clutter management, making the humble amber medication bottle an ideal canvas for functional design replication. These creative ideas offer immense practical value because they present an endless supply of free, uniform, and water-tight compartments that are perfectly scaled for storing tiny household items. The DIY appeal of these projects is exceptionally strong, allowing individuals to customize outer color palettes, try innovative surface texturing methods, and experiment with mixed media without spending a significant crafting budget. Beginners can easily approach this creative project because the structural footprints are small, lightweight, and incredibly forgiving to paint or embellish compared to large furniture renovations. Furthermore, the aesthetic versatility of updated plastic pods means they fit seamlessly into multiple decor movements, including a clean modern design workspace, an industrial tool garage, or a cozy bohemian craft room.
Sourcing Basic Materials, Safe Tool Kits, and Adhesive Surface Preparation
Thorough physical preparation and meticulous chemical decontamination are critical to ensuring your upcycled plastic containers look professional and remain safe for long-term storage use. Before starting any decorative paint application, you must assemble a dedicated toolkit containing rubbing alcohol, warm water, mild dish soap, a high-grit sanding block, a low-temperature hot glue gun, and multi-surface acrylic paints or metallic spray pigments. Surface preparation involves safely soaking your collected amber bottles in a tub of warm, soapy water mixed with a tablespoon of baking soda to loosen stubborn factory adhesive layers completely. Once the paper labels peel away, using a cotton ball saturated in rubbing alcohol ensures that all remaining sticky chemical residues are wiped clean, leaving a smooth foundation for paint grip. Scuffing the slick plastic exterior gently with fine-grit sandpaper at this stage breaks up the non-porous surface glaze, allowing primers and adhesives to bond permanently without future chipping or peeling. By organizing your workspace ahead of time, gathering your embellishments, and prepping your containers systematically before initiating assembly, you ensure an efficient and satisfying crafting workflow.
Functional Empty Pill Bottle Craft Ideas
Idea 1: Magnetic Pocket-Sized Spice Containers
Step-by-Step Guide
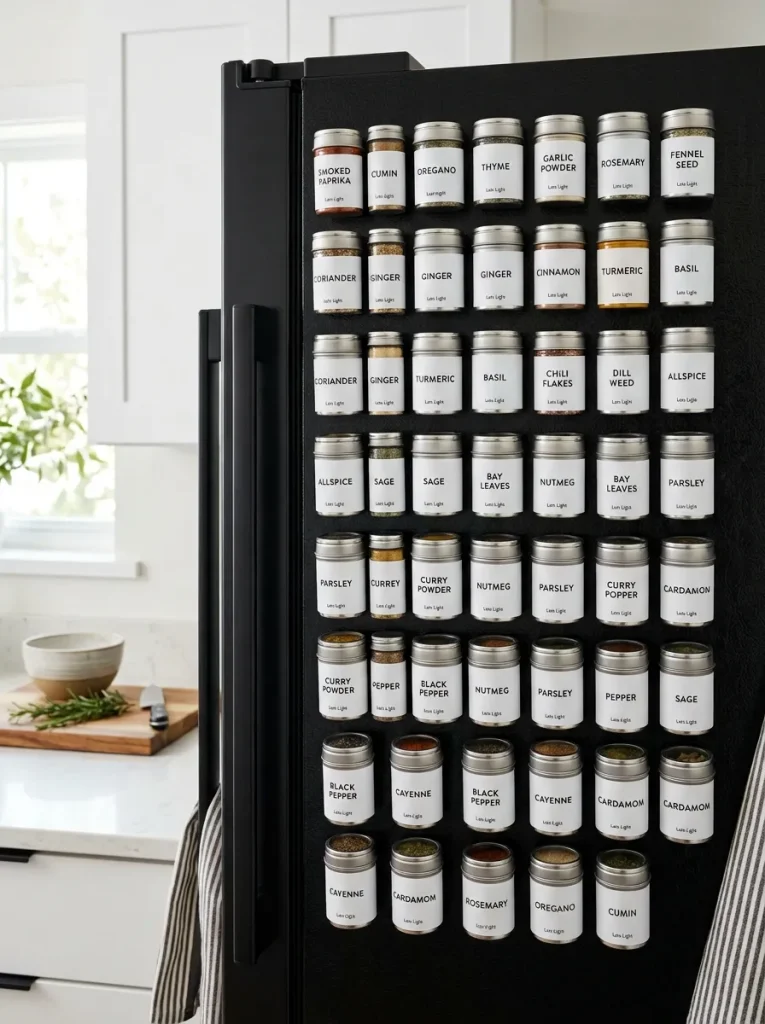
The magnetic pocket-sized spice container concept utilizes the airtight lids and uniform columns of small amber bottles to construct a highly organized, vertical culinary grid on metal surfaces. This concept targets small apartment kitchens, recreational vehicles, or outdoor camping gear boxes where traditional bulky glass spice jars consume valuable storage real estate. The design philosophy centers on accessibility and visual simplicity, transforming the plain plastic cylinders into sleek, uniform capsules that attach neatly to refrigerator doors or magnetic metal strips. By wrapping the exterior surfaces in opaque, neutral-toned labels, you protect fragile dried herbs from direct sunlight exposure while creating a highly cohesive modern design look across your culinary workspace.
To implement this method, select five to ten matching plastic bottles, ensuring they are completely clean, dry, and free of medicinal odors. Scuff the outer plastic surface lightly with a fine-grit sanding sponge to establish a matte texture that readily accepts adhesive label applications. Wrap each bottle body in a custom-cut strip of waterproof white vinyl sticker paper, leaving the safety cap clean or painting it with a matte black enamel paint. Use a permanent fine-liner marker to write your spice titles clearly onto the center of the vinyl wrap using minimalist style typography. Apply a generous bead of heavy-duty industrial strength adhesive to the flat back spine of each bottle, and press a strong neodymium disc magnet firmly into the glue. Allow the adhesive to cure undisturbed for twenty-four hours before filling the pods with your favorite ground spices and clicking them onto your metal kitchen backsplash.
Idea 2: Travel-Ready Mini Sewing Kits
How to Make
The travel-ready mini sewing kit relies on the compact structural volume of standard prescription containers to create a portable emergency repair system that slides easily into purses or luggage bags. This design concept consolidates loose sewing notions, such as needles, safety pins, thread, and spare buttons, into a single moisture-proof vault that prevents accidental punctures. The design philosophy focuses on maximizing internal spatial efficiency, using a central cardboard spool to wrap multiple colors of utility thread neatly within the core. This easy project functions as a thoughtful, highly practical handmade gift for students heading to college, frequent business travelers, or bridesmaids preparing for unpredictable dress emergencies.
To make this portable emergency kit, clean a large-format prescription bottle thoroughly and wipe the interior with rubbing alcohol to remove any fine powder residues. Cut a thin strip of sturdy corrugated cardboard that matches the internal height of your bottle, and notch small slits along the outer long margins to anchor your threads. Wrap small lengths of black, white, navy, and tan utility threads securely around the cardboard strip, leaving the ends secured inside the notches. Place three heavy-duty hand-sewing needles, four assorted safety pins, two shirt buttons, and a small needle threader directly inside the bottom of the plastic cylinder. Cut a small circle from a sheet of pink felt fabric, glue it directly to the top surface of the plastic safety cap, and insert two straight pins to serve as an integrated external pin cushion. Wrap a decorative strip of pastel washi tape around the outer body of the cylinder to complete the aesthetic decoration.

Idea 3: Faux Mercury Glass Bud Vases
How to Create
The faux mercury glass bud vase concept transforms thin industrial plastic cylinders into heavy, sophisticated home decor accents that mimic the metallic, mottled look of vintage silver glassware. This styling method relies on combining reflective metallic spray paints with a fine water-and-vinegar misting technique applied directly to the interior or exterior walls of the bottle. The design philosophy focuses on optical illusion, using high-gloss metallic layers to hide the cheap orange plastic completely while catching ambient room highlights gracefully. These small vases work beautifully when grouped in trios on living room fireplace mantels or arranged as low-profile floral accents for summer patio table layouts.
To create this reflective look, ensure your scuffed and prepped plastic bottle is completely free of surface fingerprints by wiping the exterior down with a clean microfiber cloth. Mix equal parts of white distilled vinegar and tap water inside a small plastic spray bottle equipped with a fine misting nozzle attachment. Spray a very light coat of the water-and-vinegar mixture across the outside of the plastic container, allowing the small, rounded water beads to sit undisturbed on the surface. Immediately spray a thin layer of high-gloss metallic silver or mirror-finish chrome spray paint directly over the wet water droplets. Let the paint set for exactly two minutes, then use a dry paper towel to dab the surface gently; the paint over the water beads will lift away, leaving a beautiful distressed vintage mercury glass pattern. Apply a final clear satin topcoat sealer to protect the delicate metallic film from scratches before inserting short faux greenery sprigs.

Idea 4: Stackable Hardware Organizer System
Setup Method
The stackable hardware organizer system applies industrial organization principles to workshops, garages, and craft spaces by converting large batches of uniform medication containers into a highly visible storage grid. This layout targets the chaotic accumulation of small metal screws, copper nails, picture hanging hooks, and wall anchors that easily get lost in deep toolbox drawers. The design philosophy centers on total visual transparency and modular efficiency, allowing builders to locate the exact hardware dimensions they need instantly without opening multiple compartments. This budget ideas strategy provides immense utility because the durable plastic walls easily withstand the weight and sharp edges of metallic fasteners.
To set up this workshop storage grid, collect fifteen to twenty large-format amber or clear prescription bottles that share the exact same height and cap style. Mount a flat, smooth sheet of plywood to your garage wall stud system using heavy-duty construction screws to serve as your primary backing panelboard. Arrange the plastic safety caps of your bottles in a neat, symmetrical grid layout across the plywood board, leaving two inches of clearance between each cap. Drive a short, half-inch wood screw directly through the center of each plastic cap into the plywood board, anchoring the lids permanently to the wall structure. Organize your small hardware components by size, placing separate lengths of nails and screws into individual plastic bottle bodies. Screw the filled plastic containers upward into their corresponding wall-mounted caps, creating an elegant floating storage display where containers can be unscrewed independently with one hand.

Idea 5: Glitter-Bedazzled Emergency Coin Holders
Execution Process
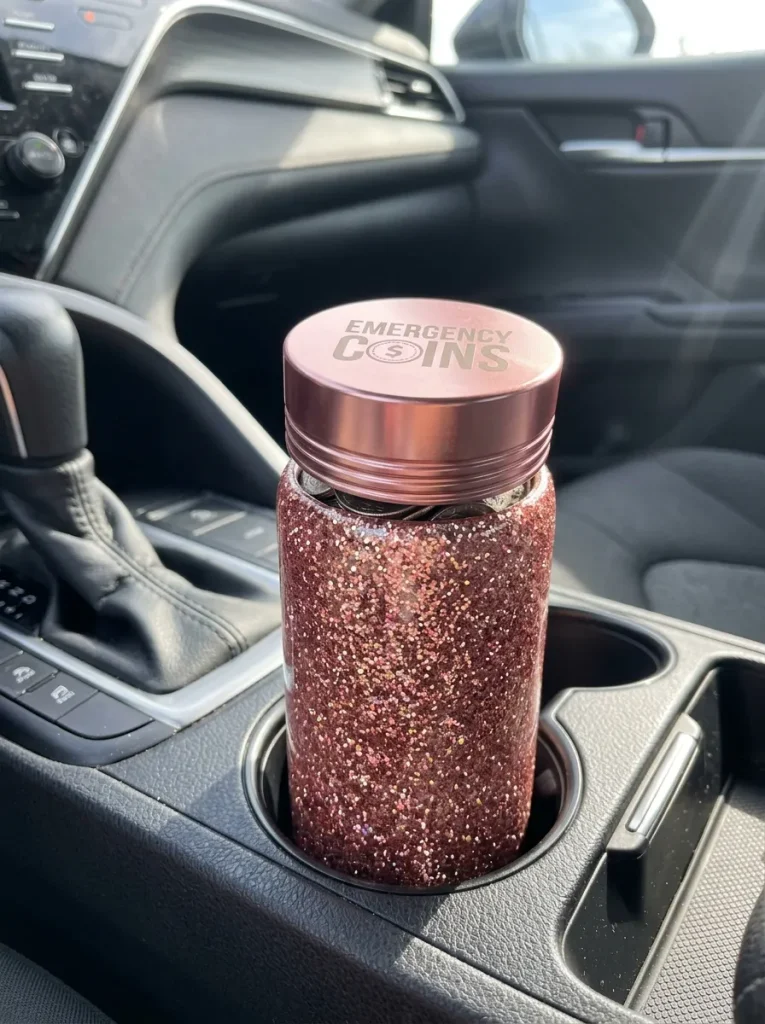
The glitter-bedazzled emergency coin holder introduces a vibrant, high-texture design element into your vehicle organization accessories by utilizing sparkling glues and loose sequins. This concept focuses on containment and convenience, keeping loose change tightly packed inside a small pod that fits perfectly into car cupholders or glove compartments. The design philosophy centers on playful, high-visibility customization, using dense layers of fine glitter to turn a mundane plastic waste item into an eye-catching accessory. This project represents an excellent entry-level craft for children or beginners who want to practice smooth glitter application and multi-surface glue sealing.
Initiate the execution process by selecting a medium-sized medication cylinder and wiping the outer plastic walls clean with a drop of rubbing alcohol. Use a flat foam brush to apply a thick, continuous layer of water-based decoupage glue or white school glue across the entire exterior surface of the bottle body. Roll the wet, glue-coated cylinder through a shallow tray filled with premium fine-grade polyester glitter in a color that matches your aesthetic inspiration, such as rose gold or champagne. Stand the bottle upright on a sheet of wax paper, and let the initial adhesive layer dry undisturbed for a full four hours until hard. Use a soft makeup brush to sweep away any loose, stray glitter flakes before applying a thin, protective top layer of decoupage sealer over the glitter to lock the particles down permanently. Paint the plastic cap with a coordinating metallic paint pen, fill the interior with quarters, and place it in your console.
Idea 6: Desktop Cord and Earbud Management Pods
How to Create
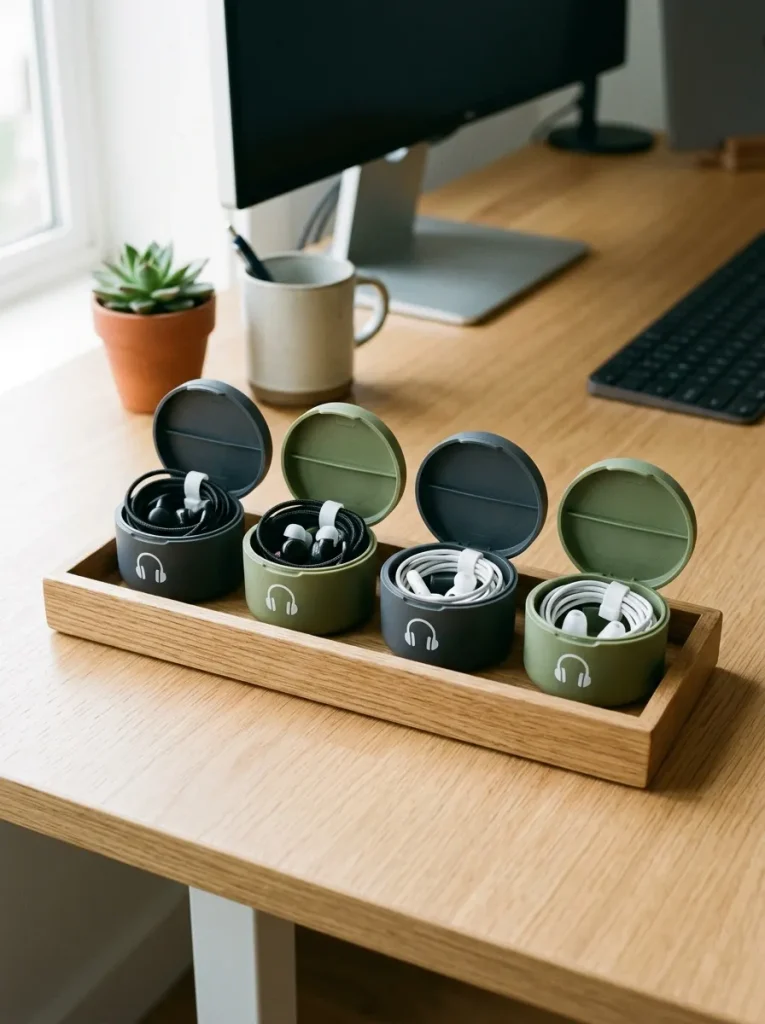
The desktop cord and earbud management pod concept addresses the modern workspace problem of tangled charging cables and frayed headphone wires using compact, protective containment sleeves. This organization solution utilizes the smooth internal cavity of medium-sized plastic containers to shield delicate electronic components from accidental crushing, dust accumulation, and liquid spills on desks. The design philosophy focuses on minimalist style functionality, creating clean, designated compartments for specific tech accessories to streamline your daily workflow. By decorating the exterior with sleek matte textures or simple labels, this project turns industrial waste into a professional desktop accent.
To create this cable management pod, scuff the exterior of a clean prescription container thoroughly with medium-grit sandpaper to remove the factory shine. Apply two thin coats of a specialized plastic-bonding spray paint in a clean, sophisticated tone like matte charcoal gray, soft olive green, or off-white. Once the paint has dried completely for six hours, use a white gel pen or a fine-point paint marker to draw a simple geometric icon representing a cable or headphone wire on the front face. Carefully wrap your phone charging cable or wired earbuds into a loose, circular loop that matches the internal diameter of the container body. Slide the looped cable cleanly inside the painted cylinder, and lock the safety cap in position to keep the wires fully compressed and dust-free. Arrange three or four matching pods inside a small wooden desk tray to establish an elegant, organized tech station.
Idea 7: Concealed Backyard Key Hider Rock
Step-by-Step Guide
The concealed backyard key hider rock merges home security utility with realistic organic landscaping textures to construct a hidden outdoor storage compartment. This concept attaches a water-tight medication bottle to the underside of a natural garden stone, embedding the plastic body directly into the earth while leaving the rock exposed on top. The design philosophy centers on total visual deception, ensuring the home decor element blends seamlessly into garden borders or gravel pathways without drawing negative attention. This project is highly actionable and provides a reliable safety backup for families who occasionally experience accidental lockouts.
To execute this outdoor security craft, select a smooth, flat-bottomed river stone or garden rock that naturally matches the geology of your backyard landscape layout. Clean the flat bottom surface of the selected rock thoroughly using a stiff wire brush to remove embedded dirt, moss, or loose silt that could ruin glue adhesion. Take a small, water-tight prescription container and apply a thick, generous bead of waterproof silicone construction adhesive or exterior epoxy resin directly to the top surface of the plastic cap. Press the glue-coated cap firmly onto the center of the clean, dry rock base, holding pressure for two minutes to eliminate weak internal air pockets. Let the adhesive cure completely for twenty-four hours in a well-ventilated space until the bond is completely unyielding. Dig a small, vertical hole in your garden soil that matches the exact depth and width of the bottle body, insert your emergency house key inside the cylinder, screw the bottle tightly into the rock-mounted cap, and push the assembly into the ground so only the natural stone remains visible above the soil line.
Idea 8: Handcrafted Travel Pill and Vitamin Vault
How to Make
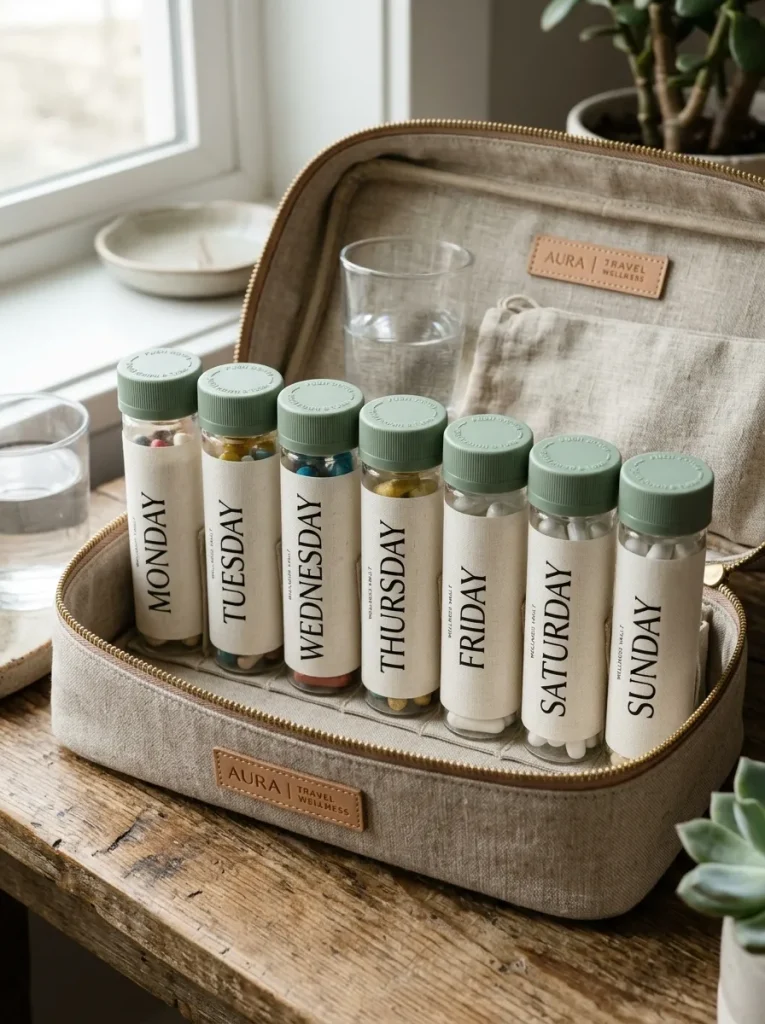
The handcrafted travel pill and vitamin vault updates the aesthetic quality of your health supplements by replacing ugly commercial pharmacy containers with beautiful, color-coded custom vials. This concept focuses on personal organization during travel, using uniform bottles decorated with soft pastel wraps to keep multi-day vitamin regimens clearly segregated within your toiletry kit. The design philosophy centers on clean, wellness-focused minimalism, removing chaotic pharmaceutical typography in favor of serene labels that promote a calming daily routine. The secure safety cap mechanism ensures your supplements remain tightly contained and protected from moisture during transit through changing climates.
To make this wellness storage vault, gather seven identical prescription containers, ensuring they feature functional, child-proof locking caps to prevent accidental opening inside luggage. Cut seven uniform strips of high-quality, self-adhesive linen paper or matte vinyl sheets that match the vertical clearance of the bottle bodies. Wrap the paper strips smoothly around each cylinder, smoothing down any air bubbles with the long edge of a plastic ruler or a bone folder tool. Use a fine-tip archive pen to write the days of the week or specific supplement names onto the center of each linen label using a neat, architectural print. Paint the matching safety caps with a soft satin acrylic paint in a single accent color, such as muted sage green or dusty rose, to establish a unified design rhythm. Place your daily vitamins inside their designated custom pods, and pack the completed set neatly into your travel bag.

Idea 9: Miniature Plant Propagation Tubes
Setup Method
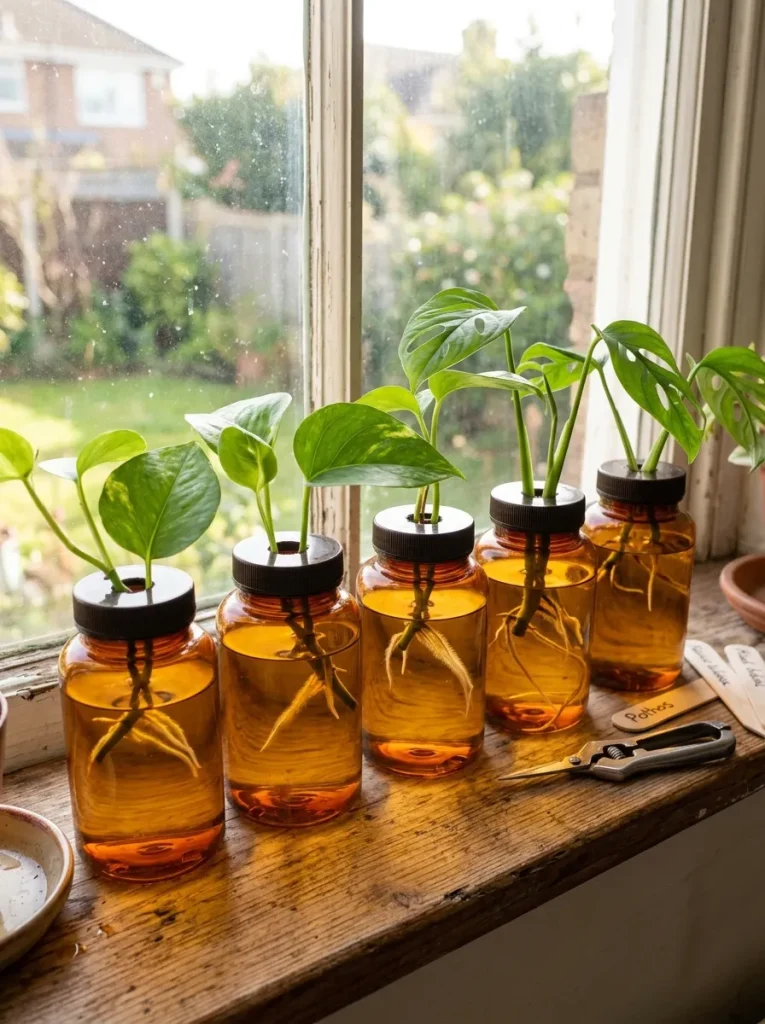
The miniature plant propagation tubes concept merges the principles of biophilic design with clever household upcycling to create an indoor horticultural workstation. This concept utilizes the translucent amber or clear walls of medicine bottles to function as miniature water reservoirs for root development in small succulent leaves or vining plant cuttings. The design philosophy focuses on natural visibility and growth tracking, allowing indoor gardeners to monitor fragile root expansion loops clearly through the plastic walls. This setup provides an elegant, budget ideas method for multiplying your favorite indoor plants, adding a fresh botanical touch to sunny windowsills.
To set up this indoor propagation station, source four or five clear or translucent amber plastic containers, removing all label residues completely with rubbing alcohol. Use a sharp utility knife or a soldering iron to carefully cut a half-inch circular hole directly through the center of each plastic bottle cap to allow plant stems to pass through safely. Fill the plastic container bodies three-quarters full with clean, room-temperature distilled water, ensuring the liquid level sits just below the neck line. Screw the modified caps back onto the bottles, and slide the stem of a fresh pothos, philodendron, or tradescantia cutting down through the top hole so the nodes remain fully submerged in the water reservoir. Arrange the group of propagation bottles inside a narrow, handmade wooden trough or attach them to a sunny window ledge using suction cups to jumpstart your indoor garden expansion.
Idea 10: Whimsical Fairy Light String Lanterns
Execution Process
The whimsical fairy light string lanterns concept introduces an atmospheric lighting accent into cozy bedrooms or festive outdoor patios by transforming plastic cylinders into glowing decorative globes. This concept relies on the natural light-filtering properties of translucent amber medicine bottles to soften the bright glare of standard white LED bulbs into a warm, amber twilight glow. The design philosophy centers on repeating patterns and ambient warmth, using a string of fairy lights to connect multiple decorated pods into a continuous, glowing architectural garland. This creative project is exceptionally beginner friendly, delivering high-impact evening decorations using basic alignment and hole-punching steps.
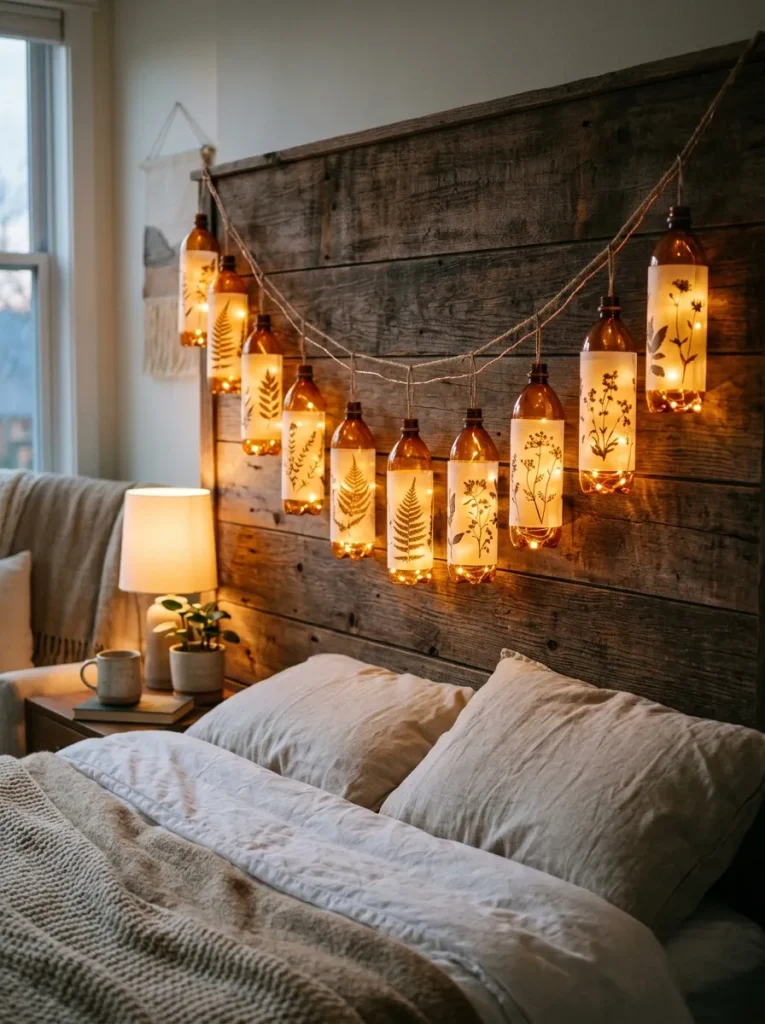
Initiate the execution process by gathering ten matching translucent amber prescription bottles and discarding the plastic safety caps entirely, as the containers will hang open to facilitate air ventilation. Wrap a thin sheet of white translucent parchment paper or vellum paper featuring delicate botanical silhouettes around the outside of each bottle body, securing the edges with a strip of clear double-sided adhesive tape. Use a power drill equipped with a half-inch spade bit or a heated metal rod to carefully bore a neat hole directly through the center of the bottom floor of each plastic cylinder. Push a single bulb node from a standard string of warm white copper-wire LED fairy lights down through the drilled bottom hole of each bottle, ensuring the light socket fits snugly inside the plastic opening. Hang the completed light garland elegantly along a bedroom headboard panel or weave it through a porch railing to cast a soft, ambient glow across your relaxing evening environment.
Common Beginner Mistakes and How to Avoid Them
When executing a DIY pill bottle upcycling project, beginner crafters frequently make critical surface preparation and chemical handling errors that can compromise both the look and safety of the final installation. The most critical mistake is failing to thoroughly clean out the interior chemical residues and fine pharmaceutical powders before using the containers to store spices, vitamins, or sewing pins. To completely avoid this health hazard, always scrub both the internal and external surfaces of the bottles with hot, soapy water, rinse them with clean water, and execute a final sanitizing wipe-down using high-purity rubbing alcohol. Another frequent pitfall is attempting to apply standard acrylic craft paint directly onto the smooth, non-porous exterior factory plastic without scuffing the surface first. Unprepared plastic possesses a slick glaze that completely prevents paint adhesion, causing your beautiful coats of color to rapidly bubble, crack, and peel away the moment the bottle is handled or squeezed. Always take time to thoroughly scuff the outer surfaces using a fine-grit sanding block, and apply a specialized plastic-bonding primer before applying your final decorative fashion pigments. Additionally, creators often use high-temperature hot glue guns on the thin plastic walls, which causes the polymer to warp, melt, and deform permanently. Always adjust your hot glue tools to their lowest temperature setting or utilize industrial-grade cold-cure epoxies to preserve structural integrity.
Practical Tips for Achieving Professional Craftsmanship Results
Elevating your handmade empty bottle creations to a professional, store-bought standard depends entirely on focusing on subtle finishing details, precise line control, and careful hardware concealment. Always invest significant time in a thorough degreasing routine; using a specialized adhesive remover ensures that all microscopic traces of sticky label glue are completely eliminated before painting. When wrapping containers with custom vinyl labels or linen paper wraps, always use a plastic squeegee or a hard credit card to push out trapped air pockets systematically from the center outward to guarantee a perfectly flat, bubble-free surface finish. If you are grouping multiple painted bottles together for a desktop organizer array, select a single cohesive color story—such as soft monochromatic grays, earth-toned terracotta shades, or metallic brass finishes—to establish a strong sense of modern design unity across your workspace. Use a high-quality permanent multi-surface paint pen to draw borders or write labels, as standard markers can bleed and smudge when exposed to natural skin oils over time. Finally, ensure all exposed raw plastic edges or cut lines are smoothed down lightly with extra-fine three-hundred-grit sandpaper to remove sharp burrs, ensuring your upcycled accessories feel comfortable, polished, and beautifully tailored for daily household handling.
Styling, Presentation, and Cohesive Home Decor Organization
Styling your finished upcycled containers within your living environment is the creative phase where you integrate your small-scale handmade projects into a sophisticated, clutter-free interior design narrative. Arrange your completed desktop cord pods or travel pill vaults inside wide, shallow wooden dough bowls or low-profile white ceramic trays to create a beautifully curated, organized look on your vanity countertops or home office sideboards. Group items featuring similar textures—such as combining your faux mercury glass bud vases with simple brass accents—to establish a strong sense of visual order and elegant style across your open shelving units. Use your wall-mounted hardware organizer grid systematically in your workshop or garage spaces, aligning the uniform columns vertically to echo the clean, linear boundaries of contemporary storage design. For indoor garden areas, place your translucent amber propagation tubes directly along sunny windowsills where natural daylight can pass through the amber plastic, creating beautiful golden reflections that highlight the growing green roots beautifully. By choosing high-quality, sustainable complementary elements like natural dried driftwood, washed linen cloths, and white pillar candles to frame your upcycled displays, you can seamlessly blend daily household utility with artistic presentation.
Strategic Budget Tracking and Efficient Time Planning
Completing a multi-bottle upcycling project successfully within a strict financial framework requires detailed asset tracking, zero-waste material utilization, and a structured approach to your weekend crafting schedule. Begin by building a comprehensive shopping list that breaks down every required supply, including multi-surface paint tubes, vinyl sticker sheets, adhesive magnets, and protective clear sealers to monitor your budget ideas accurately. To keep this creative project highly affordable, prioritize gathering your primary raw plastic containers for free from your own household usage or asking friends and family members to save their empty containers for your workshop. Allocate your available funds primarily toward high-quality detailing tools like stainless steel detail scissors, premium fine-liner paint markers, and industrial-grade adhesive epoxies, as these specialized instruments ensure professional-grade results. Manage your labor time effectively by batch-processing your cleaning and assembly steps across a single weekend; dedicate your Saturday morning entirely to labels soaking, adhesive scraping, and scuffing the plastic surfaces with sandpaper. Use Saturday afternoon for applying your foundational base primers and primary background colors, leaving your Sunday afternoon completely free for fine line detailing, gluing hardware magnets, applying protective clear sealers, and organizing your final decorative displays.
Creative Expansion and Advanced Artistic Inspiration
Once you have successfully mastered the fundamentals of surface scuffing, vinyl label wrapping, and faux mercury glass distressing on plastic containers, you can explore advanced creative variations to further challenge your crafting skills. Experiment with incorporating high-end resin casting into your upcycling routine, pouring a thin layer of clear two-part epoxy resin mixed with dried flower petals directly inside clear medicine bottles to create beautiful, solid jewel-like paperweights or cabinet drawer pulls. Advanced crafters can explore using a micro-soldering iron or a heated rotary tool to carve intricate geometric filigree cutouts along the plastic walls, transforming the containers into delicate lace-like patterns that project stunning shadow shapes when illuminated by internal LED bulbs. You can also research the creation of large-scale geometric wall mosaics, painting dozens of individual bottle caps in graduated color tones and arranging them into an expansive, abstract artwork layout on a framed plywood canvas panel. Consider drilling small, precise holes through the bottoms of several scuffed bottles, painting them to look like tiny rustic terracotta pots, and stringing them onto durable leather cords to build a beautiful vertical hanging succulent planter for your sunny backyard patio porch. By continually expanding your material choices and structural integration techniques, your handmade upcycled bottle projects will evolve into high-end conversation pieces that bring lasting creative inspiration to your home.
Additional Visual Inspiration
To watch these intricate plastic scuffing methods, vinyl label application loops, and faux mercury glass painting techniques executed with professional, real-time guidance, explore this comprehensive Pill Bottle Upcycling and Creative Storage Tutorial. This video demonstration highlights multiple beginner-friendly container designs, adhesive removal strategies, and professional clear coat sealer choices that can help you execute your custom empty bottle craft project with total confidence.
