
10 Simple Blowout Hairstyles Ideas
A salon-quality blowout transforms natural hair texture into voluminous, silky, and high-shine strands with effortless movement. Far from stiff or overly processed styling, a modern blowout focuses on scalp lifting, directional tension drying, and long-lasting thermal setting.
The secret to mastering an at-home blowout lies in prep work, sectioning discipline, and the cool-shot lock. By utilizing thermal round brushes, lightweight mousse, heat protectants, and velcro setting rollers, you can create looks ranging from 90s supermodel bounce and sleek glass bobs to soft beach waves that last for days.
Whether styling fine strands that need volume, thick hair that requires smoothing, or a layered butterfly cut, these ten curated blowout formulas deliver step-by-step styling blueprints, product pairings, and production-ready visual prompts.
Why This Idea Is Trending & Flattering
-
Long-Lasting Wearability: A properly set blowout lasts 3 to 5 days with minimal morning maintenance using dry shampoo and silk pillowcases.
-
Instant Volume & Body: Directional root-lifting techniques create natural, weightless fullness without heavy tease-combing.
-
Superior Hair Health: Smoothing with a round brush and airflow causes significantly less direct heat damage than clamping hair between flat iron plates.
-
Face-Framing Movement: Inward and outward beveling flatters jawlines, collarbones, and cheekbones across all face shapes.
-
Effortless Versatility: Blowouts serve as the polished foundation for high ponytails, claw-clip updos, or loose cascading waves.
Tools, Products & Blowout Mechanics Guide
Core Styling Tools
-
Dryers & Attachments: Ionic blow dryer with a narrow concentrator nozzle or an oval hot-air thermal brush.
-
Brushes: Ceramic-coated round brush (medium 1.5-inch for curls/bobs; large 2.5-inch to 3-inch for long-layer volume) and a wide-tooth detangling comb.
-
Setting Hardware: 2-inch to 2.5-inch velcro rollers, duckbill sectioning clips, and a silk bonnet for overnight preservation.
Essential Product Cocktail
-
Thermal Defense: Spray-on or cream heat protectant rated up to 450°F (232°C).
-
Root Architecture: Volumizing root-lifting foam or lightweight styling mousse applied strictly to damp roots.
-
Finish & Seal: Lightweight argan or squalane hair oil for mid-lengths and ends, finished with flexible-hold texturizing hairspray.
1. The 90s Supermodel Voluminous Blowout
Concept Overview & Aesthetic Appeal
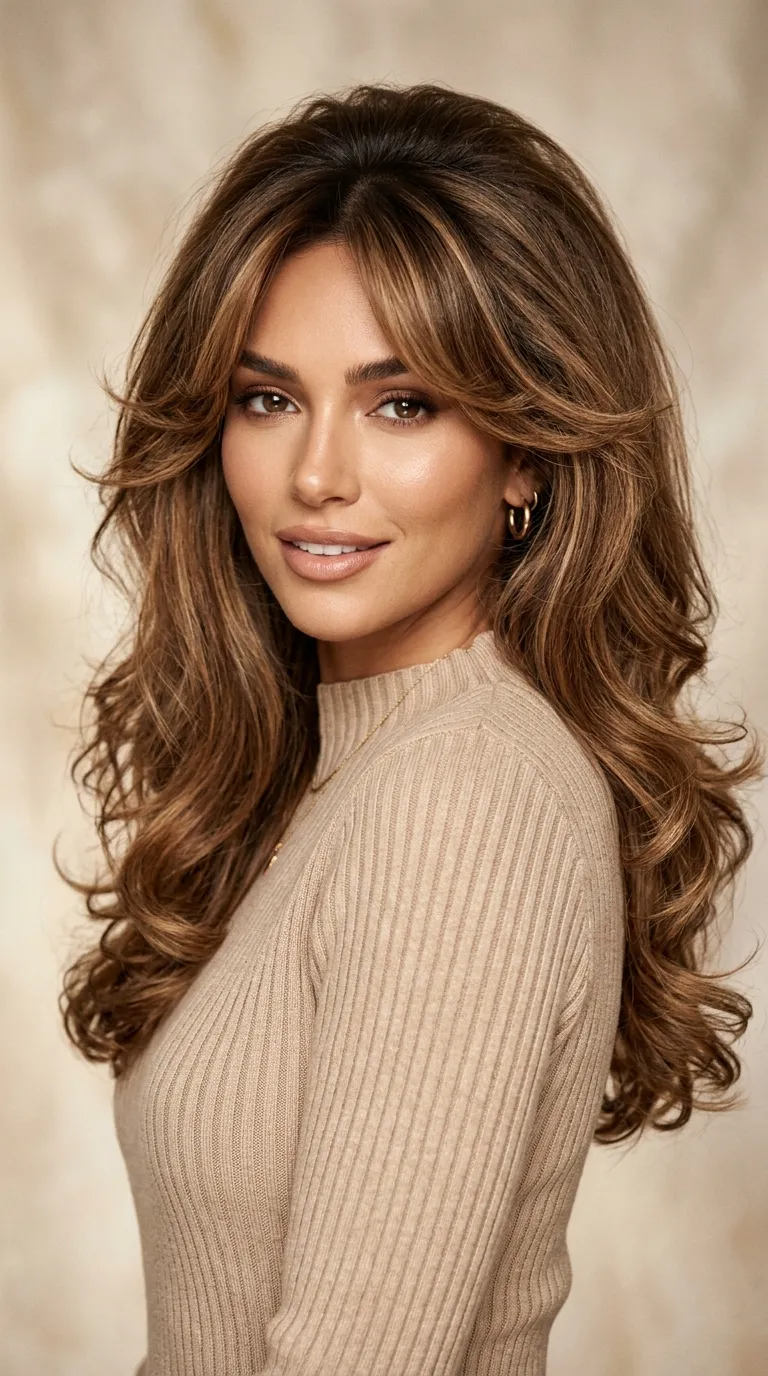
An iconic, high-volume blowout characterized by flipped curtain bangs, bouncy C-curled ends, and dramatic lift at the crown reminiscent of 1990s runway icons.
Step-by-Step Execution Guide
-
Apply a golf-ball-sized dollop of volumizing mousse to damp roots and rough-dry hair until it is 80% dry.
-
Divide hair into four quadrants: top crown, left side, right side, and back nape.
-
Work in 2-inch horizontal sections, placing a 2.5-inch ceramic round brush under the roots and pulling straight up toward the ceiling with the concentrator nozzle aligned.
-
Roll the ends inward, blast with high heat for 10 seconds, then hold the cool-shot button for 5 seconds to lock the curl.
-
Immediately roll the warm section onto a 2.5-inch velcro roller and secure at the scalp with a duckbill clip.
-
Allow rollers to cool for 15 minutes before removing; brush through with a wide-tooth comb and finish with flexible-hold hairspray.
Pro Styling Tip
Over-direct each section forward and upward as you dry; drying hair in the opposite direction of its natural fall creates long-lasting root height.
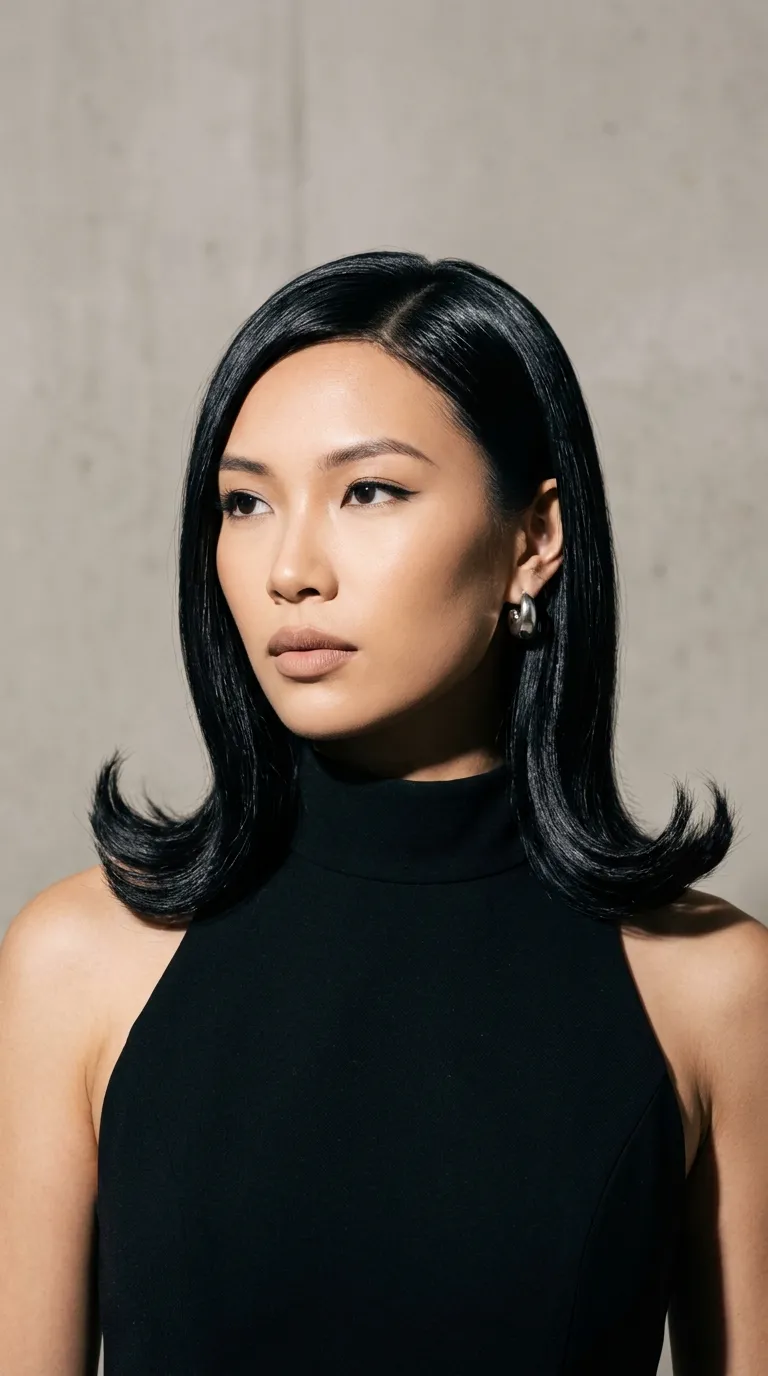
2. The Sleek Glossy Glass Hair Blowout

Concept Overview & Aesthetic Appeal
A razor-sharp, mirror-like finish that lies flat with liquid shine, sharp ends, and zero frizz or flyaways.
Step-by-Step Execution Guide
-
Saturate damp hair with a heat-activated anti-humidity smoothing spray (such as a polymer-based waterproofing mist).
-
Part hair down the center and divide into 1-inch thin horizontal sections.
-
Use a mixed-bristle (boar and nylon) round brush, keeping firm downward tension as you follow the brush with the dryer nozzle pointing down the hair shaft.
-
Smooth the ends straight down without curling or flipping the brush at the bottom.
-
Run the cold air setting down each section to seal the hair cuticle completely flat.
-
Warm two drops of lightweight hair oil between your palms and smooth over the surface from mid-lengths to ends.
Pro Styling Tip
Always keep the dryer nozzle angled downward along the hair shaft; blowing air upward against the cuticle creates instant frizz and dullness.
3. The Bouncy Butterfly Layered Blowout
Concept Overview & Aesthetic Appeal
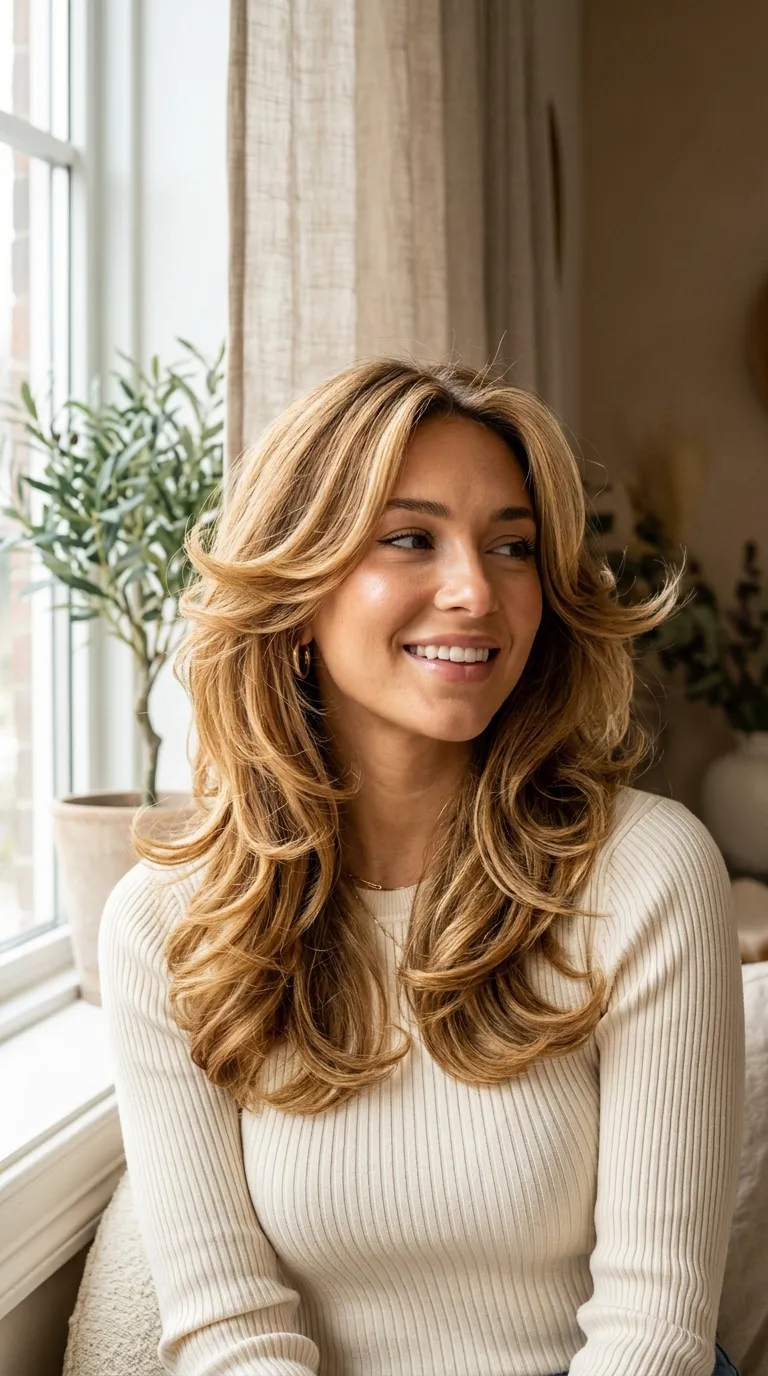
A layered look featuring soft, cascading layers that flip away from the face in dynamic, fluttery wings while maintaining fullness at the back.
Step-by-Step Execution Guide
-
Apply a lightweight blowout cream to mid-lengths and ends on 75% dry hair.
-
Section out the face-framing curtain bangs and side layers separately.
-
Blow-dry the back sections rolling under (inward) for smooth volume.
-
For the side face-framing layers, place the round brush on top of the section and roll backward away from the face, directing heat toward the outer hairline.
-
Set the face-framing wings in velcro rollers angled diagonally backward.
-
Unroll after cooling and rake fingers through to let the layered wings blend naturally.
Pro Styling Tip
Use a medium 1.75-inch ceramic barrel for the front layers to get a tighter flip, and a 3-inch barrel for the back to keep layers soft and flowing.
4. The Italian Beveled-End Bob Blowout

Concept Overview & Aesthetic Appeal
A chic, Parisian-inspired chin- or collarbone-length bob featuring soft, rounded inward-beveled ends and airy volume through the sides.
Step-by-Step Execution Guide
-
Prep damp bob-length hair with a lightweight root-boosting spray.
-
Rough-dry hair using your fingers, lifting roots side to side to build airy texture.
-
Take 2-inch vertical sections using a 2-inch round brush.
-
Roll the brush inward toward the neck as you dry the lower third of each section, creating a pronounced rounded “C-curve” bevel.
-
Blow-dry front bangs forward and under with a gentle curve.
-
Tuck one side behind the ear to highlight jawline structure, finishing with a mist of shine spray.
Pro Styling Tip
Avoid using a barrel brush that is too large on a bob; a smaller barrel ensures the ends curl under tightly enough to hug the jawline cleanly.
5. The Soft Brushed-Out Hollywood Wave Blowout
Concept Overview & Aesthetic Appeal
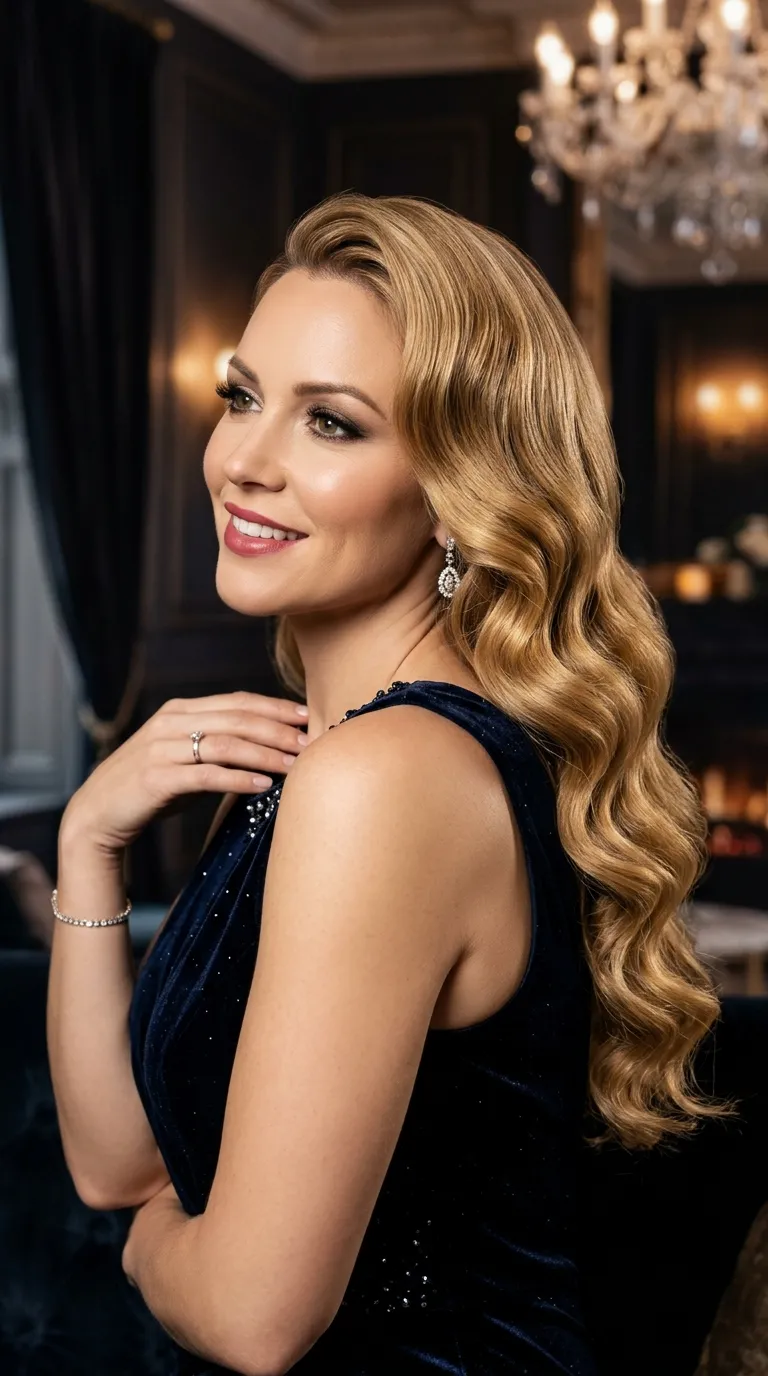
A glamorous, vintage-inspired blowout featuring uniform, undulating waves that flow continuously down the side of the head in high-gloss ribbons.
Step-by-Step Execution Guide
-
Prep hair with setting lotion and dry in horizontal 1.5-inch sections.
-
Wrap each section around a 1.5-inch ceramic brush, rolling all sections in the exact same direction (backward toward the crown).
-
Pin each warm curl flat against the scalp in a pin-curl clip to cool.
-
Once the entire head is cooled, remove all clips.
-
Gently brush through the entire head using a natural boar-bristle paddle brush; the uniform curls will link together into a single continuous wave pattern.
-
Set with a light mist of medium-hold hairspray and smooth flyaways with a clean spoolie brush.
Pro Styling Tip
Rolling every section in the identical direction is the essential rule for Hollywood waves; opposing directions will cancel the unified ribbon wave out.
6. The Textured Curtain Bang & Shag Blowout

Concept Overview & Aesthetic Appeal
A rock-and-roll, textured blowout tailored for shags and wolf cuts, highlighting choppy crown layers and wispy cheekbone-sweeping curtain bangs.
Step-by-Step Execution Guide
-
Mist damp hair with sea-salt spray or dry texturizing mousse.
-
Section the curtain bangs into a triangle at the front hairline; wrap bangs around a 2-inch round brush rolling forward, blast with heat, then roll straight backward.
-
Split the curtain bangs down the center and push them toward the temples to create an effortless open arch.
-
Blow-dry crown layers by lifting straight up and twisting the brush upon release to create piecey, separated texture.
-
Rough-dry the ends while scrunching with cool air.
-
Finish by working a dime-sized amount of matte styling paste through the ends.
Pro Styling Tip
Blow-drying the bangs forward first before flipping them backward creates maximum lift at the center part while laying flat against the temples.
7. The Deep Side-Part Old-Money Glamour Blowout
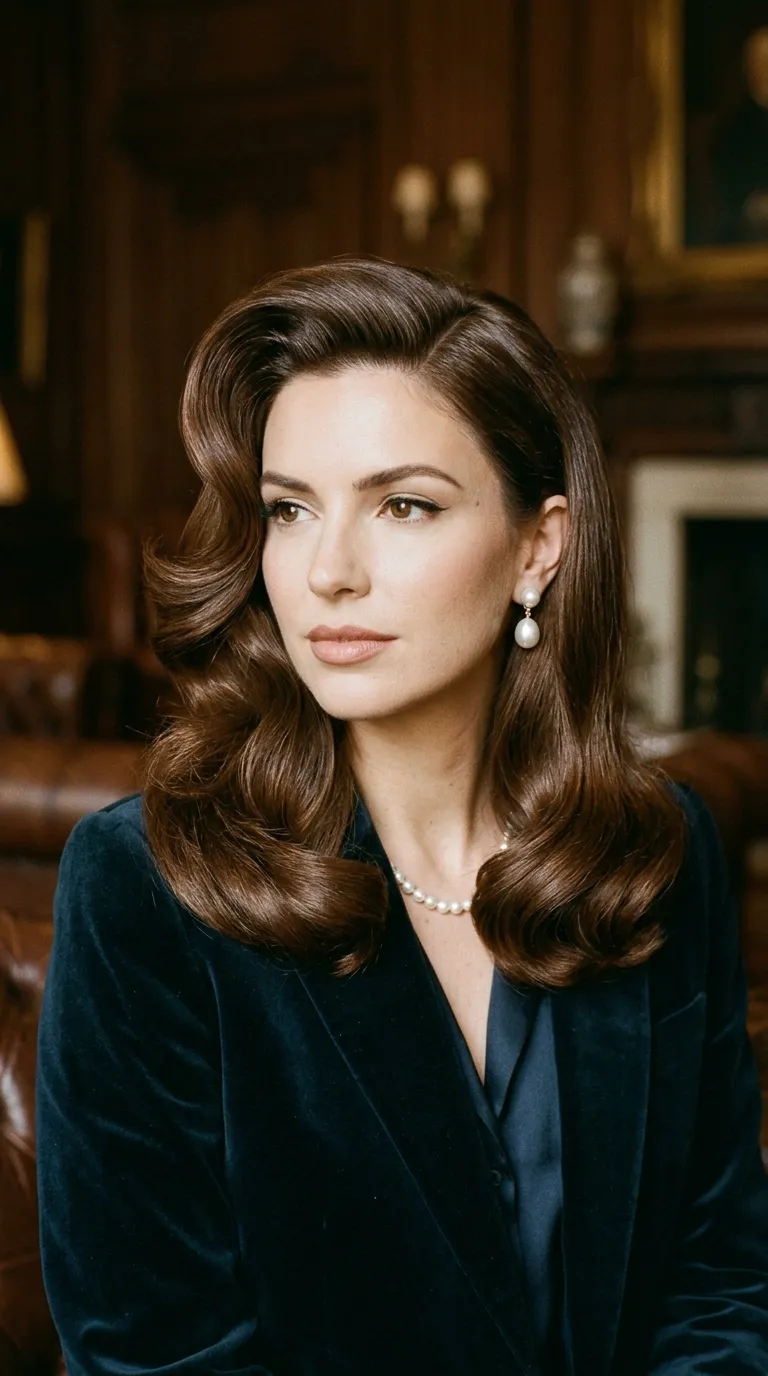
Concept Overview & Aesthetic Appeal
A sophisticated, asymmetrical blowout featuring a deep side part with dramatic swooping root volume on one side, cascading into soft, polished waves.
Step-by-Step Execution Guide
-
Create a sharp, deep side part aligned with the arch of your eyebrow using a tail comb.
-
Apply a firm-hold volumizing spray along the root line on the heavy side of the part.
-
Blow-dry the heavy side upwards and diagonally across the forehead to create a dramatic swoop.
-
Blow-dry the remaining hair in 2-inch sections, curling ends under with a large round brush.
-
Place three large velcro rollers along the side-swoop crest to set the height while cooling.
-
Remove rollers, sweep the lighter side cleanly behind the shoulder, and let the heavy side frame the face.
Pro Styling Tip
Drying the roots 1 inch past your natural part line before flipping it back over creates dramatic, long-lasting height that won’t fall flat during the day.
8. The Relaxed French-Girl Air-Blown Waves
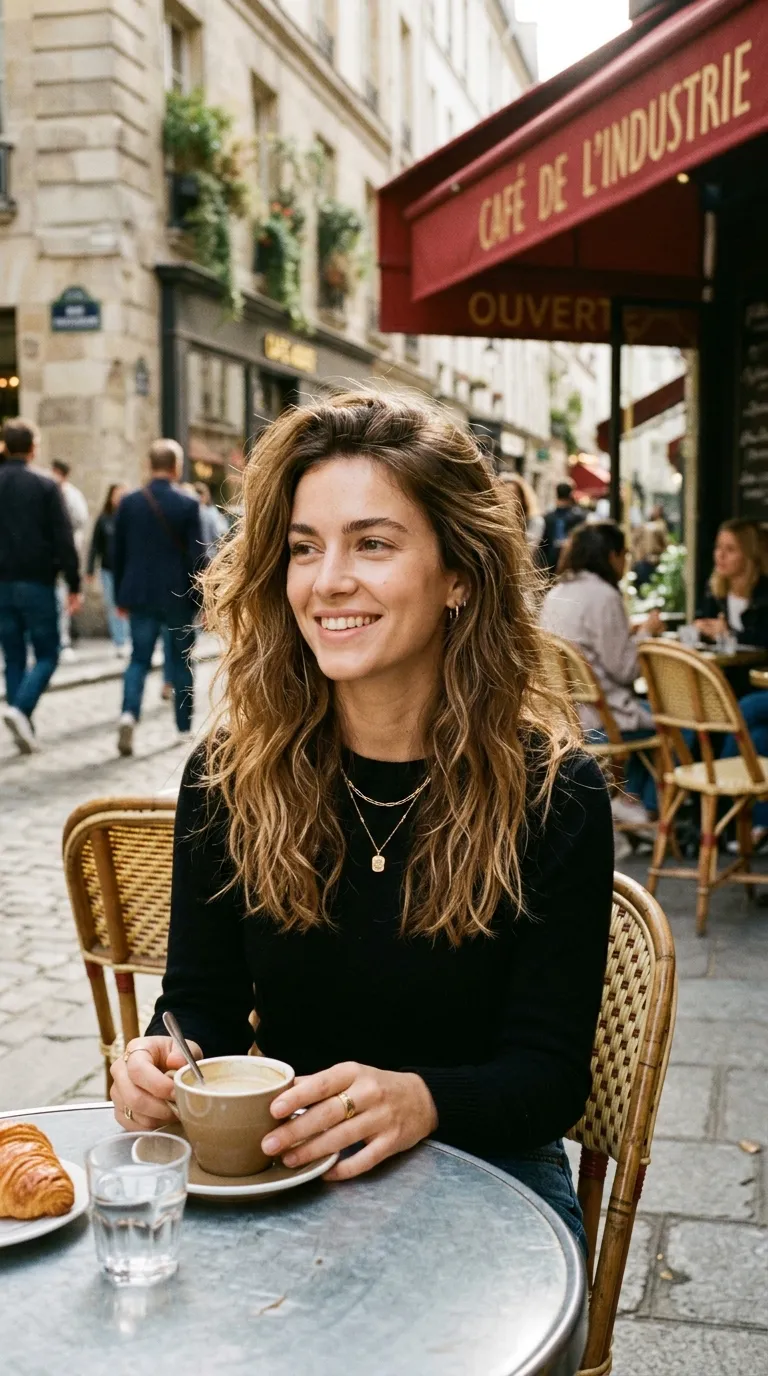
Concept Overview & Aesthetic Appeal
An effortless, lived-in blowout that looks air-dried yet polished, featuring straight, undone ends and soft mid-shaft bends.
Step-by-Step Execution Guide
-
Prep damp strands with a leave-in conditioner and lightweight air-dry cream.
-
Blow-dry hair with a paddle brush until 90% dry to smooth the cuticle without adding curl.
-
Take wide 3-inch sections of hair; wrap only the mid-shaft around a large round brush for 5 seconds while leaving the bottom 2 inches completely untouched and straight.
-
Twist each section like a rope as you release it from the brush and let it drop.
-
Once dry, shake out the twists with your fingers.
-
Mist with dry texturizing spray to add matte, effortless French-girl separation.
Pro Styling Tip
Leaving the last 2 inches of hair uncurled is what separates a relaxed modern French blowout from a traditional pageant curl.
9. The Modern Flipped-Out Retro Ends Blowout
Concept Overview & Aesthetic Appeal
A playful, modern 60s revival look featuring smooth, flat crown roots and dramatic, flicked-out ends that kick upward along the collarbones.
Step-by-Step Execution Guide
-
Apply a heat-smoothing serum throughout towel-dried hair.
-
Blow-dry roots and mid-lengths smooth and flat against the head using a flat paddle brush.
-
When reaching the bottom 3 inches of each section, switch to a 1.5-inch round ceramic brush placed on top of the section.
-
Roll the brush upward and outward away from the neck, holding heat at the bend for 10 seconds.
-
Hit the flicked ends with the cool-shot button before unrolling.
-
Lock the flared ends with high-shine firm hairspray to keep the flips crisp throughout the day.
Pro Styling Tip
Rest the round brush horizontally on top of the shoulder while drying the ends to use your shoulder as a natural ledge for the flip.
10. The Effortless Hot-Air Brush Express Blowout
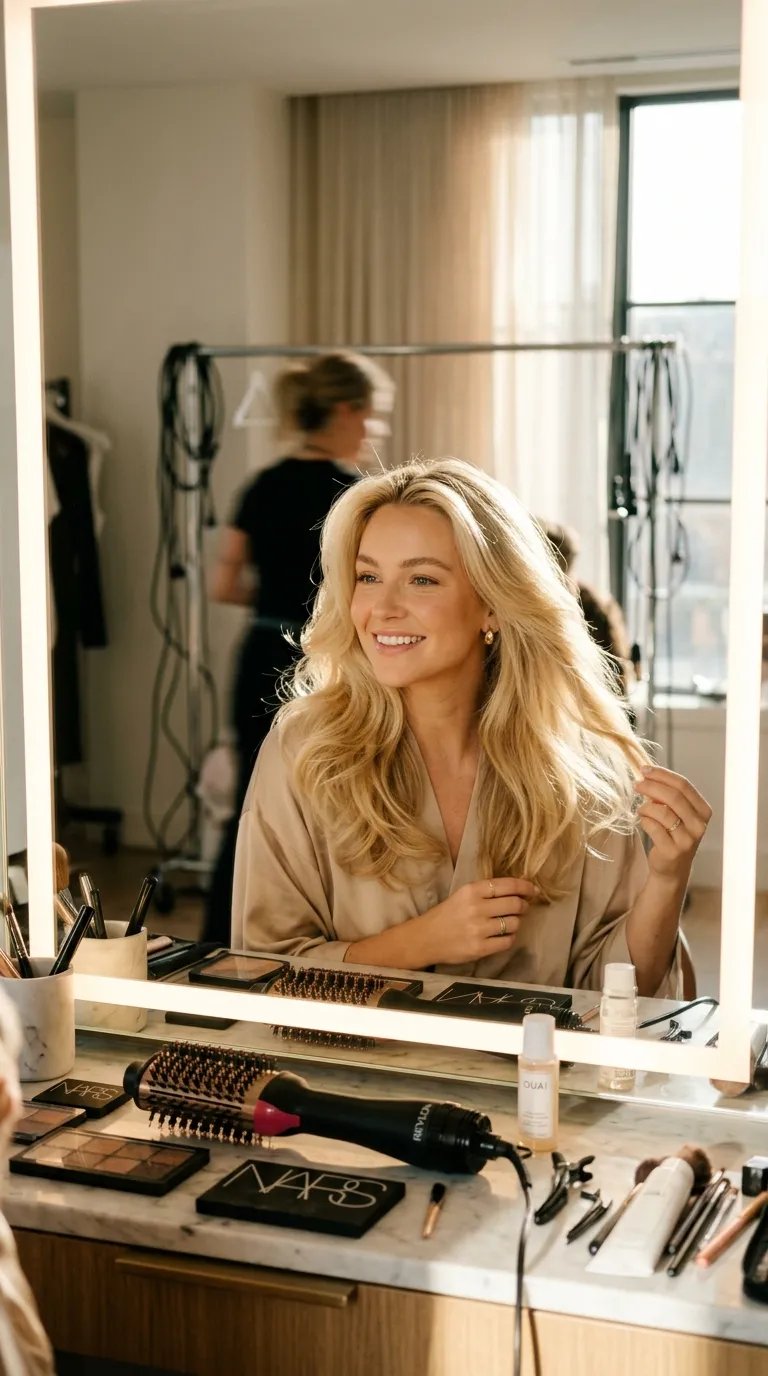
Concept Overview & Aesthetic Appeal
A quick, one-tool styling routine utilizing an all-in-one oval hot-air dryer brush to achieve smooth, voluminous results in half the time of a traditional dryer and brush.
Step-by-Step Execution Guide
-
Towel-dry hair thoroughly and apply a multi-benefit heat protectant spray (hair must be 70% dry before using the tool).
-
Clip hair into three simple tiers: bottom, middle, and top crown.
-
Glide the oval hot-air brush under each 2-inch section slowly from roots to mid-lengths to build tension and smooth frizz.
-
Rotate the oval barrel 180 degrees at the ends to create a gentle, natural bevel.
-
At the crown, pull the brush straight up toward the ceiling and roll the barrel backward for easy crown height.
-
Smooth a single drop of argan oil over the finished style to tame stray flyaways.
Pro Styling Tip
Never use a hot-air brush on soaking wet hair; rough-drying with a towel or basic dryer first prevents water-boiling heat damage and cuts styling time in half.
Blowout Style & Maintenance Comparison
| Blowout Style | Primary Tool | Hold / Setting Method | Volume Level | Best Hair Length |
| 90s Supermodel | 2.5-in Round Brush | Large Velcro Rollers | Maximum / High | Medium to Long |
| Glass Hair Sleek | Boar-Bristle Brush | Cool-Shot Downward Lock | Low / Sleek | All Lengths |
| Butterfly Layered | 1.75-in Ceramic Brush | Diagonal Roller Pinning | Medium to High | Layered Mid to Long |
| Italian Beveled Bob | 2-in Round Brush | Inward Bevel Hold | Medium / Rounded | Chin to Collarbone |
| Hollywood Wave | 1.5-in Round Brush | Flat Pin-Curl Clips | High / Structured | Long |
| Shag & Curtain Bang | 2-in Brush + Paddle | Texturizing Paste | Medium / Piecey | Shags / Wolf Cuts |
| Old-Money Side-Part | Large Ceramic Brush | Deep-Part Roller Set | Maximum / Asymmetric | Medium to Long |
| French-Girl Waves | Paddle Brush + Twist | Mid-Shaft Bend (Ends Flat) | Natural / Lived-in | Medium to Long |
| Retro Flipped Ends | 1.5-in Ceramic Brush | Outward Up-Curve Blast | Low Crown / High Ends | Shoulder to Collarbone |
| Express Oval Brush | One-Step Oval Hot Air | Slow Tension Glides | Medium / Polished | All Lengths |
Common Blowout Mistakes & How to Avoid Them
-
Starting with Soaking Wet Hair: Trying to round-brush dripping hair causes heat exhaustion, water bubbling on the cuticle, and limp results. Solution: Rough-dry hair to 75%–80% dry before introducing a round brush.
-
Skipping Sectioning Clips: Working on oversized clumps of hair prevents heat from reaching the roots, leaving the center damp and frizzy. Solution: Divide hair into clean 1-inch to 2-inch sections no wider than the diameter of your round brush.
-
Ignoring the Concentrator Nozzle: Blow-drying without the flat nozzle attachment scatters air randomly, creating split-end flyaways. Solution: Always snap the narrow concentrator nozzle on and align it parallel to the brush teeth.
-
Removing Rollers Before Hair Is Fully Cooled: Taking down warm rollers collapses the curl immediately because hydrogen bonds have not reset. Solution: Leave rollers or pin curls in place for at least 10 to 15 minutes until completely cool to the touch.
