10 Terracotta Air Dry Clay Earrings Ideas Youll Love
Terracotta air dry clay earrings capture the raw, earthy beauty of Mediterranean ceramics and southwestern artisan jewelry in a lightweight, accessible medium. Moving beyond plain polymer clay cuts, terracotta-hued air dry clay brings an authentic porous texture, natural mineral warmth, and organic clay feel that elevates handmade statement jewelry.
The secret to master-tier air dry clay earrings lies in slab conditioning, delicate texturing, and thorough moisture-sealing. Because air dry clay is more porous and lighter than oven-baked polymer, pairing it with rich terracotta tones, white ceramic glaze accents, raw brass connectors, and protective matte varnishes results in featherlight earrings that hold up to everyday wear.
Whether crafting modern geometric arches, sunburst dangles, or botanical stamped studs, these ten curated ideas deliver step-by-step blueprints, clay finishing formulas, and production-ready visual prompts.
Why This Idea Is Trending & Flattering
-
Ultra-Lightweight Comfort: Air dry clay cures into a light, airy density that allows for oversized, multi-tiered statement dangles without pulling on earlobes.
-
Warm Earthy Undertones: Rich burnt-orange, rust, and desert-clay pigments naturally complement every skin tone and pair with warm neutral wardrobes.
-
Authentic Ceramic Texture: Yields a tactile, matte, stone-like texture that mimics kiln-fired pottery without needing an expensive high-heat kiln.
-
Organic Material Pairings: Blends with unlacquered raw brass charms, freshwater seed pearls, natural wood beads, and woven raffia.
-
Accessible Home Crafting: Requires zero specialized baking equipment—shapes cure naturally at room temperature within 24 to 48 hours.
Clay Prep, Sealing & Jewelry Foundation Guide
Core Clay Prep & Rolling Standards
-
Slab Thickness: Roll clay slabs to a consistent $3text{mm to }4text{mm}$ ($1/8text{ inch}$) thickness using depth-guide rings on an acrylic roller. Rolling thinner than $3text{mm}$ causes brittle edges after drying.
-
Drying Protocol: Dry cutout pieces flat on a fine mesh drying screen or porous unglazed ceramic tile for 24 to 48 hours, flipping pieces at the 12-hour mark to prevent curling.
-
Hole Punching: Punch jump-ring connection holes ($1.5text{mm to }2text{mm}$) while the clay is wet using a micro-straw or needle tool, keeping holes at least $3text{mm}$ away from the outer edge.
Sealing & Waterproofing Formulas
-
Sanding: Sand dry edges gently using 400-grit to 600-grit ultra-fine wet/dry sandpaper to remove rough fringes.
-
Waterproof Sealing: Air dry clay is water-soluble; seal all surfaces with two coats of non-yellowing matte or satin UV-resistant acrylic varnish (e.g., Mod Podge Ultra, Liquitex Matte Varnish, or a thin coat of UV resin).
-
Earring Hardware: Use hypoallergenic surgical stainless steel or 14k gold-plated brass earring posts, jump rings ($5text{mm to }6text{mm}$), and secure post bonding with two-part jewelry epoxy.
1. The Mediterranean Arched Window with Raw Brass Sunburst

Concept Overview & Aesthetic Appeal
An architectural dangle earring featuring a cutout terracotta arch reminiscent of Santorini windows, suspended from an open raw brass sunburst connector.
Step-by-Step Execution Guide
-
Roll natural or terracotta-tinted air dry clay to a $3.5text{mm}$ uniform slab.
-
Cut an arch shape ($25times35text{mm}$) using a stainless steel clay cutter; cut a smaller inner arch cutout to create an open window frame.
-
Pierce a $1.8text{mm}$ hole at the top center of the arch.
-
Let dry flat for 24 hours, flipping once.
-
Lightly sand the inner and outer curves with 400-grit sandpaper.
-
Seal with two coats of matte acrylic sealer.
-
Connect the clay arch to a raw brass half-sunburst post stud using a $6text{mm}$ gold-plated open jump ring.
Pro Maker Tip
Sand the cured clay dry with light pressure; pressing too hard on thin arch arms can snap the piece before the sealant reinforces it.
2. The Moroccan Stamped Tile with White Ceramic Glaze Infill

Concept Overview & Aesthetic Appeal
A textured square or diamond stud earring featuring an intricate stamped floral tile pattern, with white acrylic paint wiped into the grooves to mimic ancient painted pottery.
Step-by-Step Execution Guide
-
Roll a $4text{mm}$ thick clay slab on a smooth ceramic tile.
-
Press an ornate silicone or rubber Moroccan mandala stamp firmly and evenly across the clay surface.
-
Cut $20times20text{mm}$ squares or diamonds with a sharp craft blade.
-
Once fully dried (36 hours), brush bright white water-based acrylic paint generously across the stamped pattern.
-
Immediately wipe the raised clay surface with a damp sponge, leaving the white paint trapped only in the stamped crevices.
-
Coat with a glossy ceramic glaze varnish for a polished tile look.
-
Adhere hypoallergenic titanium earring posts to the reverse using two-part epoxy.
Pro Maker Tip
Wipe the surface with a barely-damp microfiber cloth; an overly wet sponge will wash the white pigment out of the deep stamp lines.
3. The Desert Oasis Saguaro & Half-Moon Dangle
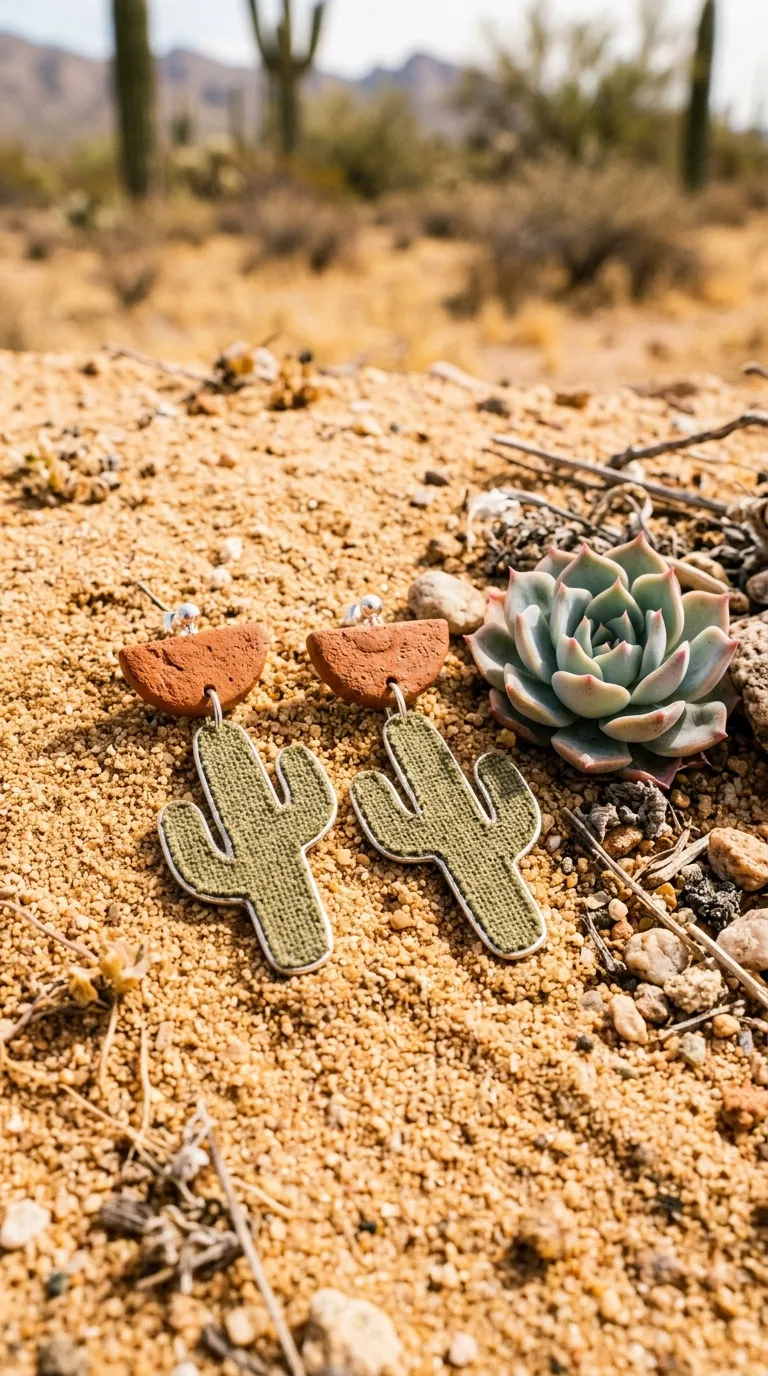
Concept Overview & Aesthetic Appeal
A southwestern bohemian statement earring pairing a small terracotta-colored half-moon stud with a swinging cutout saguaro cactus pendant.
Step-by-Step Execution Guide
-
Cut two distinct components: a $15text{mm}$ semi-circle (top post piece) and a $30text{mm}$ stylized saguaro cactus silhouette (lower dangle).
-
Punch matching holes in the bottom edge of the half-moon and the top of the cactus.
-
Press a coarse linen fabric swatch into the wet clay to give the pieces an organic desert-woven texture.
-
Dry, sand edges smooth, and seal with a dead-flat matte varnish.
-
Fasten surgical steel stud posts with flat pad backs to the top semi-circle using jewelry adhesive.
-
Connect the two pieces using a single $5text{mm}$ brass jump ring.
Pro Maker Tip
Texture the clay slab before cutting your shapes; texturing after cutting will distort the clean cut edges of the cactus arms.
4. The Bohemian Tiered Palm Leaf & Raffia Fringe Drop
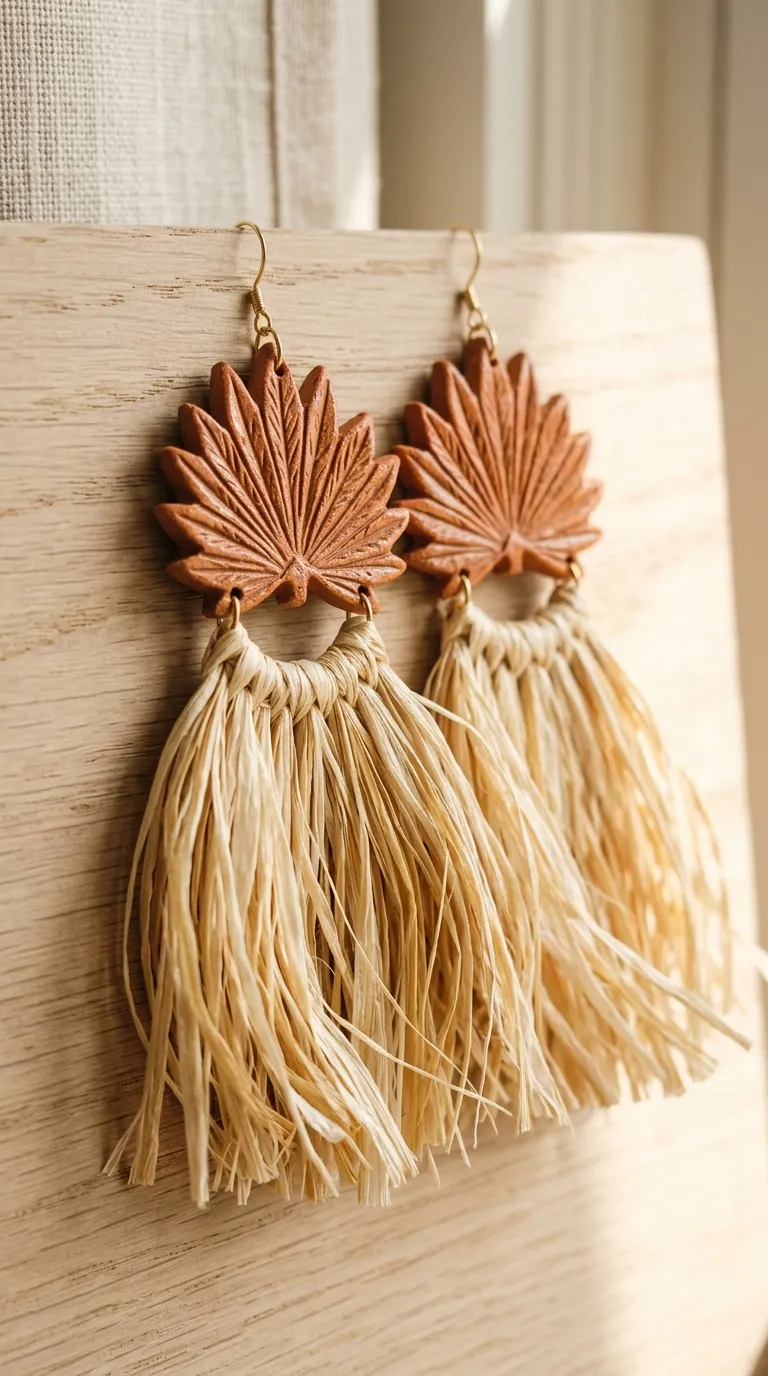
Concept Overview & Aesthetic Appeal
An earthy, textural earring combining a fan-shaped carved terracotta palm leaf with a bottom fringe of natural woven raffia straw.
Step-by-Step Execution Guide
-
Cut a fan-shaped triangular piece of clay ($30text{mm}$ wide).
-
Score fine radial lines from the base outward using a fine needle tool to mimic palm fronds.
-
Punch three small holes evenly spaced along the bottom curved edge of the palm fan.
-
After drying and sealing, thread 2-inch strands of natural blonde raffia fiber through the bottom holes, securing with larks-head knots.
-
Trim the raffia fringe straight across with sharp tailoring scissors to a 1-inch length.
-
Attach a gold French wire hook to the top hole.
Pro Maker Tip
Steam or iron the raffia fiber strands under a cloth before knotting; this eliminates kinks and ensures the fringe hangs straight.
5. The Minimalist Linear Slab with Genuine 24k Gold Leaf Rim

Concept Overview & Aesthetic Appeal
A chic, high-end modern earring featuring a raw matte terracotta bar with organic, hand-applied gold foil along the outer raw perimeter.
Step-by-Step Execution Guide
-
Roll clay and cut slender geometric rectangles ($10times45text{mm}$).
-
Lightly pinch and distress the outer edges with your fingertips for an organic, handmade stone silhouette.
-
Dry completely and smooth the front face with a 600-grit sanding pad.
-
Paint a thin line of water-based gold leaf adhesive (size) strictly along the distressed outer edges.
-
Let the glue turn tacky for 15 minutes, then press genuine gold leaf sheets onto the rim with a soft mop brush.
-
Seal the entire bar with satin varnish to prevent gold leaf flakes from rubbing off.
-
Attach to gold ball-stud posts.
Pro Maker Tip
Apply the gold leaf sealer only after the glue is 100% tacky and transparent; applying foil to wet glue turns the gold dull and cloudy.
6. The Abstract Face Silhouette & Terracotta Clay Pebble

Concept Overview & Aesthetic Appeal
An artsy, gallery-worthy piece pairing an organic, hand-rolled terracotta pebble stud with a dangling continuous-line wire face charm.
Step-by-Step Execution Guide
-
Hand-roll irregular, smooth organic pebble shapes ($12text{mm to }15text{mm}$ in diameter) and flatten slightly.
-
Imprint a subtle natural thumbprint or gentle wave texture into each pebble.
-
Dry for 24 hours, sand the back completely flat, and apply two coats of clear matte sealant.
-
Epoxy a flat-back stainless steel ear post to the back of the clay pebble.
-
Hang a delicate pre-formed hollow wire Picasso-style abstract face charm from the pebble using a small connecting jump ring.
Pro Maker Tip
Flattening the back of the pebble against a sheet of glass while wet ensures a perfectly flat surface for gluing the earring post securely.
7. The Terracotta & White Speckled Terrazzo Hoop
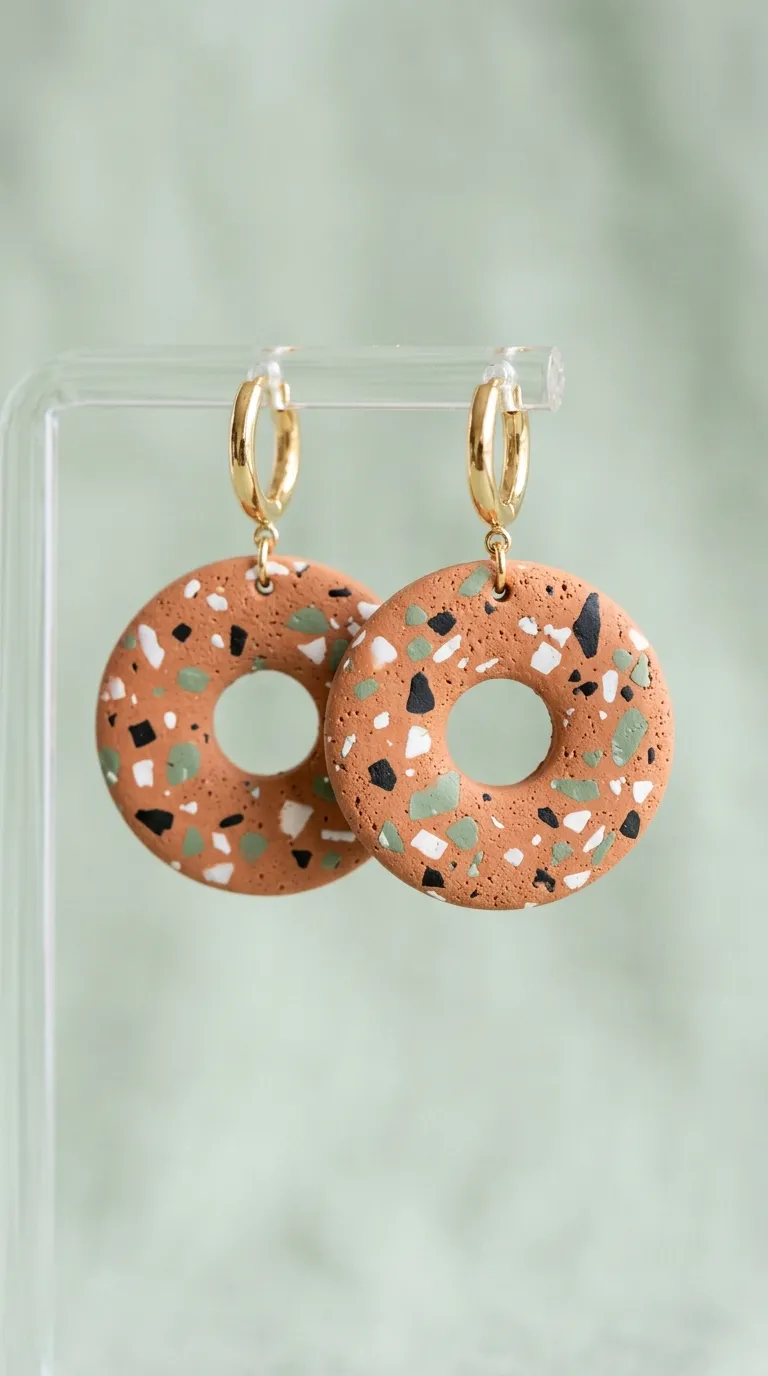
Concept Overview & Aesthetic Appeal
A playful retro hoop featuring a warm terracotta base embedded with contrasting white, black, and sage-green air dry clay micro-chips to mimic Italian terrazzo stone.
Step-by-Step Execution Guide
-
Roll tiny scraps of dry white, black, and sage air dry clay into miniature flakes and crumb shavings.
-
Knead terracotta clay lightly, flatten into a thick patty, and sprinkle the colored flakes across the top.
-
Roll the slab down with firm pressure to $3.5text{mm}$, embedding the chips flush into the terracotta surface.
-
Cut out $30text{mm}$ circular donut rings (hoop drops) using nested concentric circle cutters.
-
Dry, sand smooth, and seal with a semi-gloss glaze to bring out the colored stone speckles.
-
Suspend the terrazzo donut from a $20text{mm}$ gold huggie hoop.
Pro Maker Tip
Ensure accent flakes are nearly dry before embedding; wet colored clay will smear and bleed into the terracotta base when rolled.
8. The Botanical Fern Impression & Raw Freshwater Pearl Drop
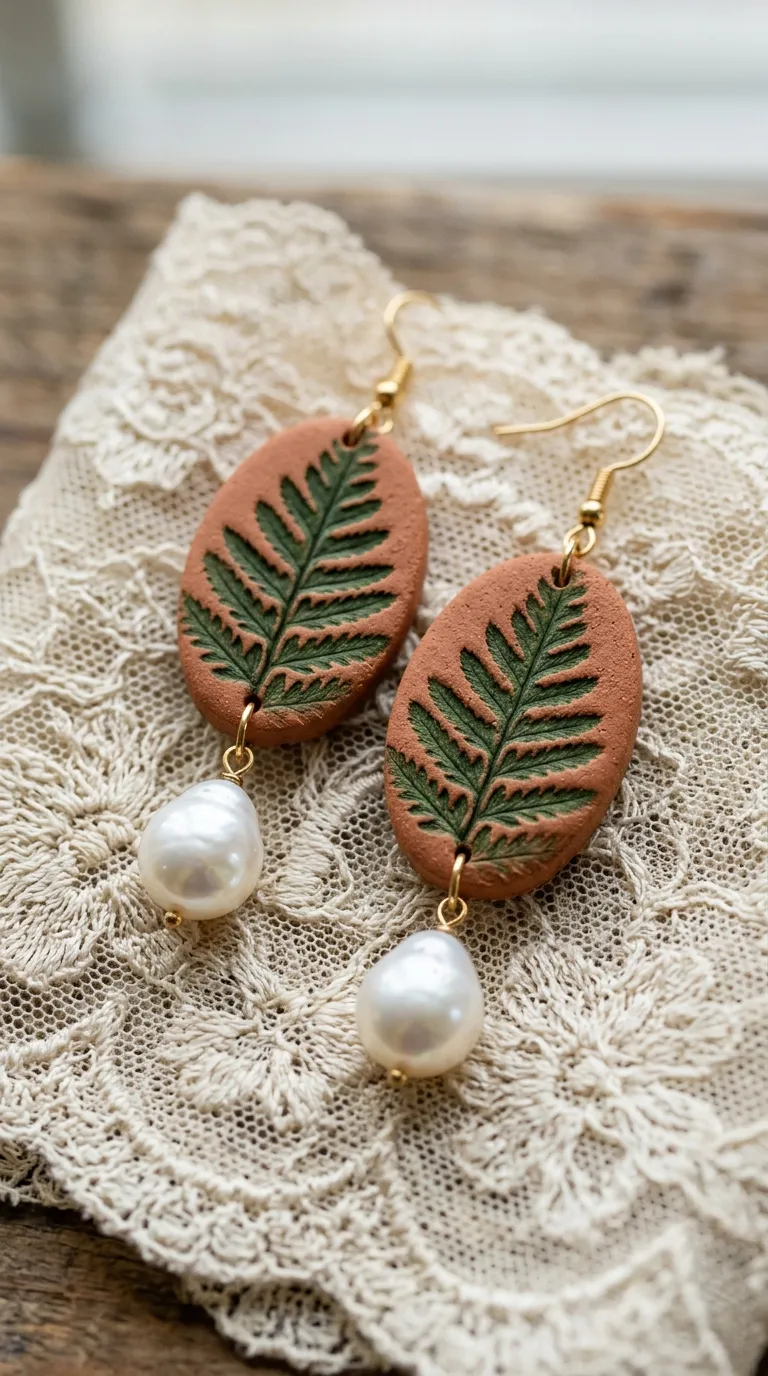
Concept Overview & Aesthetic Appeal
A delicate, romantic drop earring featuring a crisp impression of a fresh fern sprig on a terracotta clay oval, finished with a dangling natural baroque freshwater pearl.
Step-by-Step Execution Guide
-
Press a fresh, clean miniature fern frond or rosemary sprig firmly into a wet $3.5text{mm}$ terracotta clay slab using a roller.
-
Peel the plant leaf away carefully using tweezers to reveal the botanical vein relief.
-
Cut an elongated oval ($20times35text{mm}$) around the fern impression.
-
Punch connection holes at the top and bottom of the oval.
-
Dry, lightly sand, and apply matte sealant.
-
Connect a white genuine baroque freshwater pearl to the bottom hole using a gold headpin and wire loop.
-
Mount a brass fishhook ear wire to the top.
Pro Maker Tip
Use fresh, pliable greenery rather than dried leaves; dried botanicals crumble into the wet clay and leave messy debris.
9. The Modern Bohemian Arch & Hand-Woven Cane Webbing Drop
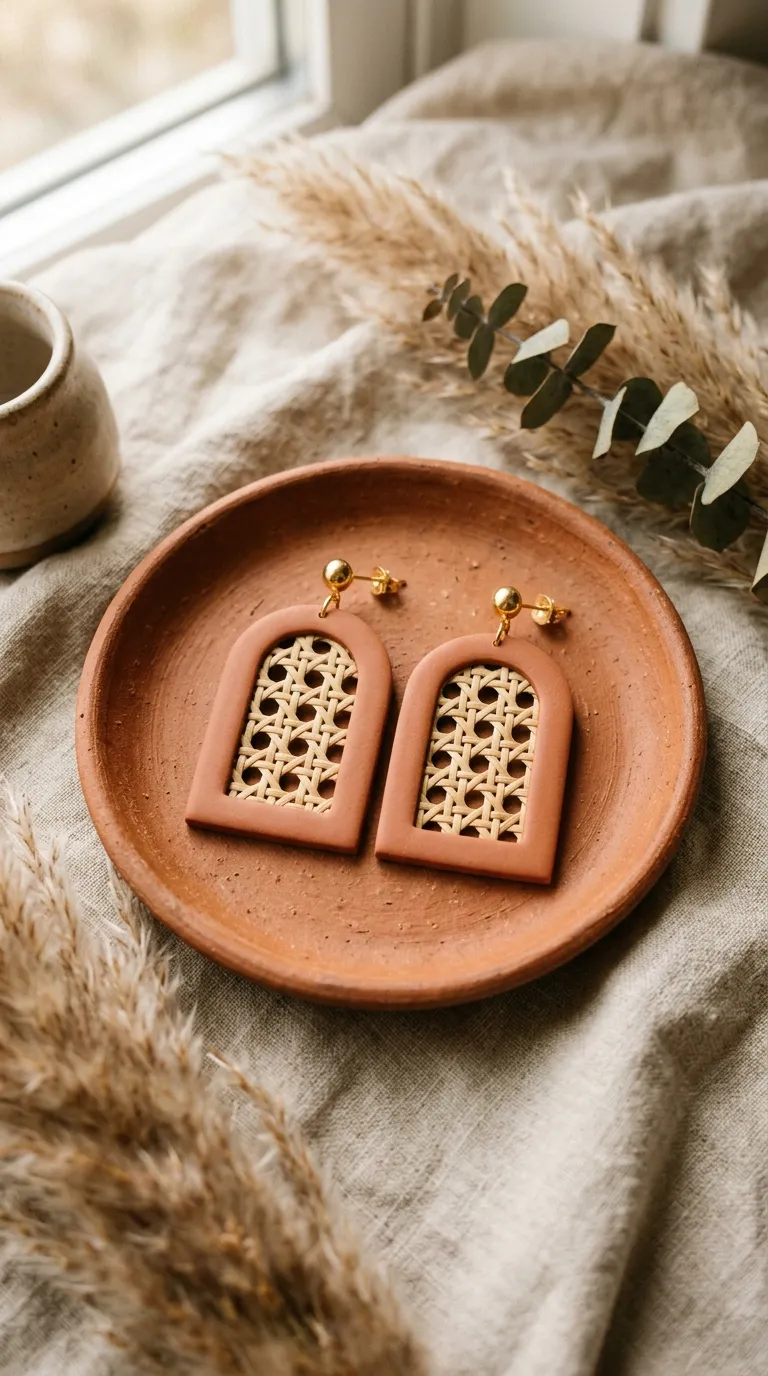
Concept Overview & Aesthetic Appeal
A mixed-media masterpiece combining a solid terracotta clay upper arch with an inserted lower window of authentic woven rattan cane webbing.
Step-by-Step Execution Guide
-
Cut a wide terracotta clay arch ($35times40text{mm}$) with an open interior window.
-
Punch tiny $1text{mm}$ stitch holes along the inner perimeter frame of the arch.
-
Let the clay dry and seal with matte sealer.
-
Cut a matching piece of pre-soaked natural hexagonal cane webbing to fit the open window.
-
Sew the cane webbing tightly to the back of the clay arch using natural tan linen thread through the pre-punched holes.
-
Finish the back with a thin coat of craft glue over the thread knots.
-
Attach a titanium post to the top reverse.
Pro Maker Tip
Soak cane webbing in warm water for 20 minutes before cutting and stitching; damp cane is flexible and won’t splinter during assembly.
10. The Sunburst Radial Scallop Studs with Raw Clay Edge
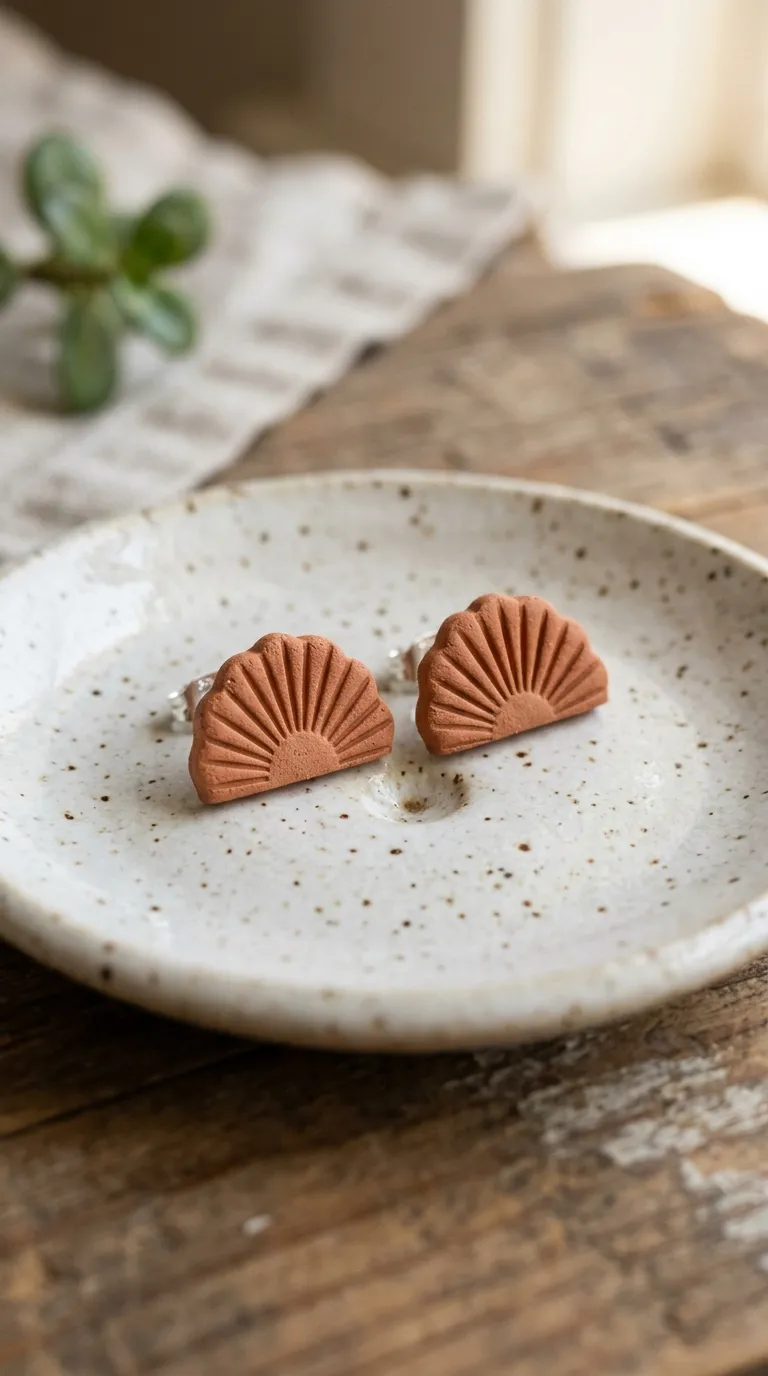
Concept Overview & Aesthetic Appeal
A minimalist everyday stud featuring a scalloped half-sunburst silhouette with fine radial gouge marks that highlight the natural earthy texture of unglazed terracotta.
Step-by-Step Execution Guide
-
Roll a $4text{mm}$ slab of rich terracotta clay.
-
Cut semi-circles ($18times12text{mm}$) using a scallop or round cutter cut in half.
-
Use a mini U-gouge carving tool or the tip of a toothpick to carve small, radiating grooves outward along the curved rim.
-
Dry for 24 hours.
-
Lightly buff the front face with 0000-grade steel wool for a soft stone sheen.
-
Seal with a breathable water-repellent matte penetrating sealer.
-
Epoxy stainless steel earring posts to the center back.
Pro Maker Tip
Steel wool buffing on fully cured air dry clay produces an ultra-smooth, silky stone finish without needing high-gloss varnishes.
Terracotta Clay Earring Concept & Assembly Breakdown
| Earring Concept | Core Shape / Components | Key Decorative Accent | Hardware Type | Difficulty Level |
| Arched Window Sunburst | Cutout Arch + Brass Sun | Hollow Open Frame | Brass Sunburst Post | Beginner |
| Moroccan Stamped Tile | $20text{mm}$ Stamped Square | White Acrylic Paint Infill | Flat Titanium Post | Intermediate |
| Desert Oasis Saguaro | Half-Moon + Cactus Drop | Linen Fabric Imprint | Surgical Steel Post | Beginner |
| Palm Leaf & Raffia | Fan Palm + Raffia Straw | Carved Radial Veins | Gold French Hook | Intermediate |
| Linear Gold Leaf Bar | $10times45text{mm}$ Bar | Genuine 24k Gold Rim | Ball Stud Post | Beginner to Int. |
| Abstract Face Pebble | Organic Rolled Pebble | Hollow Wire Face Charm | Flat Stainless Post | Beginner |
| Terrazzo Specks Hoop | Concentric Circle Donut | Multi-Color Clay Flakes | Gold Huggie Hoop | Intermediate |
| Botanical Fern Drop | Imprinted Oval + Pearl | Real Fern Leaf Relief | Baroque Pearl / Wire | Beginner to Int. |
| Arch with Cane Webbing | Arch Frame + Rattan | Hexagonal Cane Webbing | Stitched Thread Post | Advanced |
| Scalloped Sun Studs | Scalloped Semi-Circle | Carved Radial Grooves | Flat Stainless Post | Beginner |
Common Clay Earring Mistakes & How to Avoid Them
-
Skipping the Waterproof Sealer: Air dry clay softens and disintegrates when exposed to rain, sweat, or perfume. Solution: Always apply two continuous coats of water-resistant acrylic matte varnish or UV resin covering all front, back, and inner hole surfaces.
-
Rolling Slabs Too Thinly: Slabs rolled under 3mm become fragile and snap easily during daily wear. Solution: Use $3.5text{mm to }4text{mm}$ rolling guide rings to maintain a sturdy, durable thickness.
-
Punching Holes Too Close to the Edge: Punching holes less than 2mm from the clay perimeter creates weak points that break under jump-ring tension. Solution: Leave at least $3text{mm to }4text{mm}$ of clay buffer between the hole and the piece edge.
-
Using Superglue Alone on Earring Posts: Cyanoacrylate (superglue) snaps off smooth metal earring posts under shear pressure. Solution: Scuff the metal post pad with sandpaper and bond with two-part jewelry epoxy (e.g., Devcon 5-Minute Epoxy) or embed the post base with a thin layer of clay/UV resin