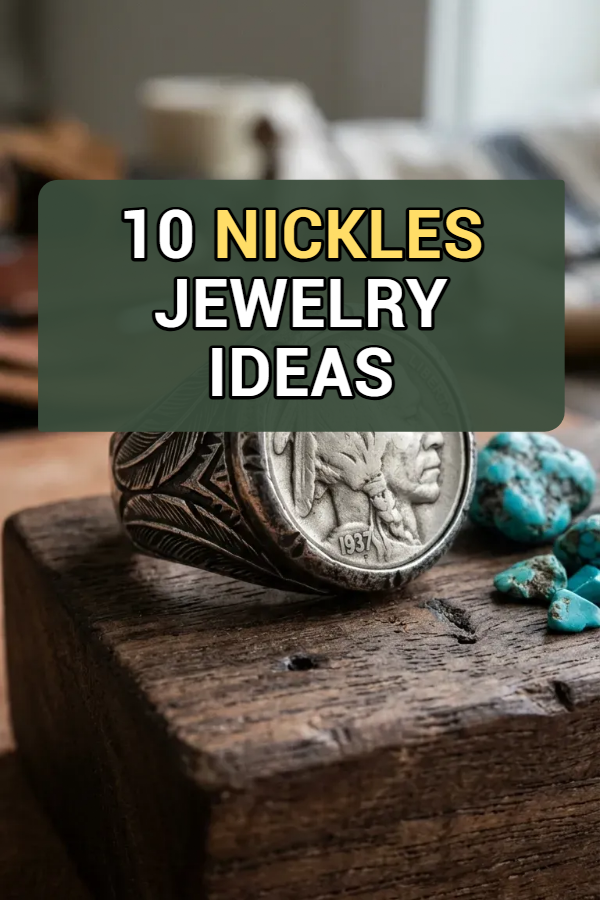
10 Nickles Jewelry Ideas
Nickel coin jewelry transforms everyday pocket change and vintage historical currency into striking, tactile wearable art. Upcycling vintage five-cent pieces—such as vintage Buffalo nickels, classic Jefferson designs, or antique silver “V” Liberty nickels—bridges the gap between numismatic history, industrial metalsmithing, and modern bohemian style.
The secret to elevated coin jewelry lies in precision metalwork, patina enhancement, and tailored bezels. By utilizing techniques like high-relief doming, cut-out filigree piercing, ring forging, and bezel soldering, you highlight the relief artwork of historic engravers while creating durable, conversation-starting accessories.
Whether styling a rugged Western aesthetic, crafting heirloom keepsakes, or expanding a metalsmithing portfolio, these ten curated jewelry concepts deliver step-by-step assembly guides, metalworking formulas, and production-ready visual prompts.
Why This Idea Is Trending & Flattering
-
Tangible Historical Storytelling: Authentic vintage coins carry unique dates and cultural heritage, making every piece one-of-a-kind.
-
Distinct Metal Alloy Tone: The standard 75% copper / 25% nickel alloy (or 35% silver war-time alloy) takes on a rich, vintage gunmetal patina when oxidized.
-
Tactile Sculptural Relief: High-relief mintings—especially the American Bison and Native American profile on Buffalo nickels—create natural three-dimensional depth.
-
Sustainable Heirloom Upcycling: Repurposes circulated, non-mint vintage coinage into timeless accessories rather than letting them sit in drawers.
-
Western & Bohemian Versatility: Pairs seamlessly with turquoise cabochons, hand-tooled leather, chunky sterling silver chains, and modern tailored denim.
Metals, Tooling & Safety Foundation Guide
Core Metalworking & Coin Selection
-
Vintage Buffalo / Indian Head Nickels (1913–1938): Highly sought-after for their raised American Bison and detailed profile reliefs; ideal for dapping, piercing, and statement rings.
-
Silver “War Nickels” (1942–1945): Composed of 35% silver, 56% copper, and 9% manganese (distinguished by large mint marks over Monticello); softer to forge and polishes with a bright silver luster.
-
Liberty Head “V” Nickels (1883–1913): Feature classical Victorian typography and roman numeral “V” detailing; perfect for elegant bezels and pendants.
Essential Metalsmithing Tools & Safety
-
Shaping & Doming: Steel dapping block and wooden/brass punch set, jeweler’s ball-peen hammer, ring mandrel.
-
Piercing & Cutting: Jeweler’s saw frame with #2/0 Swiss saw blades, center punch, drill press with micro-bits (0.8mm–1.2mm), cut-lube wax.
-
Finishing & Patina: Liver of sulfur or gun-blue patina solution, 0000-grade extra-fine steel wool, jewelers’ rouge with a rotary buffing wheel, Renaissance micro-crystalline wax.
-
Skin Barrier Sealants (Crucial): To prevent skin irritation or green marks from direct copper/nickel contact, back coins with sterling silver sheet, or coat skin-contact areas with jewelry-grade hypoallergenic ceramic sealant (e.g., ProtectaClear).
1. The Dapped Buffalo Nickel Statement Signet Ring

Concept Overview & Aesthetic Appeal
A bold, unisex signet ring featuring a domed vintage Buffalo nickel centered on a tapered solid sterling silver band with hand-carved southwestern feather engravings.
Step-by-Step Metalworking Guide
-
Select a high-detail vintage Buffalo nickel (approx. 1920s–1930s with visible mint relief).
-
Anneal the nickel gently with a jeweler’s torch to cherry-red heat to soften the alloy, then quench in water.
-
Place the coin into a matching concave depression in a steel dapping block and tap lightly with a wooden punch to form a smooth, convex dome.
-
Fabricate a heavy-gauge (1.5mm) sterling silver ring band and bezel cup sized to cradle the domed coin edge.
-
Solder the silver bezel to the ring shank, set the coin inside, and burnish the bezel rim over the coin’s perimeter.
-
Dip the finished ring in liver of sulfur to blacken recessed details, then polish raised surfaces to a bright mirror shine.
Pro Metalsmith Tip
Annealing before dapping prevents the coin from cracking along its outer rim and makes the hard 75/25 copper-nickel alloy malleable under the hammer.
2. Cut-Out Pierced Native American Silhouette Pendant

Concept Overview & Aesthetic Appeal
An intricate piece of hand-pierced jewelry where the background field of a Buffalo nickel is meticulously sawed away, leaving only the floating profile and outer rim.
Step-by-Step Metalworking Guide
-
Apply a thin layer of painter’s tape over the coin face, tracing the negative-space fields around the Native American profile.
-
Use a center punch and a 0.8mm drill bit to create tiny starter pilot holes in every negative space zone.
-
Thread a #3/0 jeweler’s saw blade through a pilot hole, clamp into the saw frame, and lubricate the blade with beeswax.
-
Carefully saw along the exact contour of the profile and interior rim, removing the flat background field entirely.
-
Clean up inside cut edges using micro needle files and 600-grit emery paper.
-
Solder a sterling silver jump ring bail to the top rim and suspend on a heavy oxidized box chain.
Pro Metalsmith Tip
Maintain slow, rhythmic saw strokes perpendicular to the coin face; rushing or twisting the saw will instantly snap delicate #3/0 blades.
3. Forged Double-Sided Coin Band Ring
Concept Overview & Architectural Design
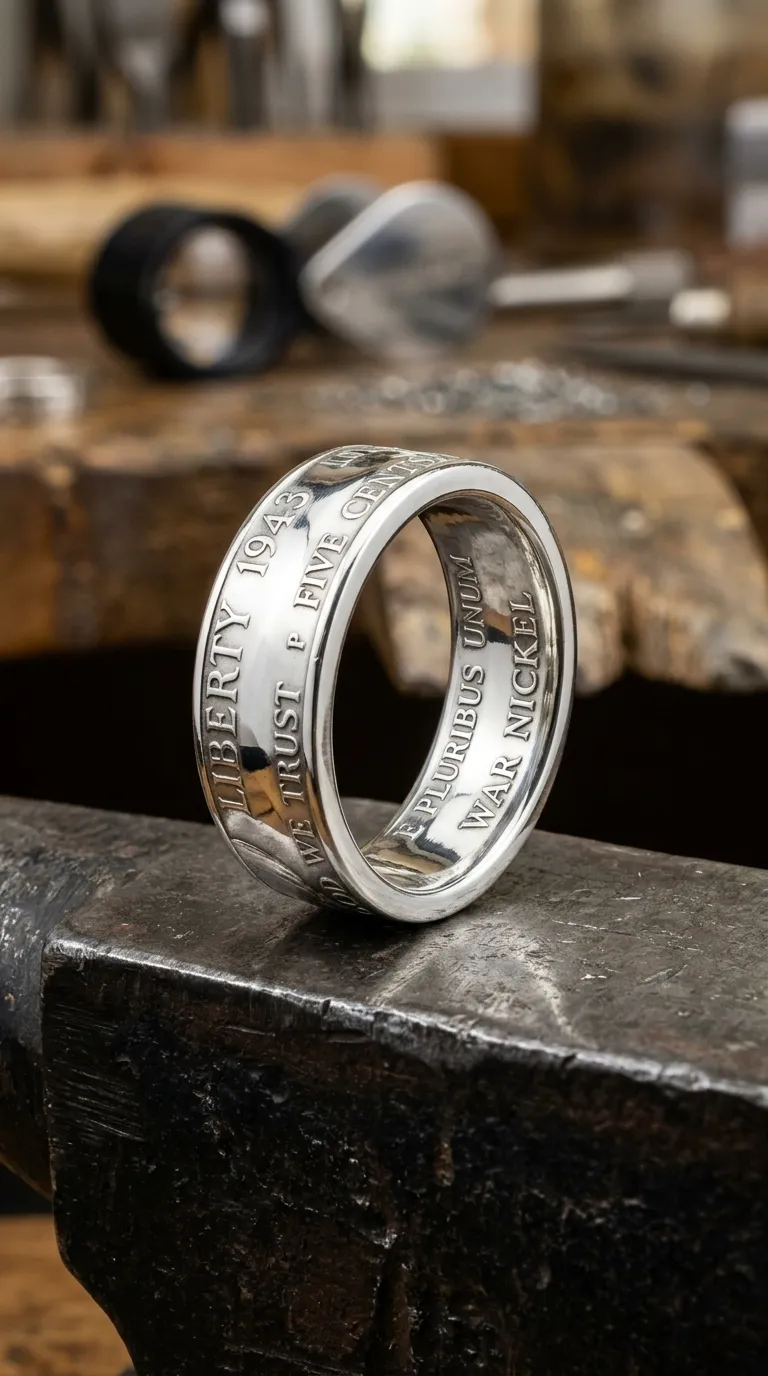
A seamless continuous metal ring band forged by punching the center out of a nickel and folding the outer coin edge downward, preserving internal and external edge lettering.
Step-by-Step Metalworking Guide
-
Punch a precise 1/2-inch center hole through the middle of a vintage nickel using a disk punch set.
-
Anneal the outer coin ring to soften the metal.
-
Place the ring over a conical 17-degree folding cone, pressing down with an arbor press to flare the inner wall downward.
-
Transition the flared ring into a steel ring-sizing reduction die, pressing repeatedly while flipping the ring to form straight, parallel cylinder walls.
-
Re-anneal every two press cycles to prevent stress fractures along the coin details.
-
Polish the interior bore smooth for ergonomic finger comfort and seal with clear ceramic sealant.
Pro Metalsmith Tip
Use a 1942–1945 35% silver “War Nickel” for ring bands; the silver alloy folds with smoother grain transitions and significantly lower risk of edge tearing than standard nickel alloy.
4. Vintage Coin & Royston Turquoise Drop Earrings

Concept Overview & Aesthetic Appeal
A Southwestern-chic earring pair combining two matching-date Buffalo nickels suspended beneath natural green Royston turquoise teardrop cabochons.
Step-by-Step Metalworking Guide
-
Select two matched-condition nickels showing identical bison profiles facing outward.
-
Solder a tiny closed sterling silver jump ring to the top rim of each coin.
-
Fabricate two teardrop-shaped sterling silver bezel cups to hold 6x8mm Royston turquoise stones.
-
Solder sterling silver ear wire posts to the backs of the stone bezels, with a small bottom loop.
-
Set the turquoise cabochons into the bezels using a brass bezel roller.
-
Link the coin pendants to the bottom bezel loops and brush the entire piece with a satin antiquing paste.
Pro Metalsmith Tip
Pick a pair where one coin displays the Bison side and the other displays the Profile side, or source mirror-image replica dies for a perfectly balanced set.
5. Bezel-Set Western Concho Bolo Tie with Braided Leather
Concept Overview & Aesthetic Appeal
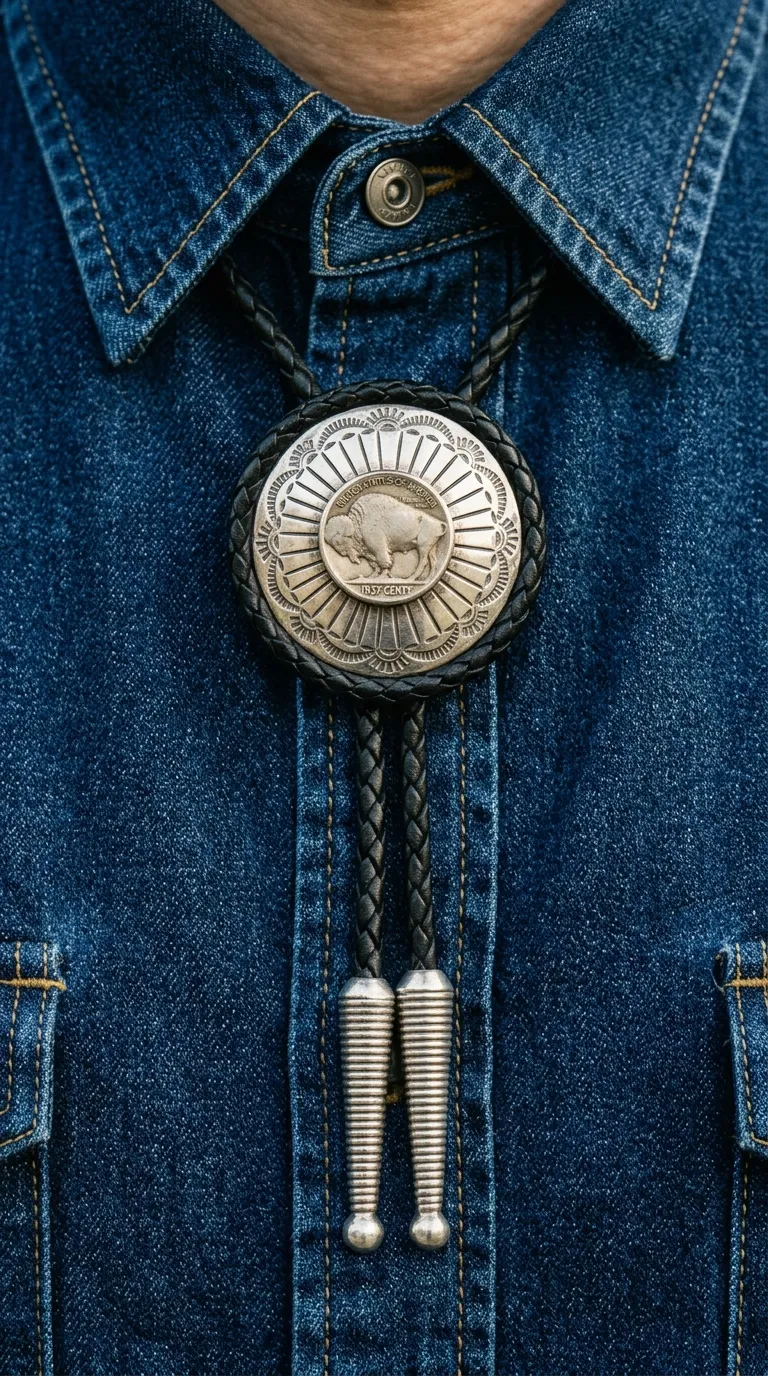
A statement western accessory featuring a large vintage nickel framed by an intricate stamped-sterling sunburst concho plate, sliding along braided kangaroo leather cords.
Step-by-Step Metalworking Guide
-
Cut a 1.5-inch circular backing disc from 20-gauge sterling silver sheet.
-
Use traditional steel stamp tools to hammer sunburst rays and scalloped borders around the outer circumference of the disc.
-
Solder a serrated coin-bezel wire in the exact center of the stamped disc.
-
Solder a heavy-duty tension-locking bolo slide bracket to the reverse side of the silver disc.
-
Press the vintage nickel into the center bezel and fold the serrated teeth securely over the coin rim.
-
Thread a 4-ply 36-inch braided black leather bolo cord through the bracket, capping cord ends with ribbed silver aglets.
Pro Metalsmith Tip
Use low-temperature silver solder paste when attaching the rear bolo slide to prevent overheating and melting the delicate stamped details on the front face.
6. Minimalist Stamped Initial Nickel Disc Charm Bracelet

Concept Overview & Aesthetic Appeal
A modern, layered charm bracelet featuring flattened vintage nickels hand-stamped with custom family initials, connected by chunky paperclip link chains.
Step-by-Step Metalworking Guide
-
Select flat, circulated Jefferson nickels; sand the smooth reverse side lightly to prep for stamping.
-
Secure the coin in a steel stamping jig and hammer clean uppercase serif initials or coordinates into the center using hardened steel metal stamps.
-
Drill two 1.2mm holes on opposite sides of the coin rim to create a two-point connector link.
-
Darken the stamped letters using black enamel acrylic marker or liver of sulfur, wiping excess pigment off the polished high surfaces.
-
Connect the stamped coin links into a solid sterling silver paperclip link chain with heavy jump rings.
Pro Metalsmith Tip
Place the coin on a flat, heavy steel bench block while stamping to ensure the stamp delivers a crisp, deep impression without warping the coin shape.
7. Tiered Bohemian Coin Fringe Choker Necklace

Concept Overview & Aesthetic Appeal
A festival-ready statement choker featuring five graduated vintage nickels suspended from an open-link chain, swinging with rhythmic movement across the collarbone.
Step-by-Step Metalworking Guide
-
Source five vintage nickels (e.g., three Buffalo nickels and two Liberty “V” nickels).
-
Drill a single clean 1mm suspension hole near the top edge of each coin.
-
Form five handmade wire-wrapped bails using 20-gauge oxidized sterling silver wire.
-
Cut an 14-inch length of textured cable chain, adding a 2-inch extender chain at the clasp.
-
Space the five coins symmetrically along the front 5-inch arc of the chain, with the largest coin centered and smaller coins flanking the sides.
-
Hang small dangling silver teardrop beads between the coins to add texture and chime.
Pro Metalsmith Tip
Drill coin holes slowly using cutting oil on a high-speed rotary tool; hard nickel alloy will dull dry drill bits in seconds.
8. Hand-Engraved Hobo Nickel Art Pendant

Concept Overview & Aesthetic Appeal
A traditional folk-art transformation where the original coin portrait is re-carved by hand into a whimsical skull, fisherman, or wandering vagabond character.
Step-by-Step Metalworking Guide
-
Secure a vintage Buffalo nickel firmly into an engraver’s ball vise with thermo-loc plastic.
-
Use tungsten carbide flat and round graver tools under a stereo microscope to carefully re-carve the Native American profile into a stylized Day-of-the-Dead skull or top-hat gentleman.
-
Stipple the background field with a micro-beading tool to create contrast against the sculpted face.
-
Apply gun-blue patina into the deep engraved cuts, buffing high surfaces with diamond paste.
-
Mount the finished carving into an open-back floating wire bezel with a wide bail.
Pro Metalsmith Tip
Hobo nickel carving is a traditional American art form dating back to the Great Depression; authentic hand-carved pieces carry high artisan value.
9. Cufflink Set with Reversible Swivel Mounts

Concept Overview & Aesthetic Appeal
A tailored formal menswear accessory featuring polished vintage nickels mounted in heavy bullet-back cufflink mechanisms, displaying the Native American portrait on the front and Bison on the cuff reverse.
Step-by-Step Metalworking Guide
-
Select two identical high-grade nickels (or two pairs to mount front-and-back).
-
Solder sterling silver bullet-back cufflink swivel findings directly to the flat reverse of the coins using medium silver solder.
-
If making double-sided linked cuffs, solder small silver jump ring loops to the backs of four coins and connect pairs with a 1/2-inch three-link chain.
-
Clean any fire scale in a warm pickle bath for 15 minutes.
-
Polish the faces with white rouge to a mirror finish, highlighting the clean raised mint reliefs.
Pro Metalsmith Tip
Apply heat paste or anti-flux over the face of the coin while soldering cufflink stems to protect the fine mint details from heat oxidation.
10. Leather Wrap Wristlet with Domed Nickel Concho Studs
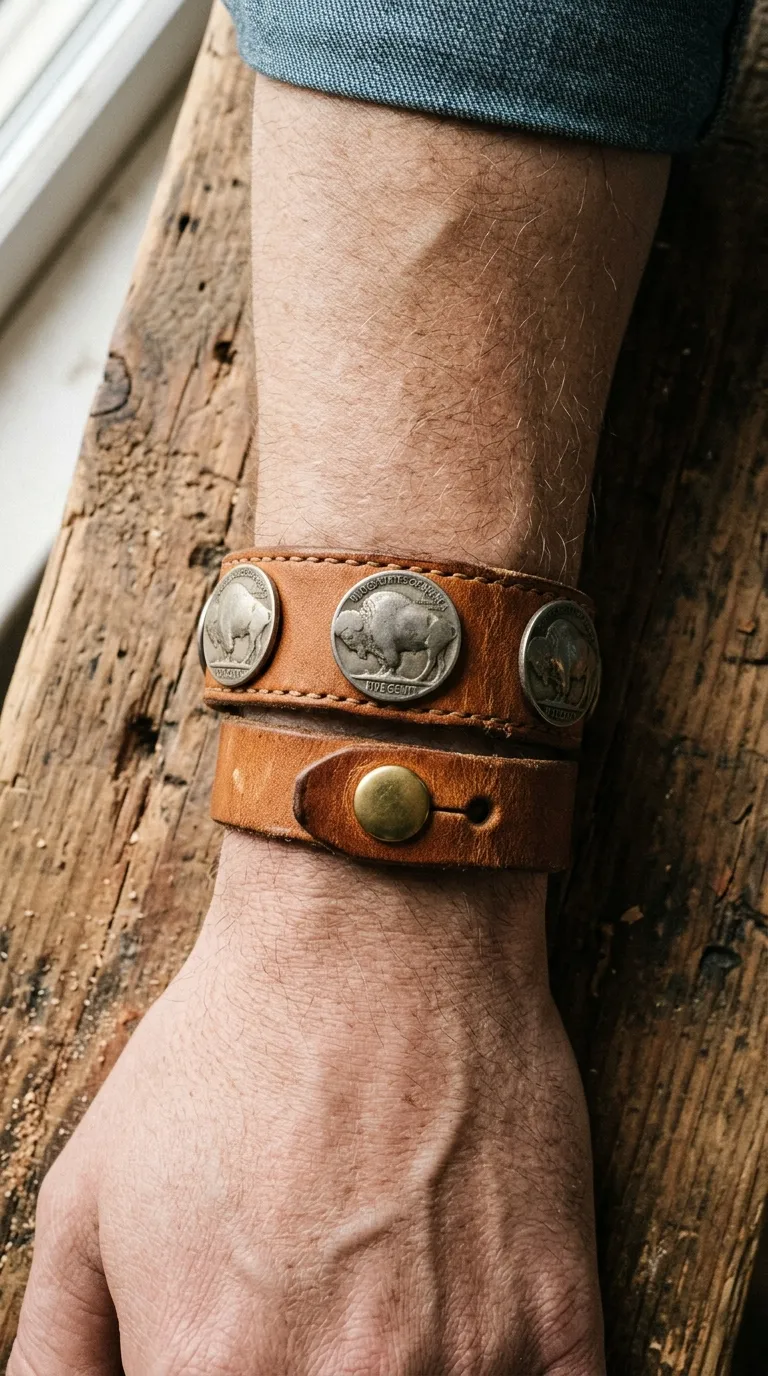
Concept Overview & Aesthetic Appeal
A rugged, double-wrap bracelet crafted from rich vegetable-tanned bridle leather, accented by domed Buffalo nickel screw-back conchos and brass rivets.
Step-by-Step Metalworking Guide
-
Cut a 1/2-inch wide, 16-inch long strip of 5-oz vegetable-tanned bridle leather in saddle tan or dark chocolate brown.
-
Bevel and slick the leather edges using gum tragacanth and a wooden burnisher.
-
Dome three Buffalo nickels using a dapping punch, then solder Chicago screw-back posts to their concave undersides.
-
Punch clean 4mm holes along the leather strap, inserting the domed nickel conchos and tightening the screw backs firmly from the underside.
-
Finish the strap with a solid brass collar button stud closure or a mini roller buckle.
Pro Metalsmith Tip
Line the inside of the leather strap with a thin strip of pigskin lining to completely cover the screw backs, ensuring smooth, pinch-free skin contact.
Coin Jewelry Concept & Technique Comparison
| Coin Jewelry Concept | Primary Coin Used | Key Metalworking Technique | Difficulty Level | Style / Aesthetic |
| Dapped Signet Ring | Buffalo Nickel (1913–38) | Dapping + Bezel soldering | Intermediate | Southwestern Modern |
| Pierced Silhouette | Buffalo Nickel | #3/0 Jeweler saw piercing | Advanced | Intricate Bohemian |
| Forged Band Ring | Silver War Nickel (1942–45) | Center punching + Die folding | Intermediate | Industrial Heritage |
| Turquoise Drops | Matched Buffalo Nickels | Bezel stone setting + Loops | Intermediate | Santa Fe Luxe |
| Concho Bolo Tie | Buffalo / V-Nickel | Metal stamping + Bezel work | Intermediate | Western Formal |
| Initial Charm Bracelet | Jefferson Nickel | Hand-stamping + Hole drilling | Beginner | Modern Minimalist |
| Coin Fringe Choker | Mixed Vintage Nickels | Cold connections + Wire wrap | Beginner | Festival Bohemian |
| Hobo Skull Pendant | Buffalo Nickel | Hand graver carving | Advanced (Artisan) | Folk-Art Gothic |
| Swivel Cufflinks | Matched Jefferson / Buffalo | Torch soldering + Polishing | Beginner to Int. | Menswear Tailored |
| Leather Wrap Concho | Domed Buffalo Nickels | Dapping + Leathercraft | Beginner | Rugged Ranch Casual |
Common Metalsmithing Mistakes & How to Avoid Them
-
Skipping Alloy Annealing Before Shaping: Cold-working a standard 75% copper / 25% nickel coin directly in a dapping block or reduction die causes brittle stress cracks. Solution: Always heat the coin to a dull cherry red with a torch and quench in water to soften the metal before hammering or folding.
-
Neglecting Nickel Allergy Precautions: Nickel is a common skin allergen that can cause dermatitis when worn directly against bare skin. Solution: Solder solid sterling silver backings on rings and pendants, or seal skin-contact surfaces with a professional clear nano-ceramic jewelry sealant.
-
Using Acidic Cleaners That Strip Mint Luster: Soaking vintage coins in harsh chemical tarnish removers strips away natural toning and leaves coins looking chalky and dead. Solution: Use controlled liver of sulfur solutions to darken recesses, followed by gentle polishing with 0000-grade steel wool on raised reliefs.
-
Drilling Without Center-Punching: Attempting to drill hard coin metal without a starter dent causes drill bits to skate across and ruin fine face details. Solution: Always mark drill points with an automatic center punch and lubricate micro-bits with cutting wax.