10 Water Bottle Crafts For Plants Ideas
Plastic water bottles (PET, HDPE) make exceptional botanical containers because they are lightweight, non-porous, rot-proof, and easy to modify for drainage, sub-irrigation, and root observation. Instead of letting single-use bottles end up in landfills, upcycling them into purpose-built planters lets you cultivate herbs, root cuttings, build terrariums, and automate garden watering with minimal expense.
The secret to functional, elevated water bottle plant crafts lies in algae prevention, sub-irrigation wicking, and thermal edge-finishing. Shielding soil-level roots from direct UV light with textured mineral coatings or opaque wraps prevents root rot and green algae, while heat-rolling cut edges ensures safe handling during plant maintenance.
1. Dual-Chamber Sub-Irrigation Self-Watering Planter

An automatic capillary wick planter that draws water from a bottom reservoir into potting soil, keeping herbs and tropical foliage consistently moist.
-
Cut a straight-sided 1-liter or 2-liter clear plastic bottle horizontally in half, about 4.5 inches below the neck.
-
Smooth the cut edges by pressing them against a warm clothing iron lined with parchment paper for 3–4 seconds.
-
Drill or melt a 1/4-inch hole through the center of the bottle cap using an awl or heated nail.
-
Thread an 8-inch strand of 100% thick braided cotton cord or nylon rope through the cap, knotting it so 4 inches sit inside the funnel and 4 inches dangle below.
-
Screw the cap tightly onto the inverted top funnel and nest it inside the bottom reservoir base.
-
Coat the exterior of the upper planting funnel with terracotta baking soda paint (1 part acrylic paint to 1 part baking soda) to block UV rays from causing algae growth in the soil.
-
Fill the base with water, add well-draining soil mix to the top, and plant fresh basil, mint, or pothos.
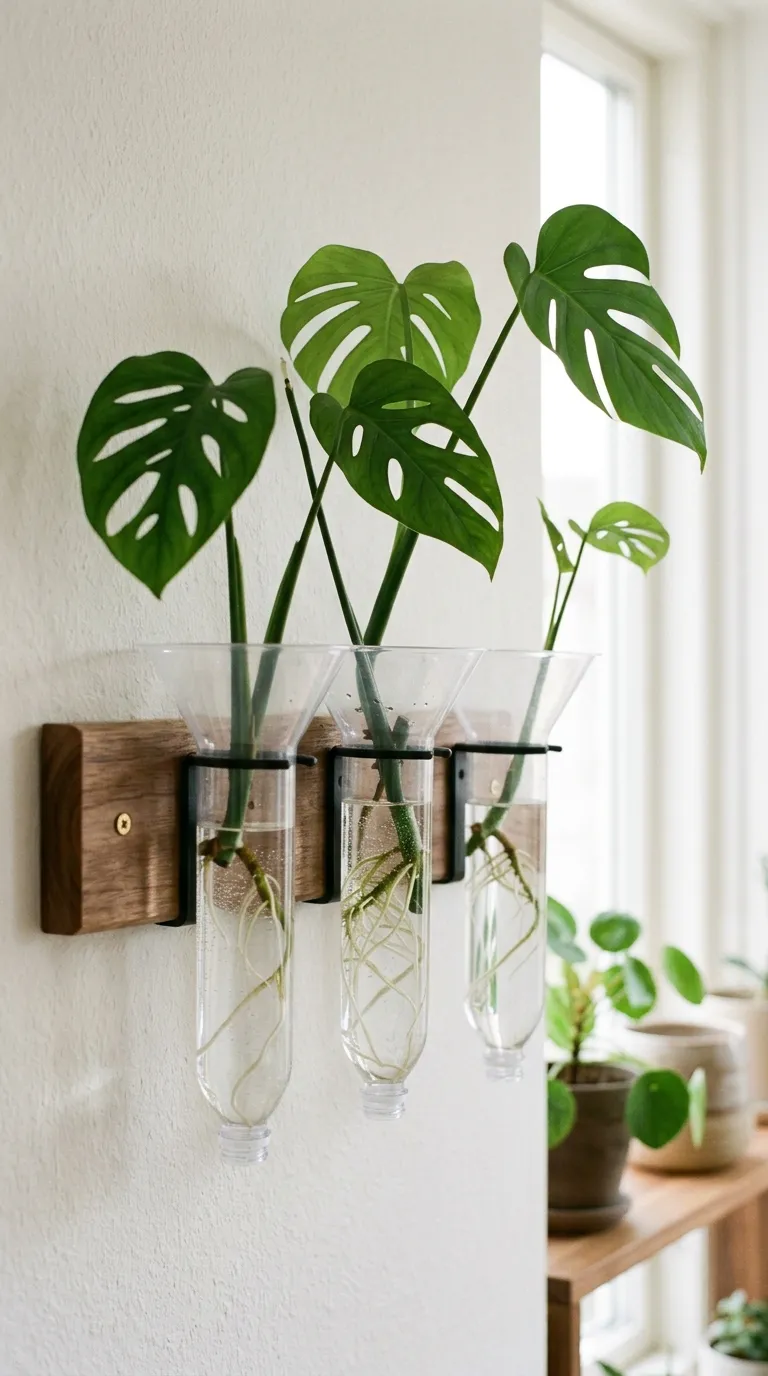
2. Minimalist Wall-Mounted Propagation Rail
A clean, Scandinavian-style plant rooting station made from inverted plastic bottle cones mounted into a stained hardwood backer board.
-
Cut the top 4-inch cone funnels from three matching 500ml or 1-liter clear plastic bottles.
-
Keep the threaded caps screwed on tightly; seal the internal cap threads with a bead of waterproof silicone sealant to ensure zero leaks.
-
Cut an 18-inch length of $1times4text{-inch}$ pine or oak board; drill three evenly spaced 1.25-inch holes along the centerline using a Forstner bit.
-
Stain the wood in warm walnut and mount to the wall using hidden French cleats or flush brass brackets.
-
Drop the inverted plastic bottle funnels into the wooden holes; the wider shoulder of each funnel rests securely on the wood opening.
-
Fill each clear funnel with fresh water and insert monstera, philodendron, or pothos vine cuttings to observe rapid root growth.
3. High-Humidity Micro-Greenhouse Cloche for Seedlings

A protective seed-starting humidity dome made from the top two-thirds of a clear water bottle, featuring adjustable cap-ventilation.
-
Cut the bottom 2 inches off a clear 1.5-liter or 2-liter water bottle, leaving a tall, clear dome with the neck and cap intact.
-
Smooth the lower cut rim with a medium-heat iron over parchment paper to prevent rough edges.
-
Place the plastic dome directly over small seed-starting peat pots, succulent props, or sensitive newly rooted cuttings.
-
Leave the screw cap loosely threaded on during early germination to trap 90%+ humidity and accelerate seed sprouting.
-
Gradually loosen and remove the cap over several days to harden off seedlings and increase air circulation before transplanting.
4. Slow-Drip Subsurface Root Irrigation Spike
A vacation plant-sitter watering spike that delivers a continuous, slow supply of moisture directly to deep root zones in outdoor container pots.
-
Select a rigid 500ml or 1-liter plastic water bottle with a secure screw cap.
-
Use a heated 1/16-inch needle or micro-drill bit to pierce 3 to 4 tiny pinholes around the bottom 1 inch of the bottle neck and cap.
-
Cut a small 1/2-inch flap into the bottom base of the bottle to act as an open refill hatch while the bottle is buried.
-
Dig a narrow hole in your garden bed or large patio planter beside a heavy-feeding plant (like tomatoes or peppers).
-
Insert the bottle neck-down 4 inches into the soil, keeping the base flush with the soil line.
-
Fill the bottle with water through the top flap; water slowly seeps directly into the deep root system, minimizing surface evaporation and weed growth.
5. Modern Scandinavian Fluted Ribbed Ceramic-Look Pot
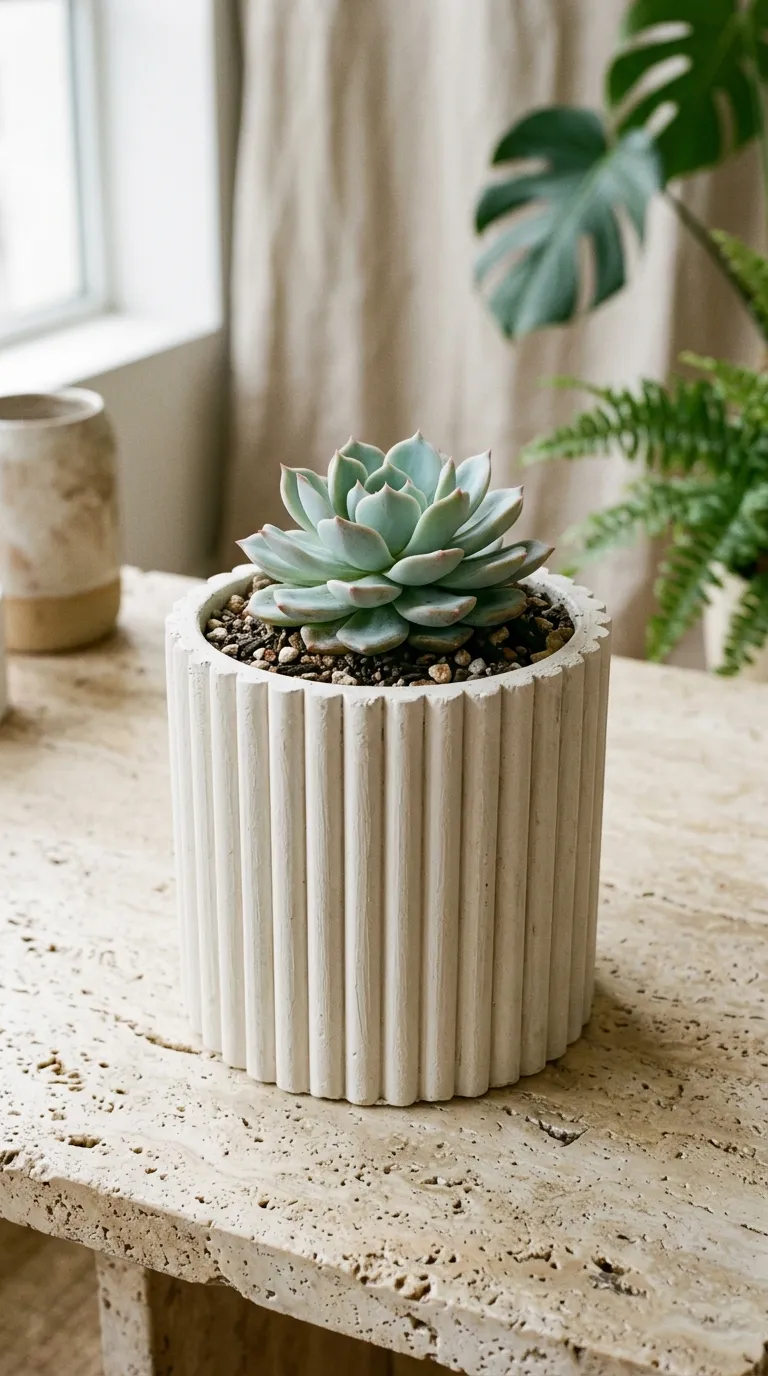
An architectural tabletop succulent pot crafted by cladding a straight water bottle base in vertical half-round wooden dowels and textured plaster paint.
-
Cut a 5-inch base cylinder from a straight-walled 1-liter plastic bottle.
-
Iron-smooth the cut rim to form a rigid, blunt safety lip.
-
Drill three 1/8-inch drainage holes through the plastic base for excess water runoff.
-
Glue vertical half-round wooden molding dowels (or flat craft popsicle sticks) side-by-side around the entire exterior circumference using industrial multi-surface glue.
-
Paint the exterior in two coats of chalky off-white or matte sage mineral paint mixed with fine silica sand.
-
Fill with gritty cactus mix and plant echeveria, jade, or haworthia succulents.
6. Closed Ecosystem Tropical Micro-Terrarium

A self-sustaining, sealed mini-biosphere built inside a wide-mouth clear plastic bottle that thrives on its own condensed water cycle.
-
Cut a clean 1.5-liter smooth plastic bottle horizontally in half, about 5 inches above the base.
-
Add a 1/2-inch drainage layer of washed pea gravel and crushed activated horticultural charcoal to the bottom base.
-
Layer damp sphagnum moss over the gravel, followed by 1.5 inches of sterilized tropical potting soil.
-
Plant slow-growing, high-humidity miniature plants (fittonia nerve plants, baby tears, or cushion moss).
-
Mist lightly with distilled water, slide the top half of the bottle over the bottom base, and seal the center seam with clear waterproof book tape.
-
Screw the top cap on tightly; place in bright, indirect light where condensation will naturally cycle and water the plants indefinitely.
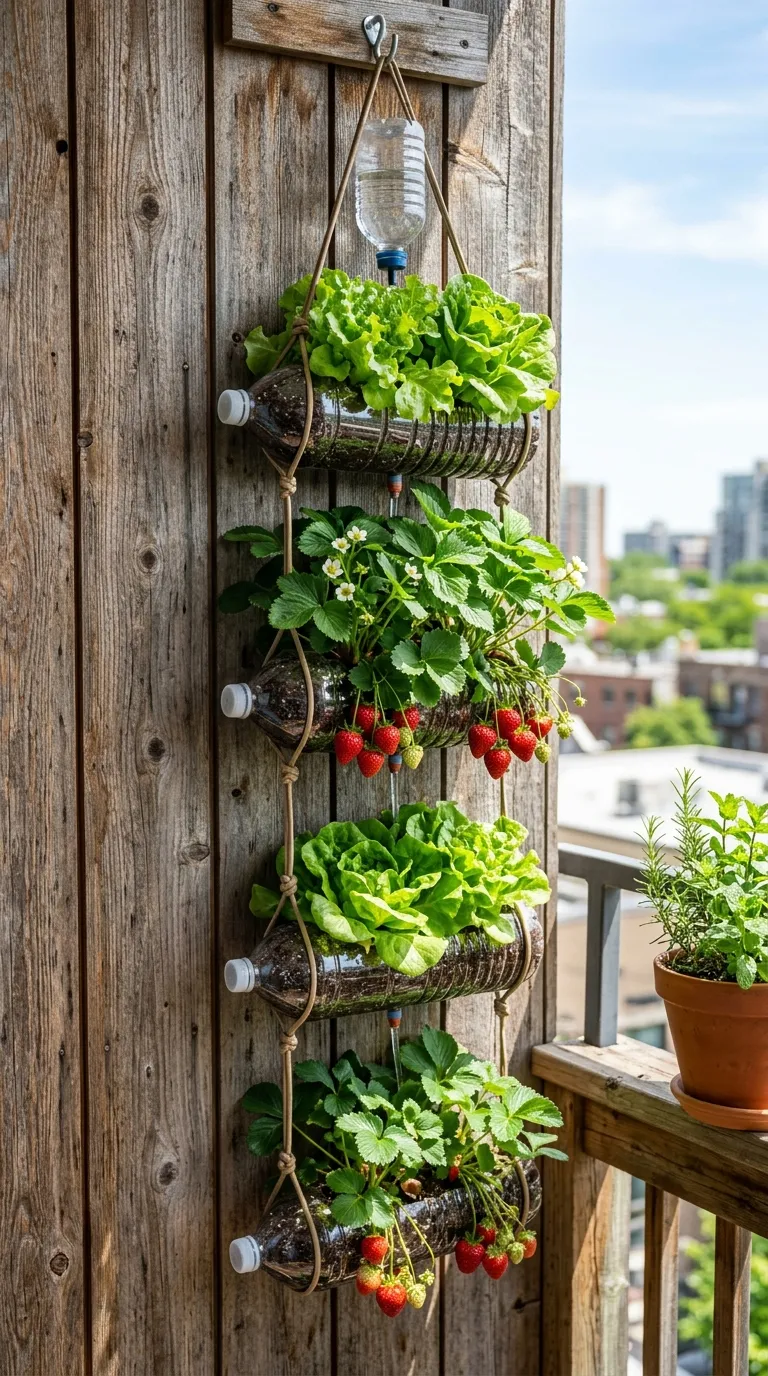
7. Vertical Hanging Gravity-Fed Ladder Garden

A high-yield urban balcony garden featuring horizontally suspended bottles linked together with braided paracord to create a cascading vertical farm.
-
Clean four matching 1.5-liter or 2-liter clear plastic bottles.
-
Cut a $2.5times6text{-inch}$ rectangular planting window along the top side of each horizontal bottle.
-
Melt three small drainage holes along the bottom underside of each bottle.
-
Drill two pairs of opposing holes through the front and back shoulder/base of each bottle.
-
Thread heavy-duty 550 paracord through the side holes, spacing the four bottles 10 inches apart vertically with secure stopper knots.
-
Fill each horizontal chamber with lightweight potting mix and plant shallow-rooted greens like loose-leaf lettuce, spinach, strawberries, or radishes.
-
Suspend the ladder from a sunny balcony railing or pergola; excess water from top tiers drains down to nourish lower tiers.
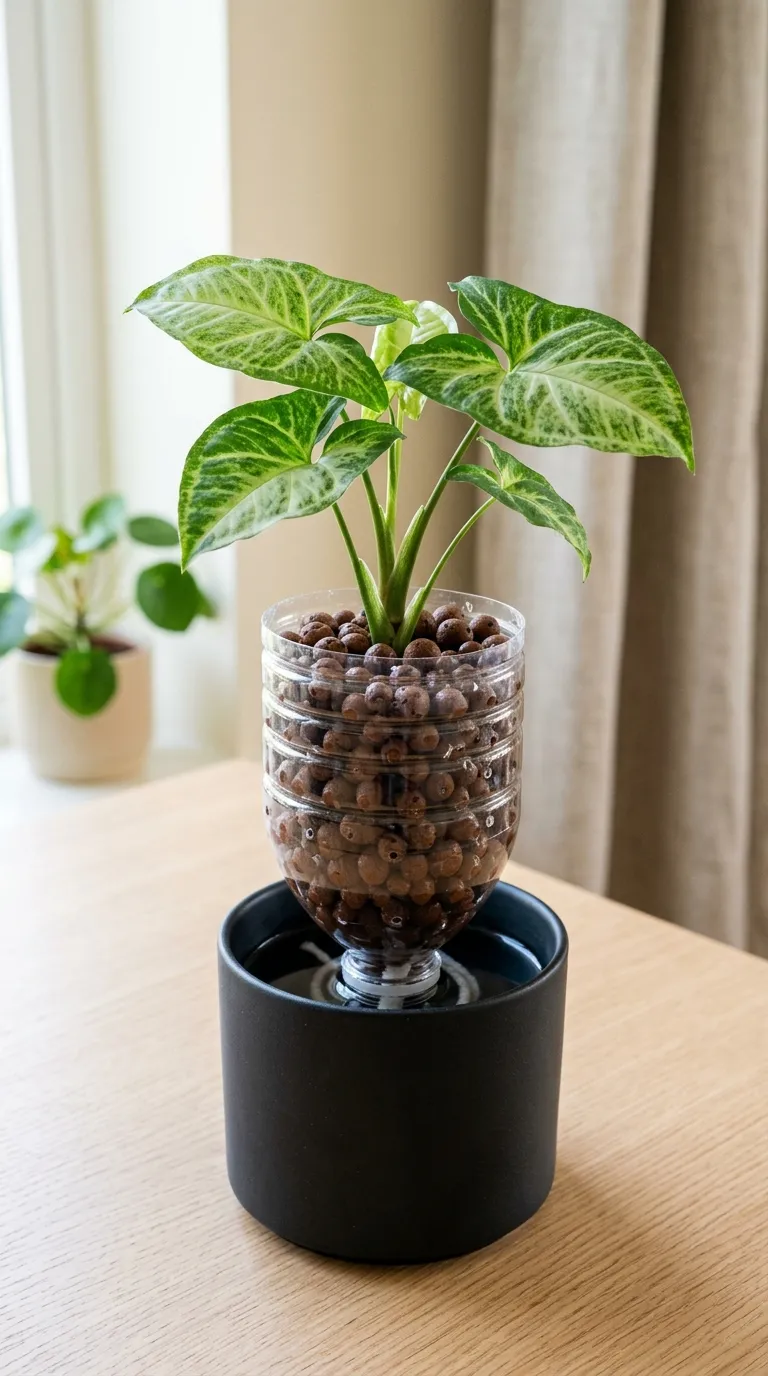
8. Slotted Hydroponic LECA Net Pot & Nutrient Chamber

A simple semi-hydroponic passive Kratky system using clay pebbles (LECA) and liquid nutrient water inside an inverted bottle reservoir.
-
Cut a 1-liter plastic bottle in half horizontally.
-
Melt multiple vertical 1/8-inch drainage slits around the tapered shoulders of the top funnel section using a fine-tip soldering iron.
-
Invert the slotted funnel into the lower reservoir base.
-
Spray the entire lower base in opaque matte black or wrap it in dark contact paper to block all light from reaching the nutrient solution.
-
Fill the upper funnel with expanded clay pebbles (LECA) and insert a water-rooted plant cutting (monstera adansonii, syngonium, or basil).
-
Fill the lower reservoir with diluted hydroponic nutrient water until it covers the bottom 1/3 of the LECA layer.
9. Coiled Jute Rope Hanging Planter Basket

A textured boho-chic hanging basket made from the wide bottom of a 5-liter water jug wrapped in thick natural jute twine.
-
Cut the top cone off a wide 5-liter square or round plastic water jug, leaving a 6-inch deep tub.
-
Roll the cut top edge against a warm iron lined with parchment paper.
-
Sand the outer plastic with 120-grit sandpaper; wrap 3/8-inch natural twisted jute rope around the container from base to rim, securing with hot glue or silicone.
-
Melt four evenly spaced holes 1/2 inch below the top rim.
-
Thread 4-ply natural cotton macramé cord through the holes, securing with overhand knots, and gather at the top with a brass hanging ring.
-
Place a potted indoor plant (like a trailing string-of-pearls or Boston fern) directly inside the waterproof liner.
10. Tiered Inverted Botanical Fountain & Water Wall
An outdoor garden feature made from a cascading column of cut bottle funnels that gently aerates and routes rainwater through moisture-loving bog plants.
-
Cut three 2-liter bottle funnels (5 inches tall); keep caps screwed on with a 3/16-inch hole drilled through each cap center.
-
Mount the three funnels vertically down a treated timber post, staggering each funnel so the spout of one drains directly into the funnel below.
-
Paint the exterior in hammered metallic copper or textured stone spray paint.
-
Pack each funnel with aquarium filter floss, coarse gravel, and moisture-tolerant plants (watercress, dwarf papyrus, or creeping jenny).
-
Pour water into the top tier to create a soothing, trickle-down vertical plant waterfall that filters water as it descends.
Upcycled Plant Craft Project & Performance Breakdown
| Plant Craft Project | Primary Plastic Bottle Base | Key Hydro / Botanical Function | Recommended Plant Types | Algae Prevention Method |
| Self-Watering Planter | 2L Soda / 1L Straight Bottle | Capillary Cotton Wicking | Kitchen Herbs, Pothos, Ferns | Terracotta Baking Soda Paint |
| Wall Propagation Rail | 500ml / 1L Clear Bottle Cones | Visual Root Observation | Monstera, Pothos, Philodendron | Regular Fresh Water Changes |
| Humidity Cloche | 1.5L / 2L Clear Dome | Moisture Retention & Venting | Seedlings, Succulent Props | High-Clarity Clear Plastic |
| Deep-Drip Spike | 1L Rigid Water Bottle | Subsurface Root Delivery | Tomatoes, Peppers, Squash | Buried Below Soil Line |
| Fluted Ribbed Pot | 1L Cylinder Base | Free Drainage & Aeration | Succulents, Cacti, Haworthia | Opaque Wood & Paint Wrap |
| Sealed Micro-Terrarium | 1.5L Smooth Clear Bottle | Closed Hydrological Cycle | Fittonia, Moss, Baby Tears | Diffuse Indirect Light Placement |
| Cascading Ladder | Four 2L Horizontal Bottles | Multi-Tiered Gravity Drainage | Lettuce, Strawberries, Spinach | Natural Foliage Canopy Shading |
| Hydroponic Net Pot | 1L Straight Inverted Bottle | Passive Semi-Hydroponics | Syngonium, Aroids, Basil | Opaque Black Base Coating |
| Coiled Jute Basket | 5L Wide Water Jug Base | Waterproof Protective Cachepot | Trailing Vines, Boston Ferns | Full Opaque Jute Rope Wrap |
| Tiered Water Wall | Three 2L Bottle Funnels | Vertical Cascade Aeration | Bog Plants, Watercress, Moss | Opaque Hammered Copper Paint |
Critical Botanical & Upcycling Rules
-
Block Sunlight from Root Zones: Clear plastic exposed to damp soil and sunlight will grow thick green algae within two weeks, competing with roots for nutrients. Always paint, wrap, or bury clear plastic when using it for long-term soil planting.
-
Always Provide Adequate Drainage: Roots need oxygen. If building a non-wicking soil planter, always melt or drill drainage holes at the lowest point of the base and add a layer of coarse gravel.
-
Thermal Edge-Smoothing: Raw cut plastic edges can sever delicate plant stems when plants lean or trail over the edge. Always press freshly cut PET plastic rims against a medium-heat iron lined with parchment paper for 3–4 seconds to create a smooth, rounded safety lip.
-
Use Food-Safe Plastics for Edibles: When growing kitchen herbs, strawberries, or leafy greens, ensure you use bottles stamped with recycling codes #1 (PET/PETE) or #2 (HDPE) and wash thoroughly with hot, soapy water before planting