10 Wooden Cross With String Art Ideas
Wooden cross string art blends rustic woodworking with precision geometric fiber art. Moving far beyond flat painted signs or basic crafts, modern string art turns reclaimed timber, dark walnut plaques, and weathered barnwood into dimensional wall sculptures.
The secret to elevated string art lies in thread tension, nail calibration, and layered color gradients. By balancing dense fiber fills with delicate open-lace geometric patterns, negative-space silhouettes, and integrated fairy lighting, you create meaningful handmade centerpieces suited for gallery walls, entryway consoles, and heirloom gifts.
Whether styling a cozy modern farmhouse, a minimalist gallery wall, or a rustic chapel nook, these ten curated concepts deliver step-by-step assembly guides, pattern formulas, and production-ready visual prompts.
Why This Idea Is Trending & Flattering
-
Tactile Dimensionality: Raised brass and steel nails paired with hundreds of intersecting thread passes create shadow lines that flat wall art cannot replicate.
-
Heirloom Durability: Solid hardwood bases combined with high-tensile cotton, silk, or metallic embroidery floss resist fading and sagging for years.
-
High Contrast on Natural Grain: Clean white, metallic, or ombré threads pop against dark walnut, charred pine, or weathered gray barnwood.
-
Accessible & Budget-Friendly: Requires basic workshop tools (hammer, pliers, linoleum nails) and inexpensive fiber spools while yielding high-end results.
-
Customizable Complexity: Scales effortlessly from simple linear perimeter outlines for beginners to complex, multi-layered mandala lace weaves.
Materials, Nail Spacing & Craft Foundation Guide
Core Wood & Fiber Palettes
-
Modern Farmhouse: Dark Walnut Stain, Bright White Mercerized Cotton Thread, Solid Brass Linoleum Nails
-
Rustic Western: Weathered Reclaimed Gray Pallet Wood, Natural Jute Twine, Antiqued Copper Nails
-
Luxe Celestial: Matte Charcoal/Ebonized Oak, Metallic Gold & Silver Embroidery Floss, Polished Steel Nails
Essential Craft Supplies & Hardware
-
Timber Base: $1times8$-inch or $1times10$-inch kiln-dried pine, solid oak, or reclaimed barnwood boards (sanded to 220-grit).
-
Nails: 5/8-inch or 3/4-inch wire brads, escutcheon pins, or brass linoleum nails with rounded heads to catch threads securely.
-
String & Thread: Size 10 crochet cotton thread, 6-strand DMC embroidery floss, or 1mm polished natural hemp cord.
-
Assembly Tools: Tack hammer, needle-nose pliers (to hold nails straight), paper template printed to scale, low-tack painter’s tape, clear matte craft glue.
1. The Classic White Lineage on Dark Walnut Plaque
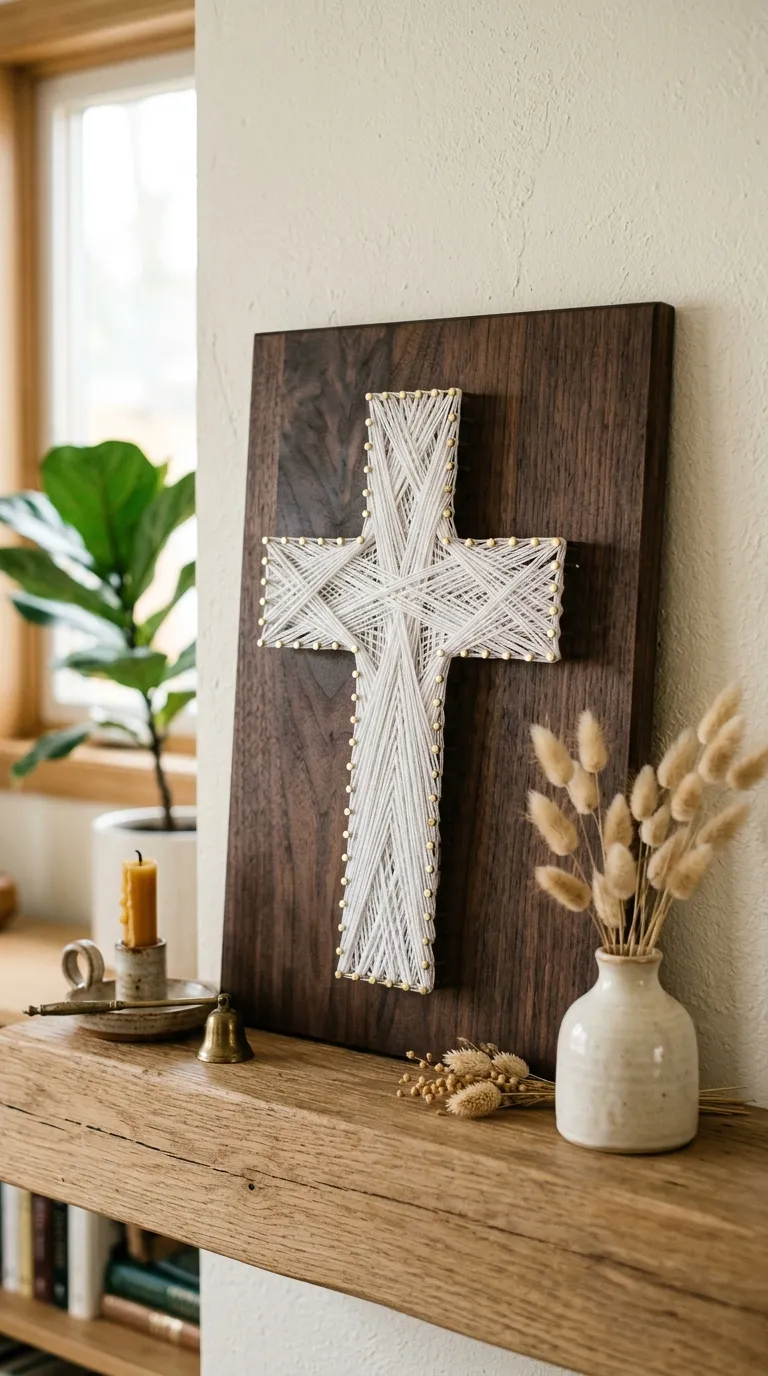
Concept Overview & Aesthetic Appeal
A timeless, high-contrast design featuring dense, multi-directional bright white cotton threading forming a crisp cross silhouette over a rich dark walnut wood plank.
Step-by-Step Execution Guide
-
Cut a solid pine or oak board to $9times12$ inches; sand smooth and apply two coats of dark walnut oil stain, finishing with a satin clear coat.
-
Tape a printed 7-inch cross outline template to the center of the dried board.
-
Using needle-nose pliers to keep nails vertical, hammer 3/4-inch brass nails around the cross perimeter spaced evenly 1/2-inch apart, driving them 1/4-inch deep into the wood.
-
Gently tear away the paper template from the nails.
-
Tie size 10 white crochet cotton to the top corner nail with a double knot and secure with a tiny drop of clear glue.
-
Outline the outer perimeter twice, then fill the interior using random diagonal zig-zag passes until achieving a dense, solid fabric weave.
-
Tie off the thread at the starting nail, snip excess, and seal the knot.
Pro Craft Tip
Keep steady, moderate tension while pulling the thread; pulling too tight bends the perimeter nails inward, while loose tension leads to sagging lines.
2. The Negative Space Inverted Cross Silhouette
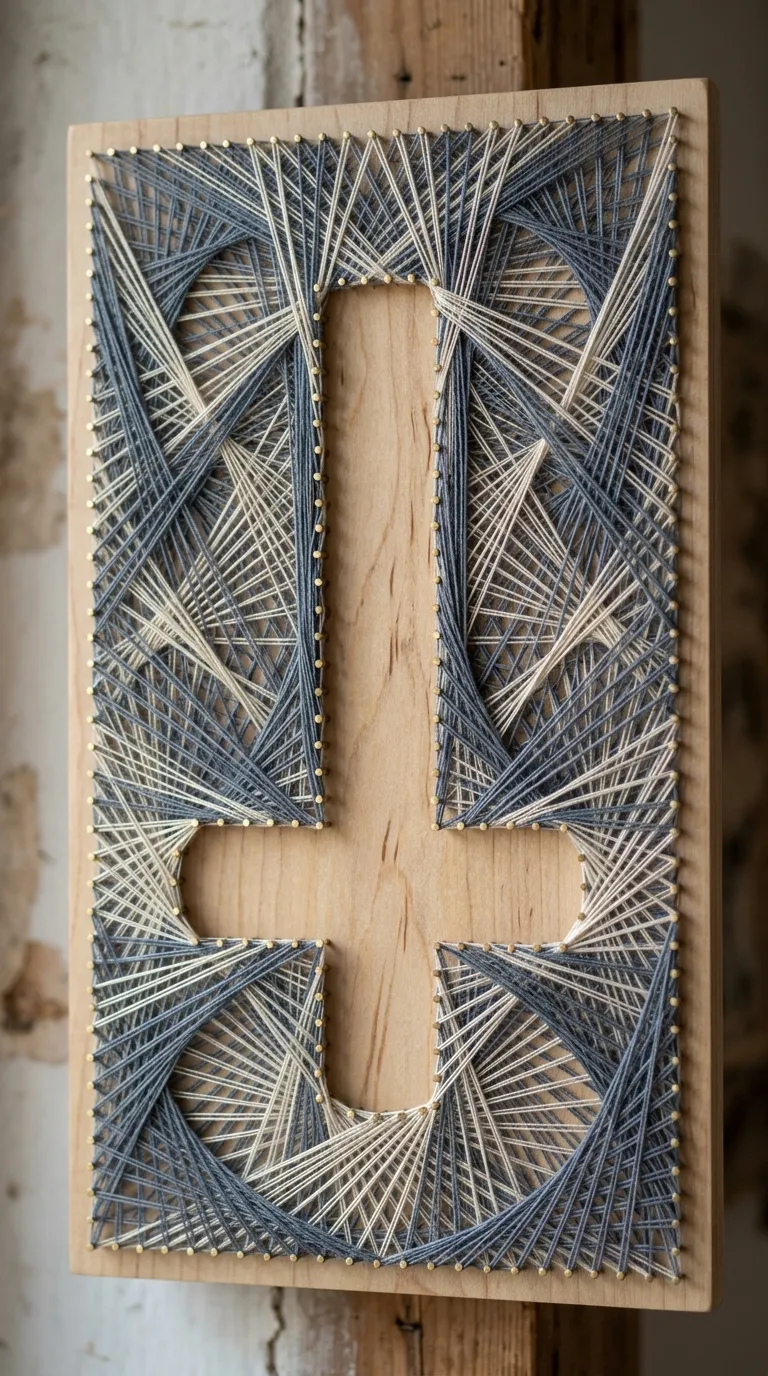
Concept Overview & Aesthetic Appeal
A modern geometric piece where the cross remains bare wood while the surrounding rectangular background is densely threaded, creating a bold floating void.
Step-by-Step Execution Guide
-
Sand and seal an $11times14$-inch light birch plywood or natural pine plaque.
-
Lay out two nail perimeters: an outer boundary rectangle along the board edges (spaced 1/2-inch apart) and an inner cross shape in the center.
-
Hammer steel wire brads along both the outer rectangular frame and the inner cross boundary.
-
Anchor cream or slate-gray embroidery thread to an outer frame nail.
-
Weave thread back and forth strictly between the outer border nails and the inner cross perimeter nails, leaving the central cross completely empty.
-
Continue weaving until the surrounding negative space is filled with a dense geometric web.
Pro Craft Tip
To keep the cross silhouette crisp, outline the inner cross nails with an extra tight perimeter pass before filling the background field.
3. The Sacred Heart Radiant Starburst Cross
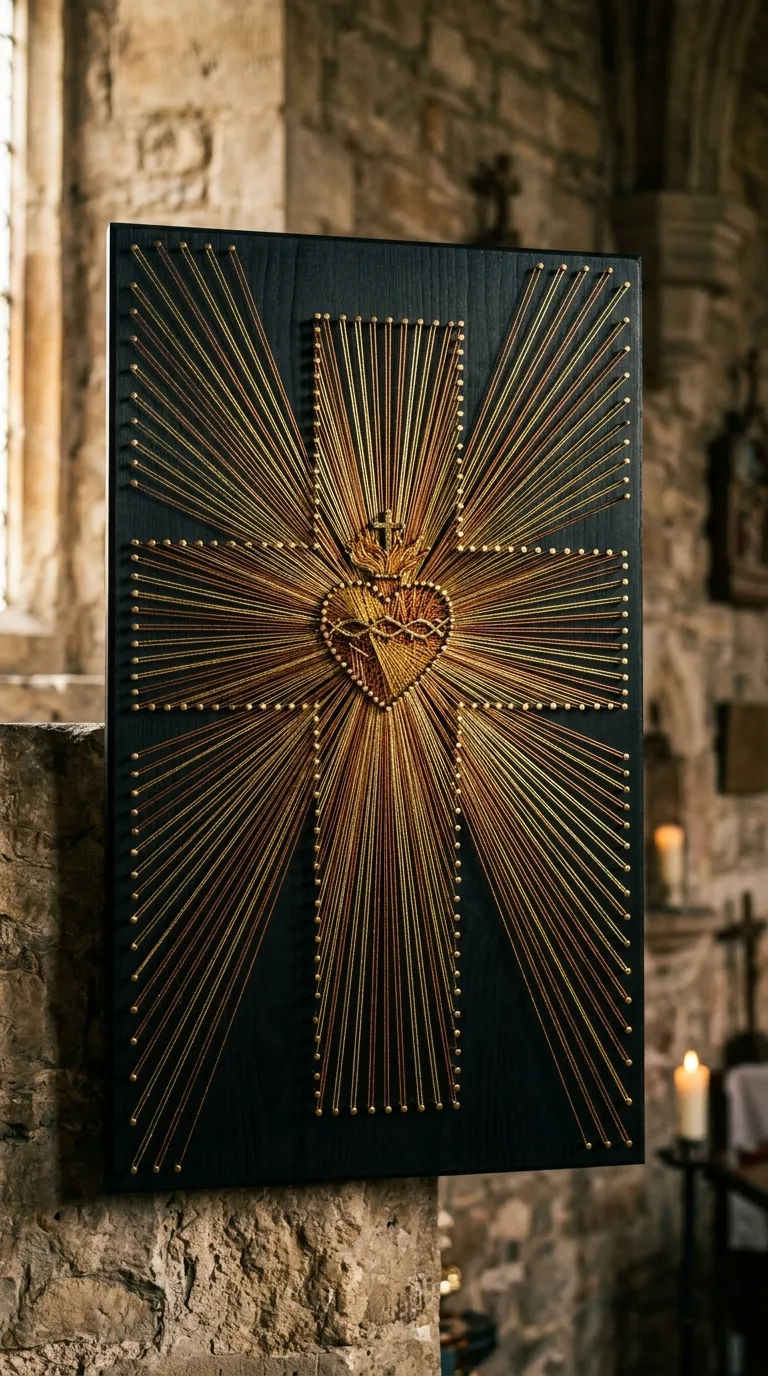
Concept Overview & Aesthetic Appeal
A radiant, expressive design featuring a central gold heart or glowing anchor point with straight threads bursting outward toward the cross perimeter tips.
Step-by-Step Execution Guide
-
Prep an $8times12$-inch ebonized black wood board.
-
Hammer an outer cross frame using brass nails, plus a small tight circular or heart-shaped cluster of 8 nails in the center intersection.
-
Tie metallic gold embroidery floss to the central cluster.
-
Run individual, straight thread passes from the center hub out to each outer perimeter nail in sequential order, creating a symmetrical sunburst.
-
Layer a secondary tier of warm copper thread over the top passes to build subtle radial depth.
-
Outline the outer cross arms with two passes of white thread to define the perimeter.
Pro Craft Tip
Use 6-strand embroidery floss rather than single-ply cotton for radiant starbursts to give the straight lines a bold, reflective metallic sheen.
4. The Rustic Pallet Wood Cross with Natural Jute Twine
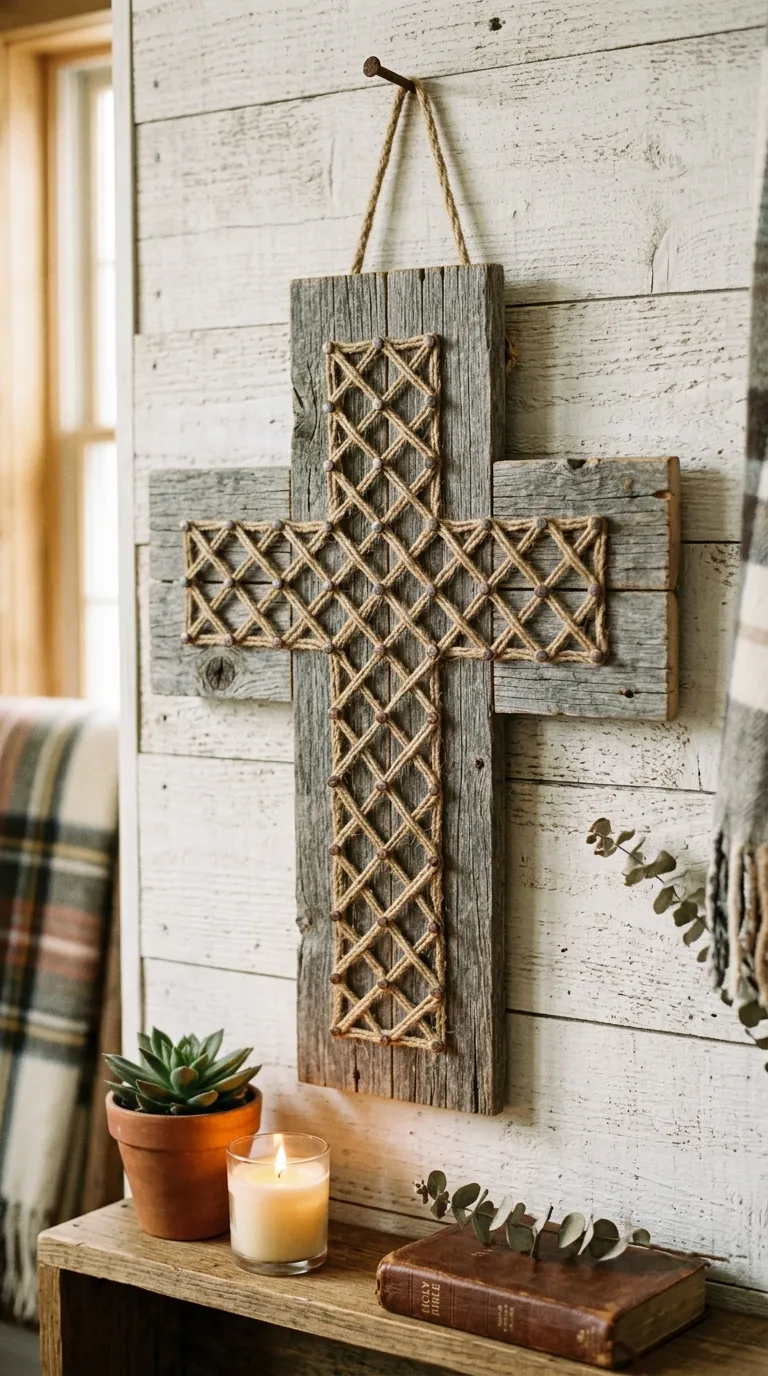
Concept Overview & Aesthetic Appeal
A rugged, farmhouse-style piece utilizing rough-sawn weathered pallet boards joined together, framed by thick natural jute twine and copper nails.
Step-by-Step Execution Guide
-
Join two 4-inch wide reclaimed gray pallet boards with pocket-hole screws on the back to form an $8times14$-inch rustic panel.
-
Hammer heavy 1-inch antiqued copper or blackened iron nails into a wide cross pattern (spaced 3/4-inch apart).
-
Use 1mm polished natural jute twine or twisted hemp cord.
-
Loop twine around the outer nails in an open, geometric diamond-lattice pattern rather than a dense solid fill.
-
Keep the natural wood knots and weathered saw marks visible through the open weave.
-
Attach a heavy wrought-iron sawtooth hanger to the back.
Pro Craft Tip
Lightly singe the jute twine with a utility lighter before stringing to remove fuzzy stray fibers and produce crisp cord lines.
5. The Ombré Sunset Gradient Floral Cross
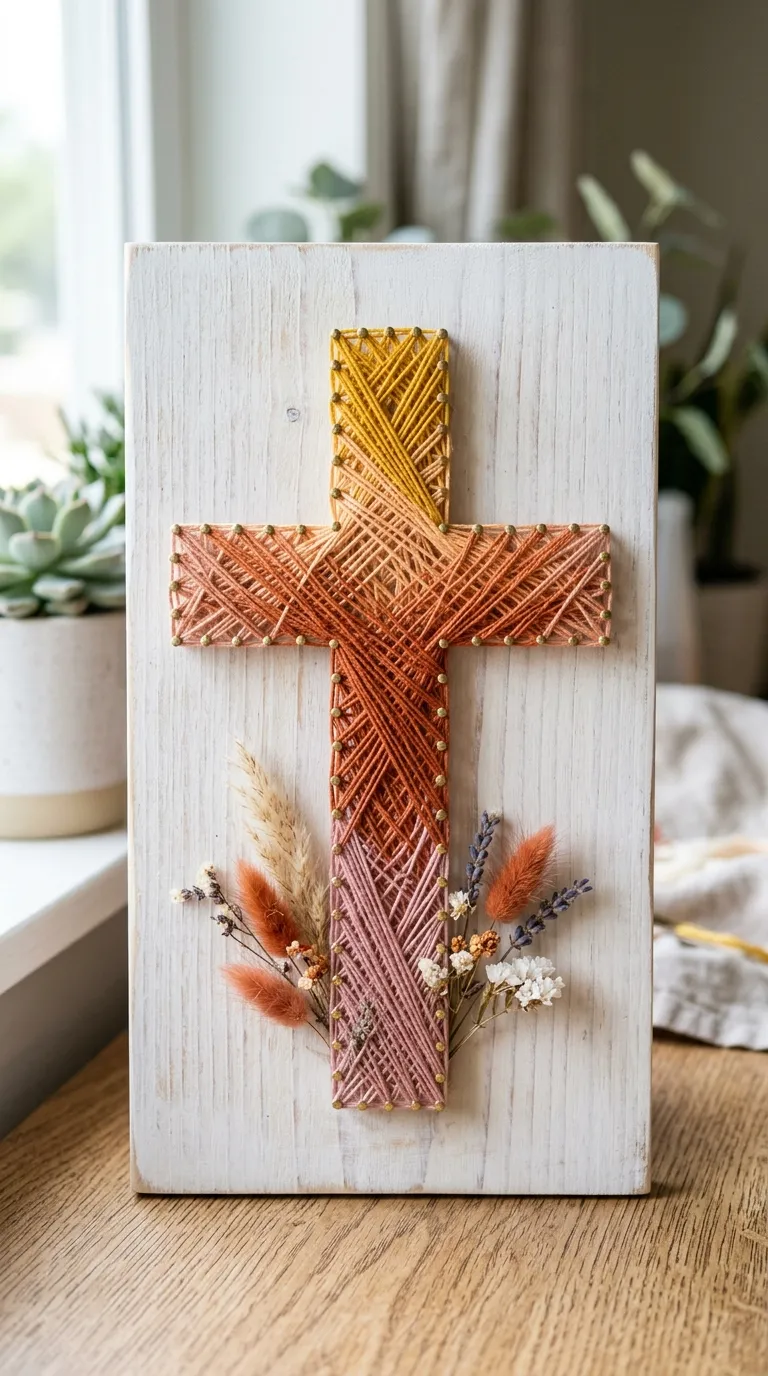
Concept Overview & Aesthetic Appeal
A warm, contemporary artistic design where threads transition smoothly through a four-color gradient from deep blush pink to warm terracotta and golden mustard.
Step-by-Step Execution Guide
-
Prepare a $10times14$-inch whitewashed pine board to serve as a bright, clean backdrop.
-
Drive 5/8-inch white-headed craft pins around a cross outline.
-
Divide the vertical cross height into four visual color zones: mustard yellow (top), peach, terracotta, and dusty rose (bottom).
-
Thread each zone with matching embroidery floss, blending adjacent zones by criss-crossing overlapping thread passes across the color boundaries.
-
Add small dried baby’s breath blossoms tucked into the bottom horizontal nail crossings.
Pro Craft Tip
Overlap adjacent thread colors across a 1-inch transition zone to create a seamless, painterly ombré gradient without hard color breaks.
6. The Floral Wreath Halo Wrapped Cross
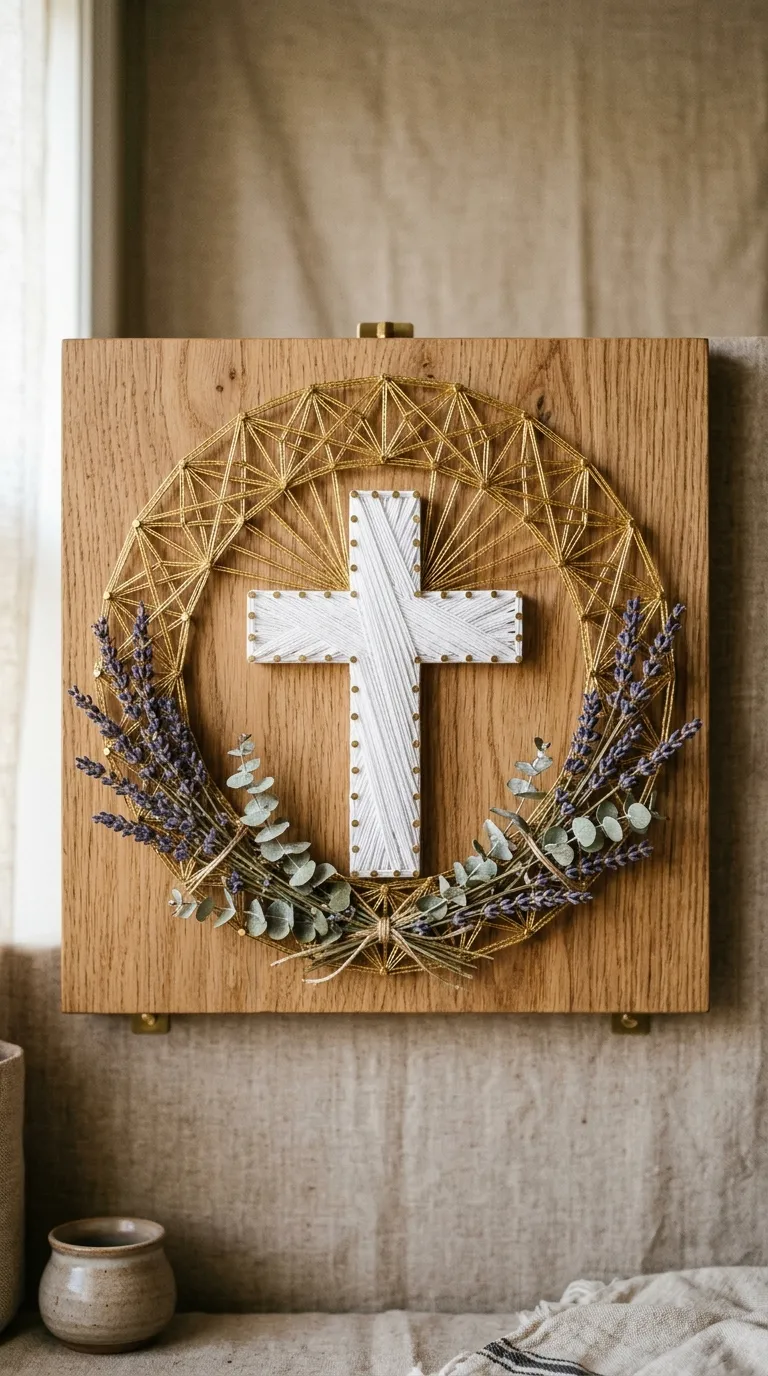
Concept Overview & Aesthetic Appeal
A delicate, botanical-inspired artwork featuring a solid white-threaded cross encircled by a circular nail halo wrapped with faux greenery and dried florals.
Step-by-Step Execution Guide
-
Sand and stain a square $12times12$-inch natural white-oak board with a clear matte sealer.
-
Hammer nails for a slender central cross, surrounded by a 9-inch diameter circular nail halo framing the cross arms.
-
Fill the interior cross densely with pure white cotton crochet thread.
-
Weave metallic gold thread in a geometric mandala spiral around the circular halo nails.
-
Use fine floral wire to secure delicate dried lavender sprigs and mini eucalyptus leaves along the bottom arc of the halo circle.
Pro Craft Tip
Wrap the floral stems with matching gold wire so the botanical attachments blend seamlessly into the metallic string lines.
7. The Distressed Aztec & Southwestern Geometric Cross
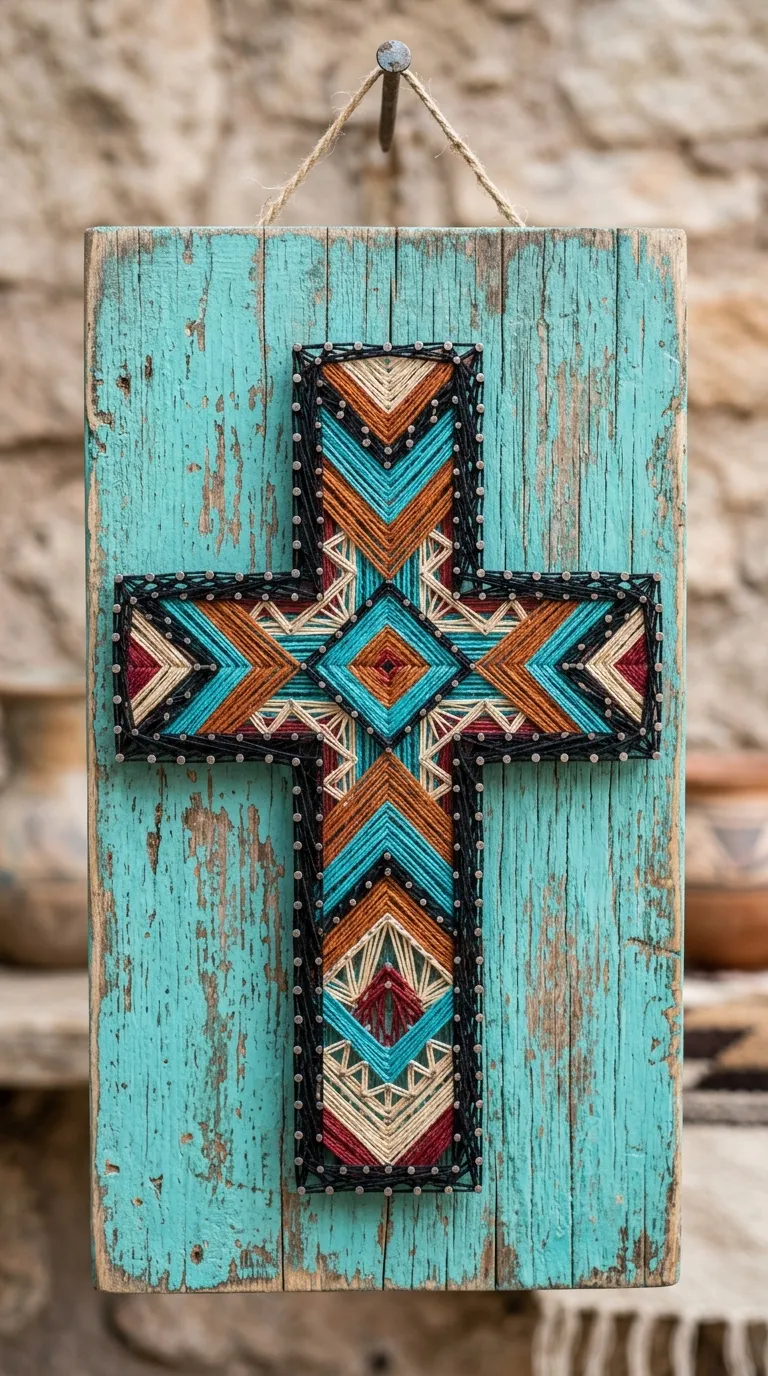
Concept Overview & Aesthetic Appeal
A bold, tribal-inspired cross featuring intricate chevron and diamond geometric string patterns in turquoise, black, and rust orange over distressed turquoise-washed wood.
Step-by-Step Execution Guide
-
Paint a $9times15$-inch pine board in turquoise milk paint, distressing edges with 120-grit sandpaper to reveal underlying dark wood stain.
-
Map out nail points along the cross perimeter as well as internal diamond intersecting points.
-
String the inner chevron arrows using crisp matte-black thread to establish structural geometric borders.
-
Fill the center diamonds with vibrant turquoise and rust-orange thread.
-
Outline the outermost cross edge with natural linen cord.
Pro Craft Tip
Use graph paper to draft your Aztec cross template before nailing; exact mathematical symmetry is essential for straight chevron angles.
8. The Micro Fairy-Lit Nightlight Cross Plaque
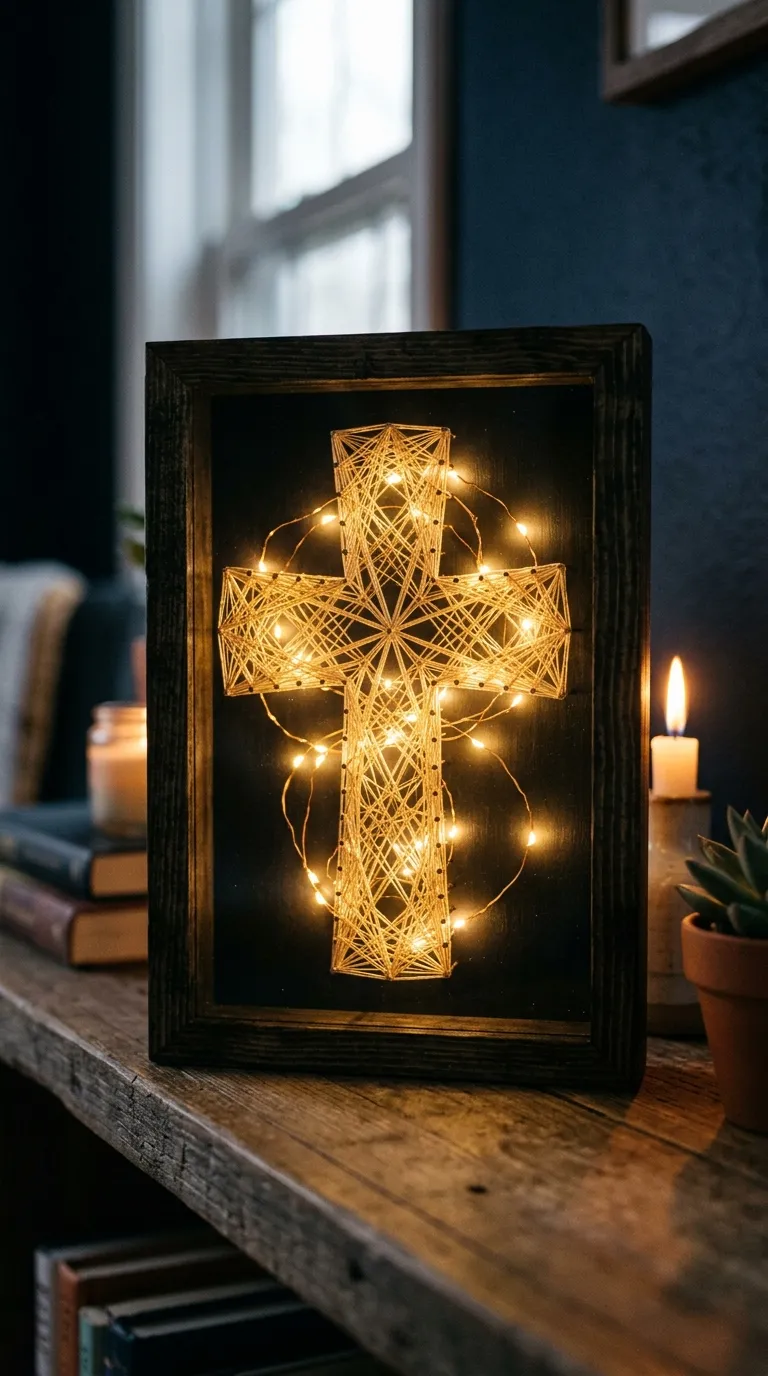
Concept Overview & Aesthetic Appeal
An ambient, glowing nightlight piece featuring a hollow-core wooden box frame, warm micro LED fairy lights, and an open geometric string cross that glows from behind.
Step-by-Step Execution Guide
-
Build a 2-inch deep hollow wooden shadowbox frame ($8times11$ inches) with a thin plywood front face.
-
Drill a 1/2-inch access hole in the lower corner of the back panel for battery pack wiring.
-
Hammer brass nails into a cross pattern on the front face.
-
Weave an open, airy geometric lace string pattern across the cross nails using champagne-colored silk thread.
-
Thread a strand of 20 warm-white copper-wire micro fairy lights underneath the string web, securing the battery pack inside the rear hollow box cavity.
-
Turn on lights to cast warm linear string shadows across the wood face.
Pro Craft Tip
Use battery-operated fairy lights with a built-in 6-hour timer switch so the string art illuminates automatically each evening.
9. The Minimalist Linear Floating Wire Cross
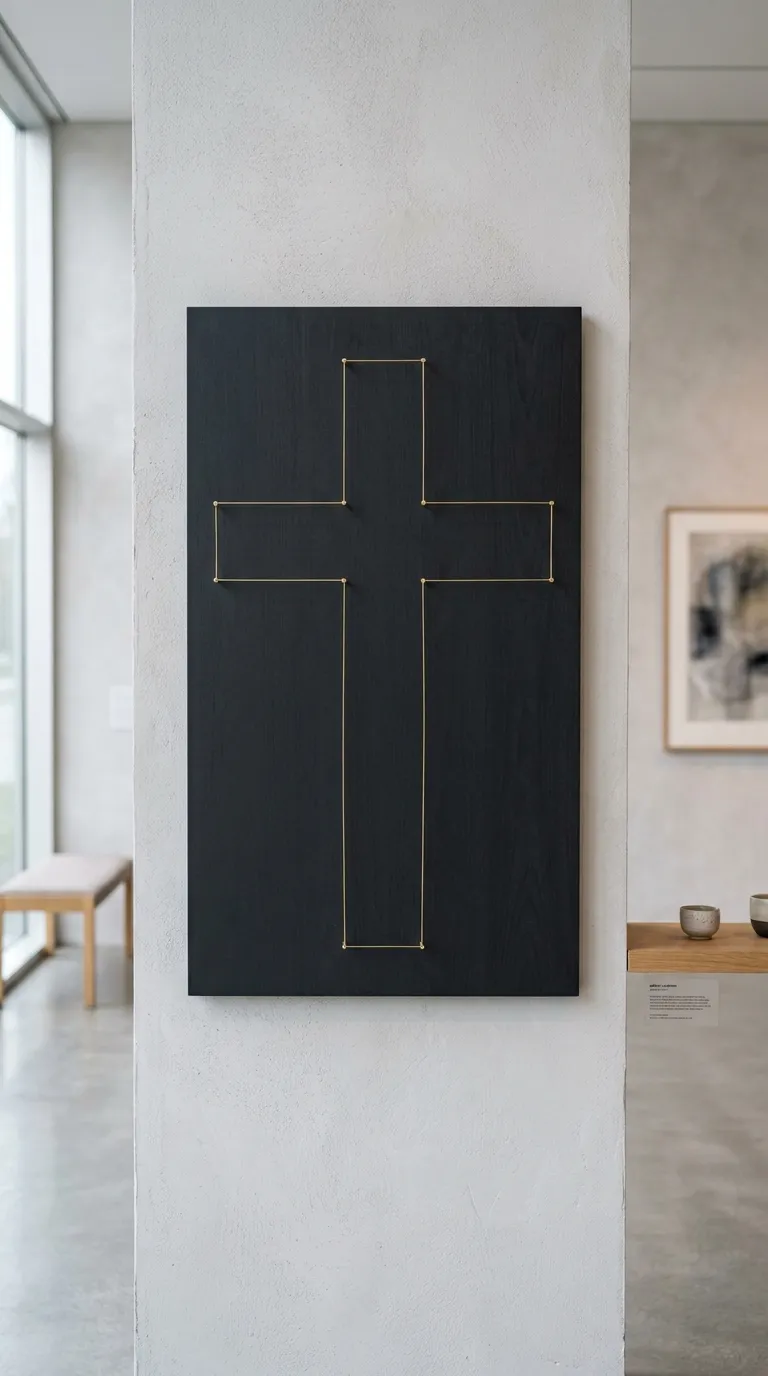
Concept Overview & Aesthetic Appeal
A Scandinavian-modern minimalist interpretation using an ultra-clean, low-nail count outline and single, parallel metallic gold wire passes over matte charcoal wood.
Step-by-Step Execution Guide
-
Paint a smooth MDF or solid birch panel in ultra-matte carbon charcoal.
-
Hammer only 12 strategic corner nails (one at every vertex of the cross geometry).
-
Instead of thread, use flexible 28-gauge gold-plated copper jewelry craft wire.
-
String clean, unbroken straight lines strictly between opposite parallel vertices to outline the minimal cross profile.
-
Fasten wire ends neatly around the corner nails, pressing wire tails flat with pliers.
-
Display on a floating shelf alongside minimalist ceramic vessels.
Pro Craft Tip
Work with continuous spool wire without kinking; smooth straight wire runs create sharp, architectural lines that look like metal inlays.
10. The Celtic Knot Endless Weave Cross
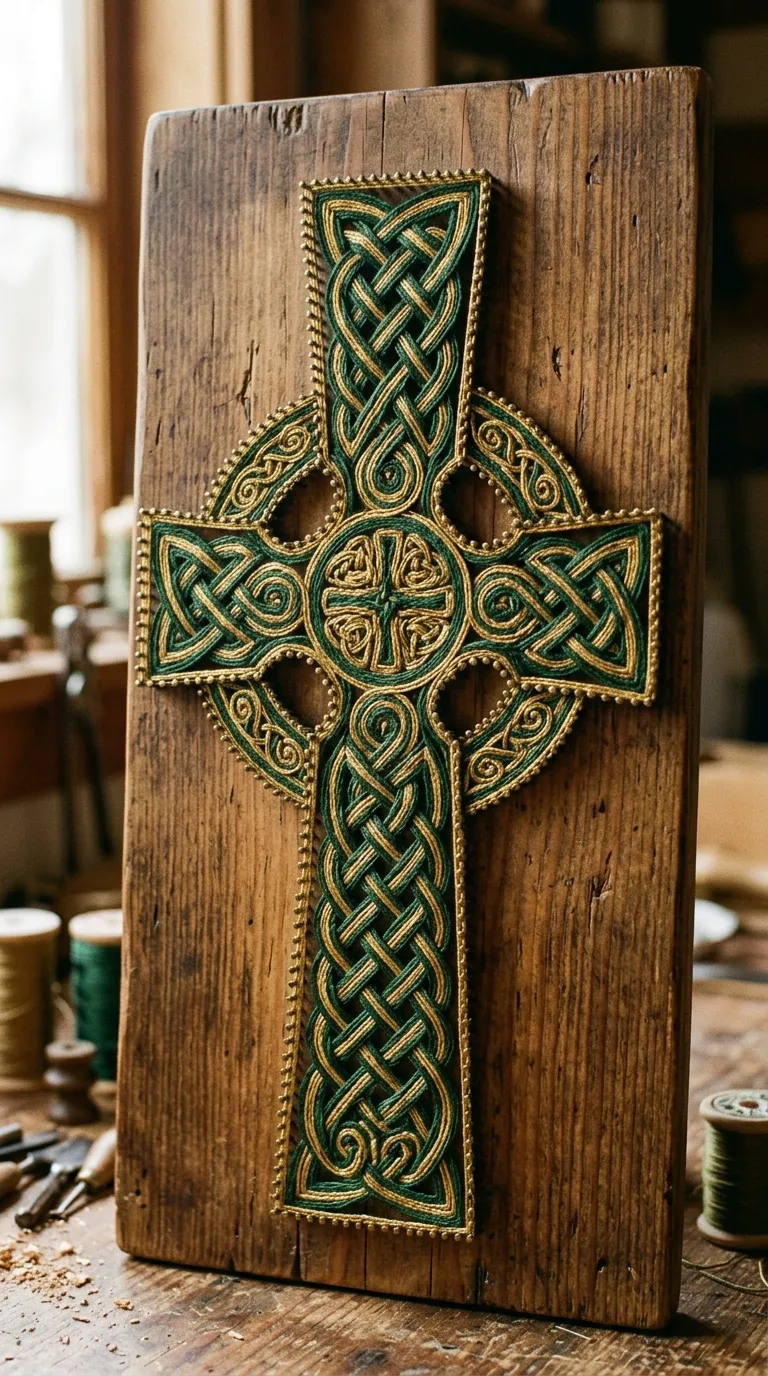
Concept Overview & Aesthetic Appeal
An intricate, complex Celtic cross featuring continuous interwoven ribbon patterns rendered in hunter green, gold, and cream embroidery threads over aged pine.
Step-by-Step Execution Guide
-
Transfer a traditional Celtic knotwork cross template onto a $10times14$-inch honey-pine board.
-
Drive 1/2-inch brass escutcheon pins at every line intersection and knot loop curve (approx. 100+ nails).
-
String the continuous Celtic knot ribbons using rich forest-green embroidery floss, carefully mimicking the over-under weaving pattern of Celtic knots.
-
Accentuate the outer circular ring behind the cross arms with metallic gold thread.
-
Seal all finishing knots with clear craft cement on the nail shanks.
Pro Craft Tip
Number the nail path on your paper template before starting; following a numbered sequence prevents missing intersecting loops in complex knotwork.
String Art Concept & Craft Comparison
| Wooden Cross Concept | Base Timber / Finish | Thread / Fiber Type | Nail Type | Difficulty Level |
| Classic White & Walnut | Dark Walnut Pine | Size 10 White Cotton | 3/4-in Brass Brads | Beginner |
| Negative Space Inverted | Light Natural Birch | Slate Gray Embroidery | 5/8-in Steel Wire Pins | Intermediate |
| Sacred Heart Starburst | Ebonized Black Oak | Metallic Gold / Copper | Polished Brass Pins | Beginner |
| Rustic Pallet & Jute | Weathered Pallet Wood | 1mm Natural Jute Twine | Antiqued Copper Nails | Beginner |
| Ombré Sunset Gradient | Whitewashed Pine | 4-Tone Embroidery Floss | White Craft Pins | Intermediate |
| Floral Wreath Halo | Natural White Oak | White Cotton / Gold Wire | Brass Escutcheon Pins | Intermediate |
| Southwestern Aztec | Distressed Turquoise | Black, Rust & Turquoise | Steel Brads | Advanced |
| Micro Fairy-Lit Glow | Hollow Pine Box | Champagne Silk Thread | 3/4-in Brass Brads | Intermediate |
| Minimalist Gold Wire | Matte Charcoal MDF | 28-Gauge Gold Wire | Brass Corner Pins (12) | Beginner |
| Celtic Knot Weave | Aged Honey Pine | Forest Green & Gold | Brass Escutcheon Pins | Advanced |
Common Crafting Mistakes & How to Avoid Them
-
Hammering Nails to Inconsistent Depths: Nails driven at random heights create an uneven, messy string plane. Solution: Cut a 1/2-inch thick scrap strip of cardboard or wood and rest it beside each nail as a depth stop while hammering.
-
Pulling Threads Too Tightly: Excessive tension causes nails to bend inward toward the center, ruining the crisp geometric outline. Solution: Maintain gentle, consistent tension, letting the dense layering of threads build volume rather than tight pulling.
-
Tearing Paper Templates and Leaving Scraps: Pulling paper straight up after nailing leaves torn paper scraps trapped under nail heads. Solution: Score paper lightly with a craft knife along nail lines and tear sideways, or use tweezers to remove stray bits.
-
Neglecting Knot Security: Unsecured starting and ending knots can unravel over time, causing the entire string web to go slack. Solution: Double-knot every start and finish, applying a tiny drop of clear matte craft glue or clear nail polish directly onto the knot.