
10 Black And White Gallery Wall Photographs Ideas
A curated black-and-white photography gallery wall brings timeless sophistication, museum-grade framing, and architectural contrast to any living space. By stripping away distracting colors, monochrome photography places the entire focus on tonal range, dramatic lighting, deep shadows, textural grain, and graphic composition.
The secret to a compelling gallery wall lies in layout geometry, mat-board proportions, and thematic storytelling. Whether you lean toward the strict symmetry of a clean grid or the dynamic energy of an organic salon-style arrangement, monochrome images unify diverse subjects—from vintage street scenes and architectural facades to raw botanical macros and candid family portraits.
Whether styling a dramatic double-height staircase, a dining room focal wall, an entryway console, or a serene bedroom retreat, these ten curated photography concepts deliver layout blueprints, matting formulas, and production-ready visual prompts.
Why This Idea Is Trending & Flattering
-
Effortless Visual Cohesion: Black-and-white processing naturally unifies photographs taken across different eras, cameras, lighting conditions, and locations.
-
Museum-Grade Architectural Contrast: High-contrast monochrome images pop boldly against both light plaster and moody, dark-painted walls.
-
Timeless Longevity: Bypasses trend-driven color palettes, ensuring your wall display remains stylish and relevant for decades.
-
Flexible Subject Layering: Easily blends high-fashion editorial portraits, architectural studies, historical prints, and personal travel snaps without visual clash.
-
Elevates Everyday Photography: Converts simple iPhone snaps and candid moments into artistic, fine-art prints through high-contrast grayscale conversions.
Framing, Matting & Spacing Foundation Guide
Core Gallery Wall Layouts
-
The Precision Architectural Grid: Uniform frame sizes, identical oversized white mats, and strict $2text{ to }3text{-inch}$ spacing between frames; best for modern, minimalist, and formal dining spaces.
-
The Dynamic Salon / Asymmetrical Cluster: Varied frame dimensions anchored around a central visual horizon line with uniform $2text{-inch}$ spacing; best for living rooms and stairwells.
-
The Linear Floating Ledge Display: Overlapping framed prints resting on shallow picture ledges; allows effortless rearranging without putting extra nail holes in drywall.
Framing, Matting & Glass Standards
-
Mat-Board Proportions: Use minimum 4-ply or 8-ply acid-free conservation mat board. For modern luxury, use weighted bottom mats (e.g., 3 inches on top/sides with 4 inches on the bottom) or oversized mats ($11times14text{-inch}$ frames for $5times7text{-inch}$ prints).
-
Frame Profiles: Thin 3/4-inch flat-profile matte black aluminum, natural raw white oak, or solid gallery white wood.
-
Glazing: Anti-reflective, UV-filtering museum acrylic or non-glare glass to eliminate reflections from nearby windows and downlights.
-
Hanging Rule: The vertical center of the entire gallery cluster should sit at eye level—57 to 60 inches from the finished floor.
1. The Ultra-Minimalist Architectural Geometry Grid
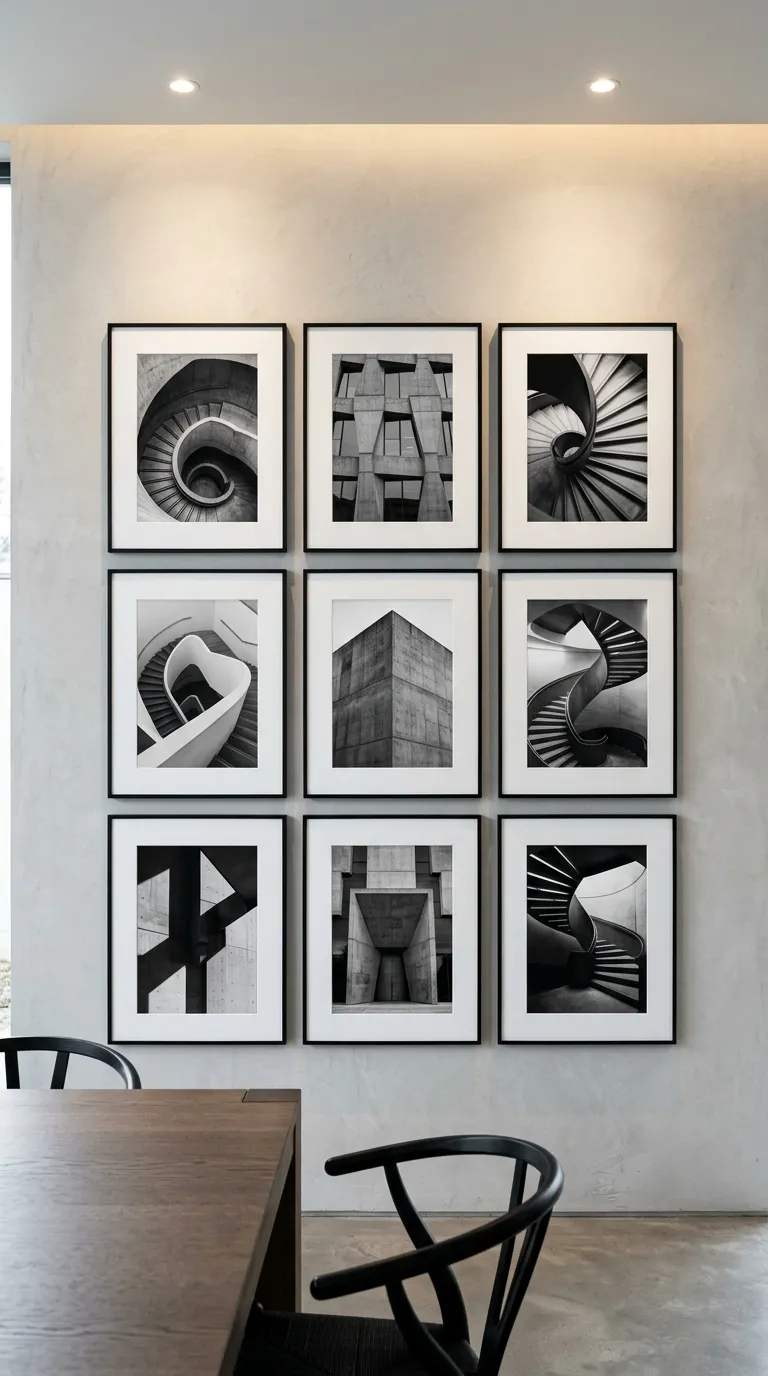
Concept Overview & Photographic Aesthetic
A symmetrical $3times3$ or $2times4$ grid displaying high-contrast, graphic architectural details: spiraling concrete staircases, brutalist facades, cantilevered steel bridges, and linear window shadows.
Step-by-Step Execution Guide
-
Select 6 to 9 architectural photographs emphasizing sharp geometric lines and deep black-and-white tonal contrast.
-
Frame each in identical $16times20text{-inch}$ slim matte-black aluminum gallery frames.
-
Mount prints using an oversized, bright-white 8-ply acid-free mat with an $8times10text{-inch}$ rectangular cutout.
-
Hang the frames in a uniform grid with strict 2-inch spacing horizontally and vertically.
-
Illuminate the grid evenly using ceiling-recessed low-glare wall-washers or an adjustable ceiling track light.
Pro Curator Tip
Shoot architectural subjects during mid-afternoon bright sunlight to capture sharp, graphic diagonal shadow planes across textured concrete surfaces.
2. The Mid-Century Modern Street & Candid Film Salon
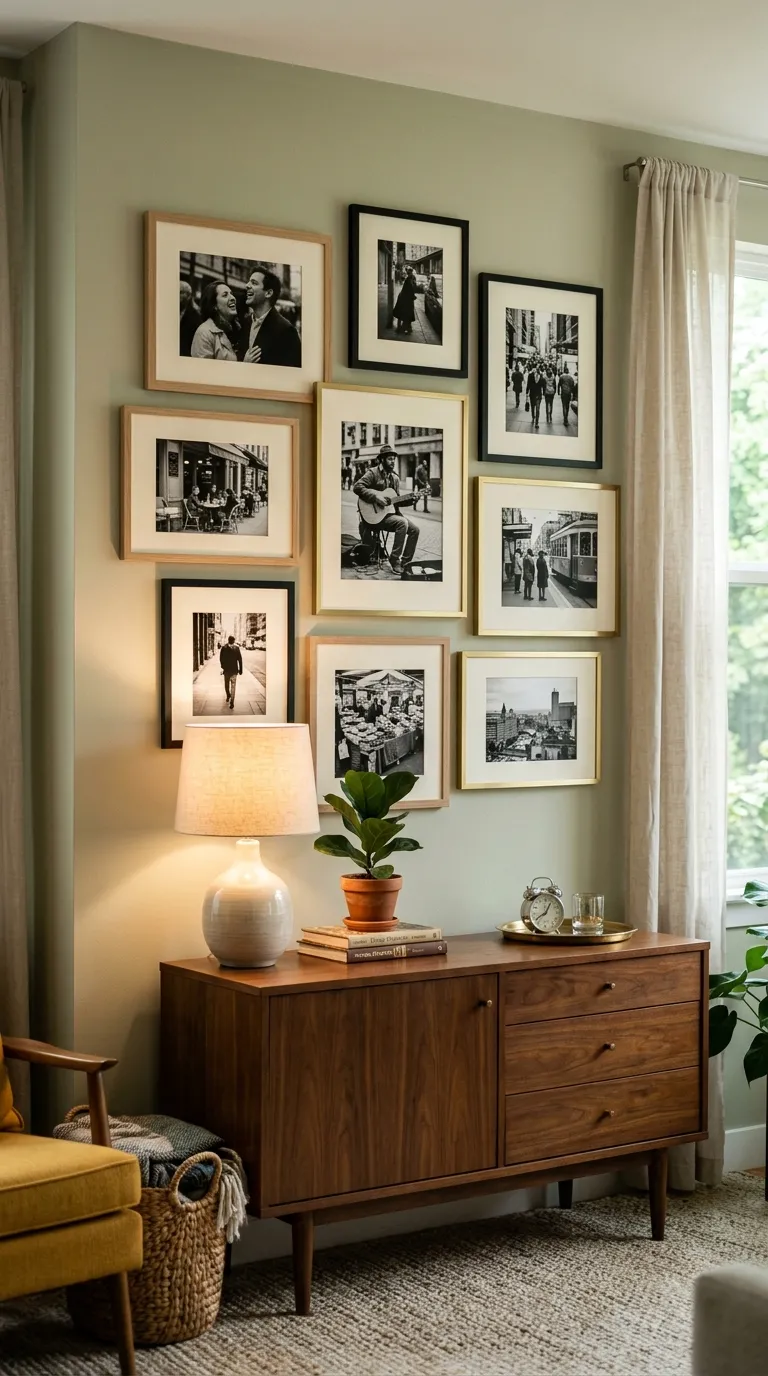
Concept Overview & Photographic Aesthetic
An organic salon-style cluster celebrating vintage 35mm street photography: rain-slicked city cobblestones, vintage taxi cabs, Parisian sidewalk cafes, and candid silhouettes with authentic film grain.
Step-by-Step Execution Guide
-
Gather 7 to 10 street photography prints with visible Tri-X film grain and rich mid-tone grays.
-
Mix three harmonious frame finishes: matte black, thin warm white oak, and a couple of slim brushed-brass accent frames.
-
Vary frame sizes ($8times10$, $11times14$, and $16times20text{ inches}$) while keeping mat boards a consistent warm off-white tone.
-
Lay the entire arrangement out on the floor first, establishing a strong central horizontal axis before hammering nails.
-
Hang prints starting from the center outward, maintaining consistent 2-inch gaps between frame edges.
Pro Curator Tip
Keep all mat boards the exact same shade of warm off-white or ivory; mixing cool bright-white mats with cream mats creates an unintentional, mismatched look.
3. The Oversized Floating Ledge Layered Display
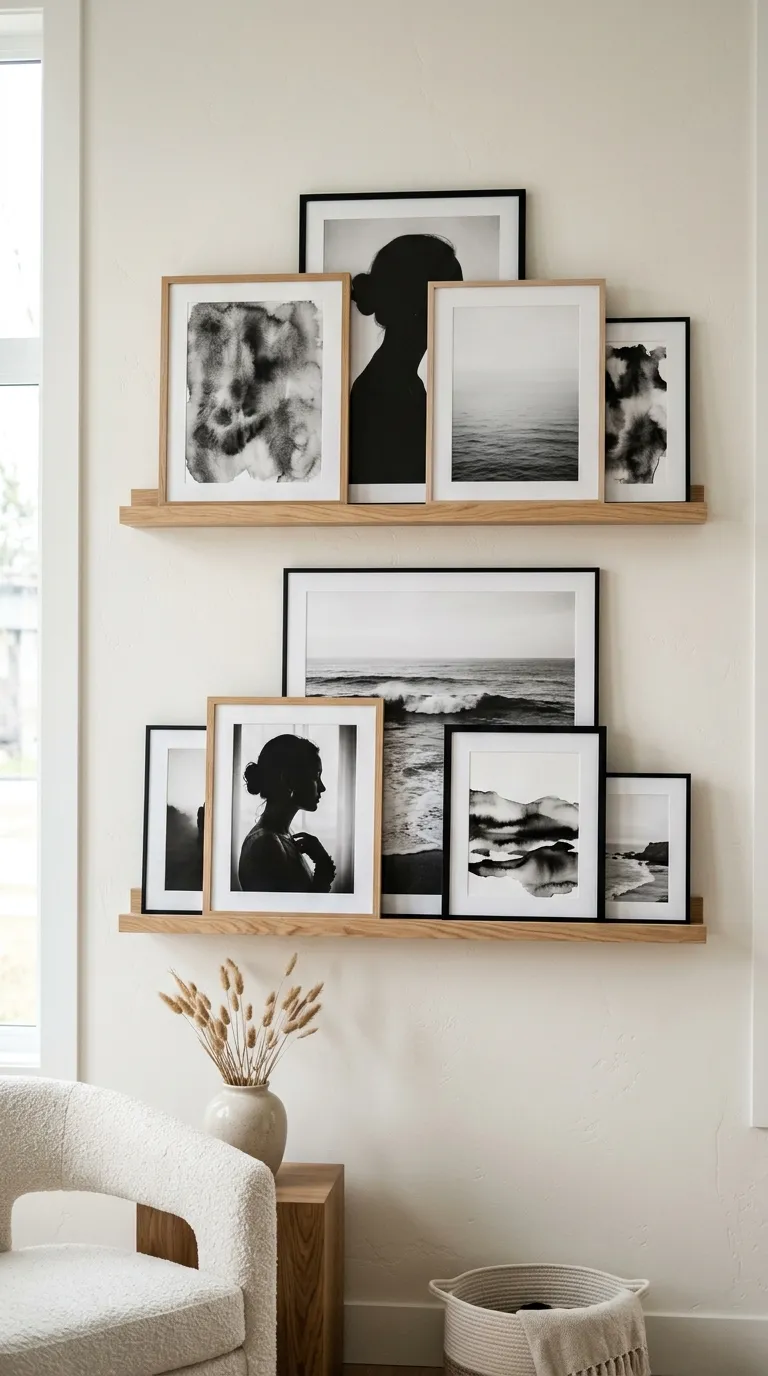
Concept Overview & Photographic Aesthetic
A flexible, layered wall arrangement using two parallel deep wooden picture ledges holding overlapping large-format monochrome prints, portraits, and abstract ink textures.
Step-by-Step Execution Guide
-
Mount two 4-foot or 6-foot natural white-oak picture ledges with front lip grooves spaced 18 inches apart vertically.
-
Frame 6 to 8 black-and-white prints in varied frame heights ($12times16text{ up to }20times30text{ inches}$).
-
Lean the largest framed prints flat against the wall on the ledges as backdrop anchors.
-
Overlap smaller framed photos in front of the larger frames at slight angles to build front-to-back depth.
-
Mix photography subjects: pair an expansive ocean horizon print with a close-up macro portrait and an abstract ink splash.
Pro Curator Tip
Apply small clear rubber bumper pads to the bottom back corners of frames to prevent them from sliding along the ledge or scratching the wall.
4. The High-Contrast Botanical & Macro Floral Study
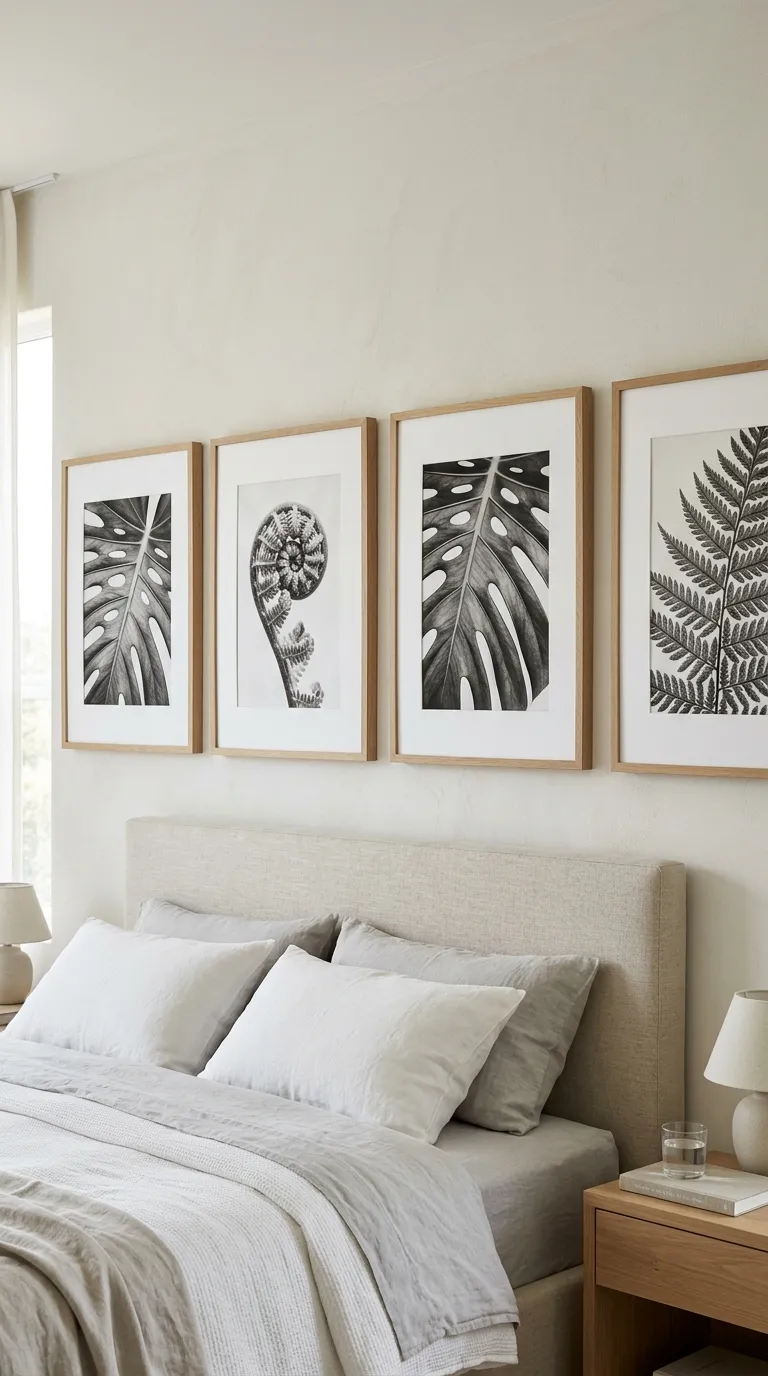
Concept Overview & Photographic Aesthetic
A botanical grid or triptych focusing on high-contrast macro textures: delicate fern fronds, veined monstera leaves, translucent flower petals, and weathered tree bark.
Step-by-Step Execution Guide
-
Curate 4 to 6 macro botanical images shot with soft backlighting against dark or pure white backgrounds.
-
Mount prints into natural, unstained rift-sawn white-oak gallery frames ($18times24text{ inches}$).
-
Use generous, oversized 4-inch white mat borders to give the intricate botanical details breathing room.
-
Hang in a clean horizontal row of 3 or 4 above a low-profile living room sofa or bedroom headboard.
-
Maintain a tight 1.5-inch spacing between adjacent frames for an uninterrupted panoramic effect.
Pro Curator Tip
Backlit macro shots of plant leaves showcase internal cellular veins and translucent textures that turn into abstract art in high-contrast black and white.
5. The Heirloom Multi-Generational Family Portrait Grid
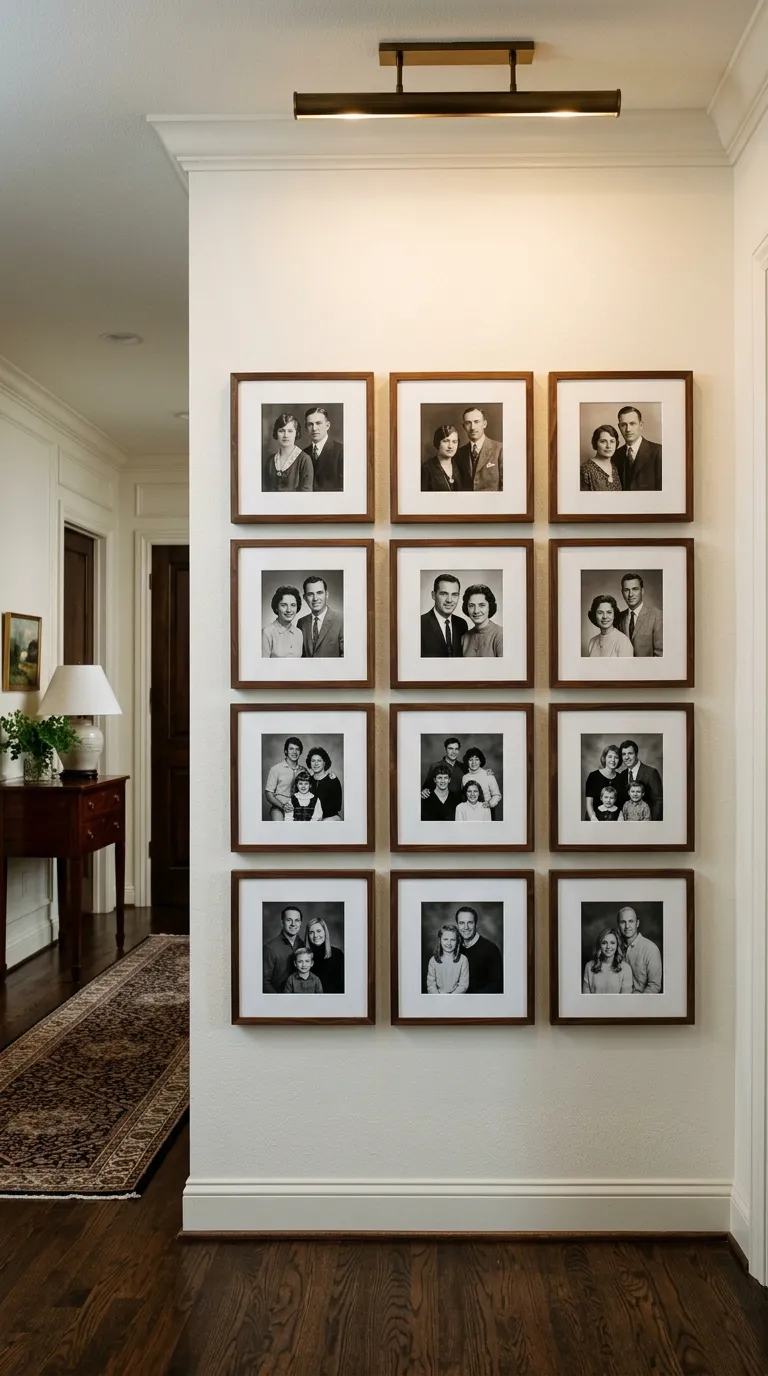
Concept Overview & Photographic Aesthetic
A structured family tribute that unifies vintage ancestors’ black-and-white portraits with modern candid studio shots of children and parents.
Step-by-Step Execution Guide
-
Digitally scan old heirloom photographs at 600 DPI, restoring contrast and scratches digitally.
-
Convert modern family portraits to match the tone of the vintage prints by applying a subtle warm platinum or neutral grayscale curve.
-
Frame 9 or 12 portraits in matching $12times12text{-inch}$ square matte-black or dark walnut frames.
-
Use custom circular or square-cut white mats ($5times5text{-inch}$ window) to focus attention on facial expressions.
-
Hang in a formal $3times3$ or $3times4$ grid along a hallway or entryway wall.
Pro Curator Tip
Crop all portraits with a consistent subject scale (e.g., tight head-and-shoulder crops where eyes align along the upper third of the mat opening).
6. The Moody Dramatic Landscape & Long-Exposure Seascape Wall
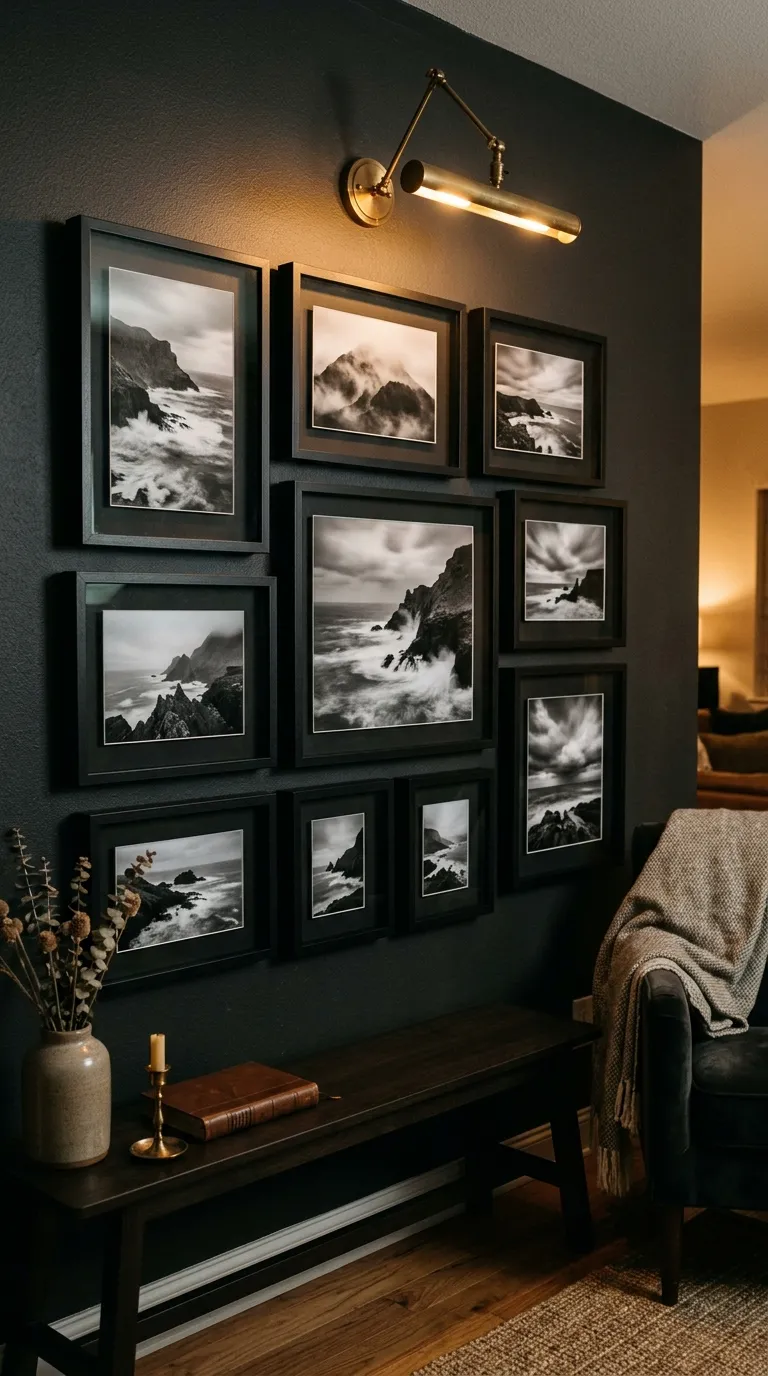
Concept Overview & Photographic Aesthetic
An expansive arrangement featuring misty mountain ranges, stormy cloud formations, and silky long-exposure ocean waves with rich, velvety blacks.
Step-by-Step Execution Guide
-
Select 5 to 7 landscape photographs captured with neutral density (ND) filters that create smooth, painterly water and sky textures.
-
Use deep, shadowbox-style black gallery frames ($20times30text{ inches}$ for the center anchor, $11times14text{ inches}$ for side accents).
-
Float-mount the prints on top of textured black or charcoal mat board with a 1/2-inch reveal to create floating shadow depth.
-
Cluster the prints in an asymmetrical arrangement above a low credenza or media console.
-
Mount a slim, antique brass or blackened-bronze picture light directly above the main center landscape.
Pro Curator Tip
Float-mounting prints (suspending the paper on foam risers without a top mat) highlights deckled, torn-paper edges and creates genuine shadow lines inside the frame.
7. The High-Fashion Editorial & Classic Silhouette Salon
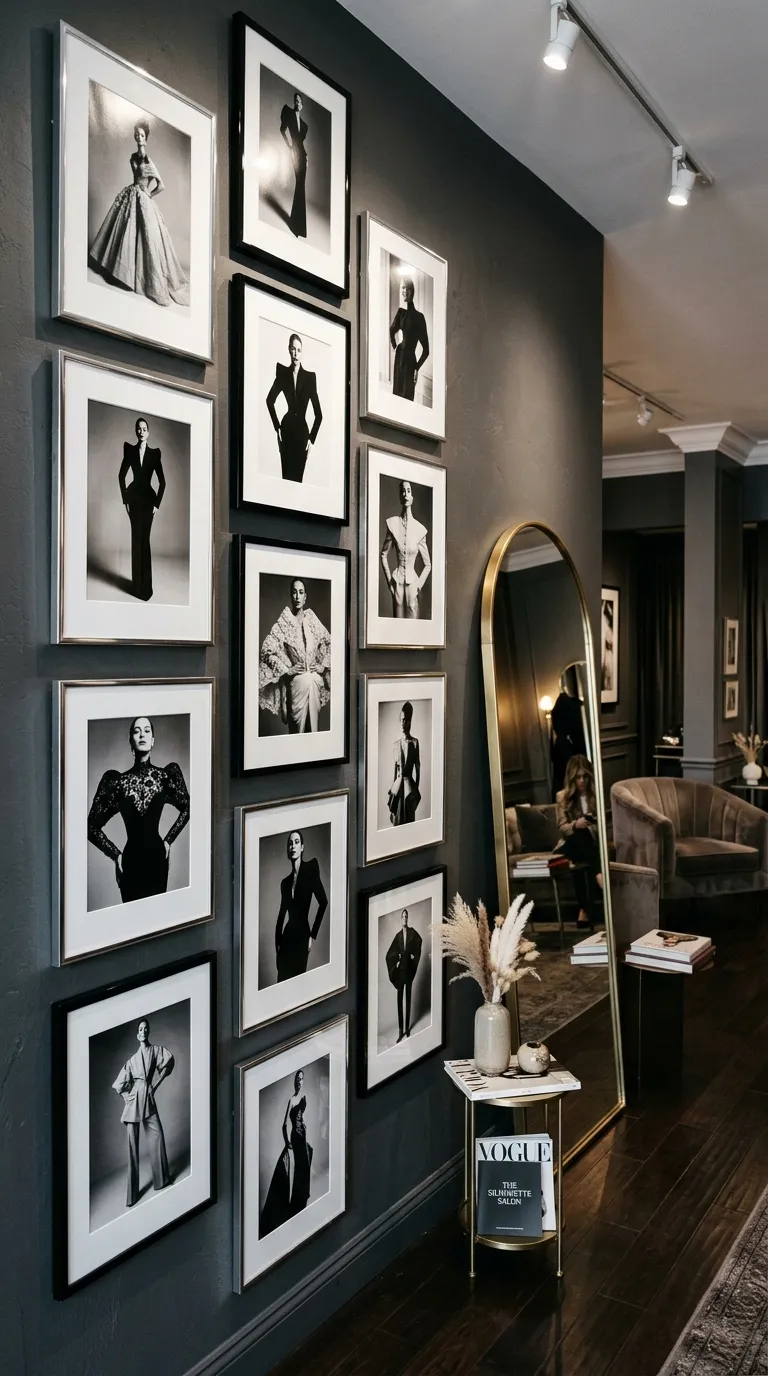
Concept Overview & Photographic Aesthetic
A glamorous, high-contrast gallery inspired by vintage fashion magazine editorials: dramatic hat silhouettes, studio portraits, flowing haute-couture fabrics, and jewelry details.
Step-by-Step Execution Guide
-
Source 6 to 8 editorial fashion and figure prints featuring bold chiaroscuro lighting (sharp highlights against deep black shadows).
-
Mix ultra-thin polished chrome, brass, and lacquered black frames.
-
Choose wide, weighted-bottom white mats (2.5 inches on top and sides, 4 inches on the bottom) for an editorial, European magazine look.
-
Arrange the frames in a tall, vertical salon configuration on a narrow accent wall or dressing room entry.
-
Pair the gallery with an adjacent standing arched brass mirror to bounce light across the prints.
Pro Curator Tip
Weighted-bottom mats counteract an optical illusion that makes centered prints appear to be sinking downward inside large frames.
8. The Ascending Staircase Chronological Gallery
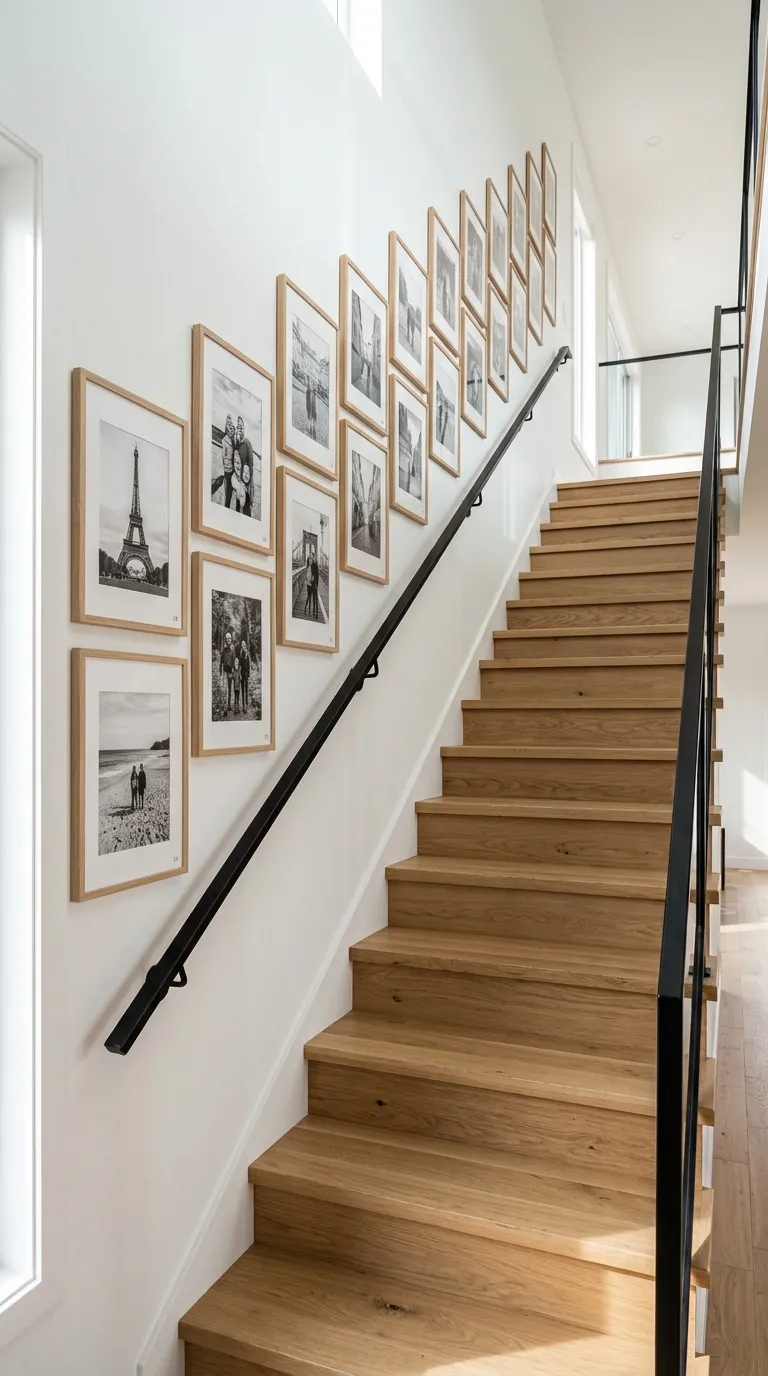
Concept Overview & Photographic Aesthetic
A stepped gallery wall that follows the upward diagonal slope of a staircase, displaying a chronological timeline of travel adventures or family milestones.
Step-by-Step Execution Guide
-
Measure the staircase angle; run a strip of painter’s tape along the wall at a fixed height (e.g., 58 inches above each stair tread nose) as your guideline.
-
Use 8 to 12 matching $11times14text{-inch}$ thin white-oak or matte-black frames.
-
Order photos chronologically from the ground floor moving upward to the second landing.
-
Align the vertical center of each frame with the angled baseline tape, maintaining a strict 2-inch gap between adjacent frames.
-
Use heavy-duty picture hanging strips or dual-point wall hooks to prevent frames from shifting crooked when stairs are used.
Pro Curator Tip
Using dual-hook mounting brackets on the back of each frame ensures frames stay level and do not shift over time from staircase vibrations.
9. The Abstract Fluid Inks & Textural Close-Up Triptych
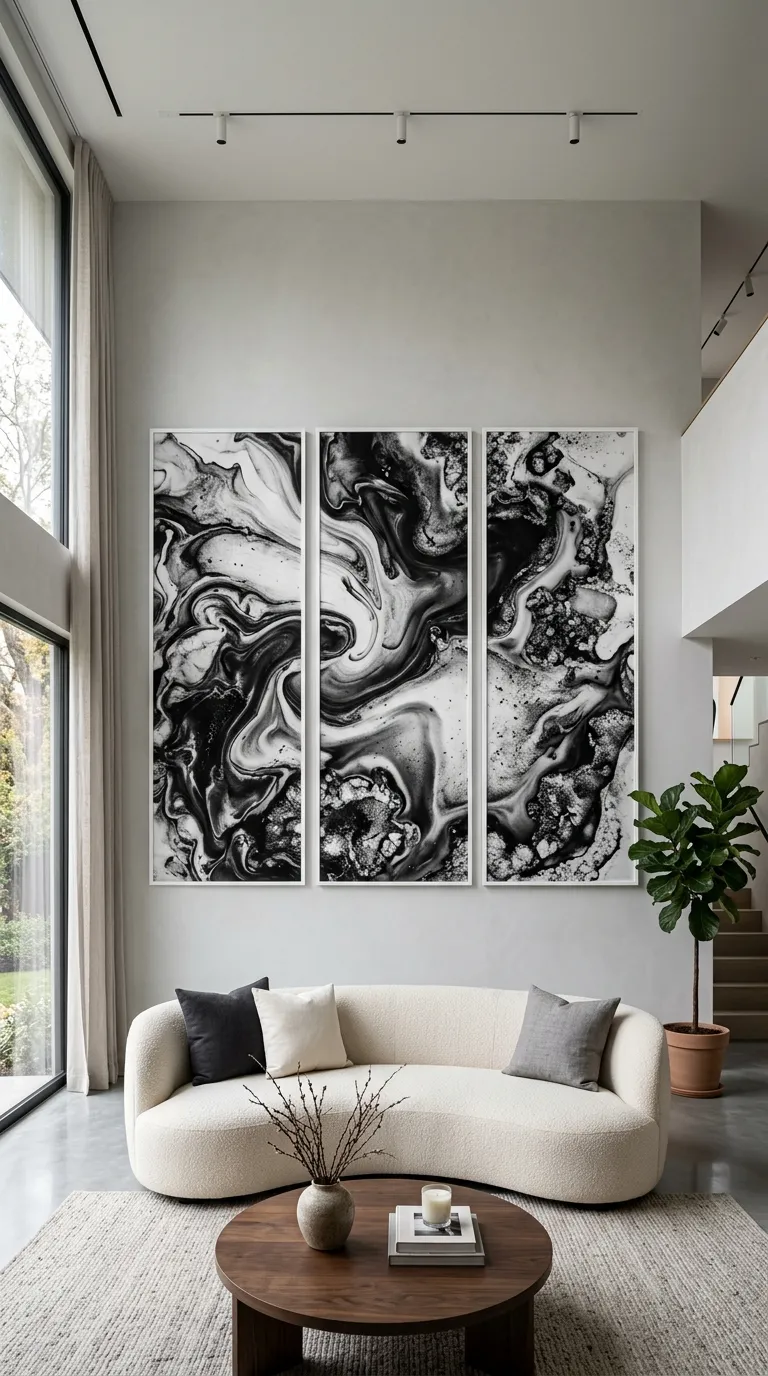
Concept Overview & Photographic Aesthetic
A minimalist, high-impact triptych of three oversized framed prints capturing macro fluid dynamics: marbled black-and-white ink swirls, mineral fractures, and water droplets.
Step-by-Step Execution Guide
-
Select three complementary high-resolution abstract monochrome macro photographs.
-
Frame in three matching, oversized $24times36text{-inch}$ natural light-wood or slim white frames.
-
Use full-bleed printing (no mat board) or an ultra-wide 4-inch white border integrated directly onto the print paper.
-
Hang the three frames in a tight horizontal sequence with exactly 1.5 inches of separation.
-
Center the triptych directly over a primary living room sofa, dining table, or entryway bench.
Pro Curator Tip
Full-bleed printing without a mat gives abstract and macro photography a contemporary, fine-art canvas feel that maximizes print scale.
10. The Eclectic Floor-to-Ceiling Maxima Wall
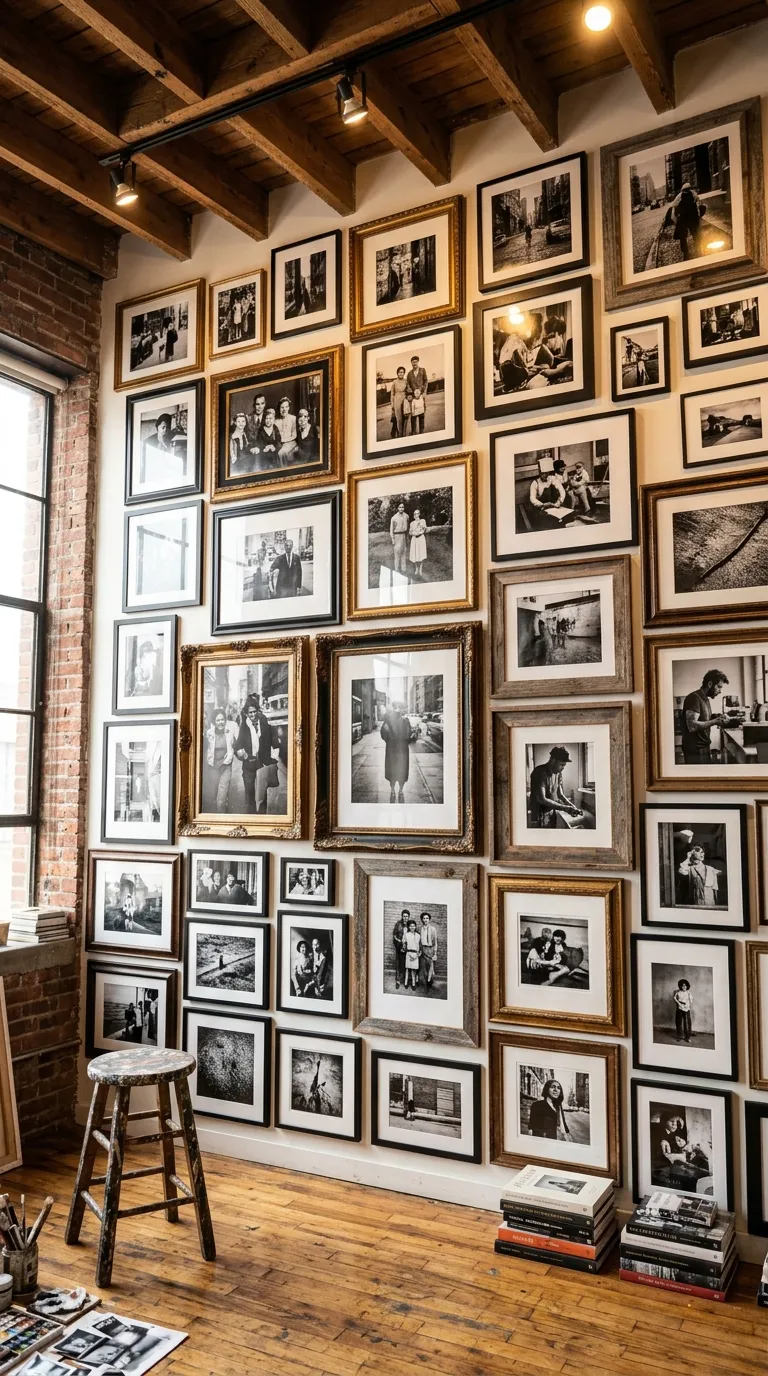
Concept Overview & Photographic Aesthetic
An immersive, full-height salon installation covering an entire accent wall from baseboard to crown molding with 20+ monochrome photographs in varied frames.
Step-by-Step Execution Guide
-
Curate a diverse collection of 20 to 30 black-and-white images: portraits, architecture, landscapes, street scenes, botanical studies, and abstract forms.
-
Collect an eclectic assortment of vintage, modern, carved wood, gilded brass, and modern black frames from thrift stores and galleries.
-
Lay paper templates of every frame across the floor to build a cohesive jigsaw layout with uniform 1.5-inch spacing.
-
Start hanging from the center anchor pieces at eye level, expanding upward toward the ceiling and down to 12 inches above the baseboard.
-
Keep all photography strictly black-and-white to unify the diverse collection of frame styles.
Pro Curator Tip
Cut kraft paper templates for every single frame and tape them to the wall with blue painter’s tape first; this allows you to adjust the entire layout before hammering a single nail.
Gallery Wall Layout & Framing Comparison
| Gallery Wall Concept | Framing Style | Mat Board Style | Spacing | Best Wall Location |
| Architectural Grid | Matte Black Aluminum | Oversized 8-Ply White | 2.0 in (Strict) | Dining Room / Formal Foyer |
| Street & Candid Salon | Mixed Oak, Black & Brass | Warm Ivory Mats | 2.0 in (Organic) | Living Room / Den |
| Floating Ledges | Thin White Oak Frames | Varied Mats / Leaned | Overlapping | Home Office / Hallway Ledge |
| Botanical Macro Row | Raw White Oak Gallery | Wide 4-inch White Mats | 1.5 in (Tight) | Above Bed / Sofa Header |
| Heirloom Portrait Grid | Square Matte Black | Circular / Square Cut | 2.0 in (Strict) | Central Hallway / Entryway |
| Moody Landscapes | Black Shadowbox Frames | Float-Mount (No Top Mat) | 2.5 in | Media Console / Living Room |
| Fashion Editorial | Chrome & Lacquer Black | Weighted Bottom Mats | 2.0 in | Dressing Room / Narrow Nook |
| Ascending Staircase | Uniform Oak or Black | Classic 2-inch White | 2.0 in (Angled) | Staircase Wall |
| Abstract Triptych | Minimal Slim White / Oak | Full-Bleed (No Mat) | 1.5 in (Linear) | Great Room / Dining Buffet |
| Eclectic Maxima Wall | Mixed Vintage & Modern | Mixed Cream / White | 1.5 in (Dense) | Full Accent Wall / Studio |
Common Gallery Wall Mistakes & How to Avoid Them
-
Inconsistent Mat-Board Tones: Mixing bright cool-white mats with yellowed cream mats in the same gallery makes some photos look dirty. Solution: Buy all mat boards from the same manufacturer and color line (such as bright white or soft off-white) to maintain a cohesive look.
-
Hanging the Center Too High: Mounting gallery walls centered on the wall height rather than eye level causes neck strain and disconnects art from furniture. Solution: Ensure the horizontal center line of the entire gallery sits 57 to 60 inches from the floor.
-
Uneven or Irregular Frame Spacing: Eyeballing distances between frames leads to crooked, sloppy grids that ruin architectural symmetry. Solution: Use a custom-cut wooden or cardboard spacer block (e.g., 2 inches wide) held between frames while marking nail holes.
-
Ignoring Frame Glass Glare: Cheap plastic or standard reflective glass acts like a mirror, obscuring dark photography under room lights. Solution: Invest in anti-reflective, UV-filtering museum glass or non-glare acrylic glazing.